Don’t know how to write queries in MongoDB syntax? Or maybe you already have some experience working with MongoDB, but you’re not familiar with the structure of the database and collections you’re working with.
AI Helper is Studio 3T’s AI-powered assistant that quickly gets you started with writing MongoDB queries, aggregations, or scripts by simply typing a question in your native natural language. Now you can query MongoDB data even if you have no code experience.
Setting up AI Helper
AI Helper uses your AI Model (Azure AI, OpenAI’s GPT-4o, or Anthropic’s Claude Opus 4.1) to process the questions you ask. To specify the model you want to use, click the Configure (gear) button at the top of the AI Helper.
This opens the Preferences dialog. After you’ve selected the Default Model, you need to specify the Azure AI API Key, OpenAI API key, or Anthropic API Key so that Studio 3T can communicate with the model.
If your default model is Azure AI, you’ll also need to specify the name you’ve given your deployment in Deployment Name and the endpoint URL in Azure AI API Endpoint.
Controlling temperature
Temperature settings allow you to control the responses from your AI model. By default, Studio 3T uses a low temperature for the accuracy and precision that is required when generating query code. You can adjust the Default Temperature setting upwards to experiment with creativity.
Disabling the AI Helper
To prevent interactions with your AI model, you can disable AI Helper by clearing the Enable AI Helper checkbox.
Opening AI Helper
You can open AI Helper from within the following Studio 3T tools:
- Collection Tab for exploring MongoDB data
- Aggregation Editor for building aggregate queries
- IntelliShell the Integrated Development Environment (IDE) for writing MongoDB queries and developing scripts
To open AI Helper:
- Toolbar – Click the AI Helper button
- Shortcut – Press Ctrl + Shift + B (⌘+ Shift + B)
To open AI Helper in a separate window so that you can easily view all the generated query code, click the Pop out button at the top of the dialog:

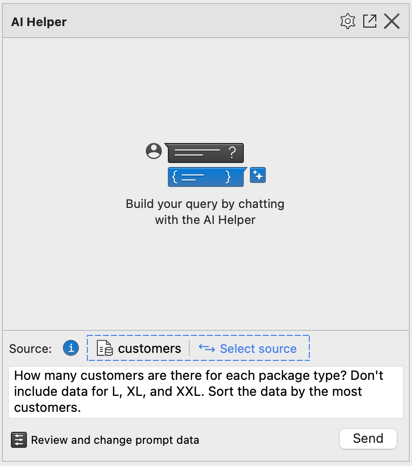
Asking questions about MongoDB data
To ask your AI model a question about your MongoDB data, simply type it in your native natural language in the text box.
If you’re using AI Helper from within the Aggregation Editor or IntelliShell, you can select multiple data sources for Studio 3T to build the prompt for your question. To select the data sources, click Select source and choose the required collections. Note that the collections must be from the same database.
Press Ctrl + Enter (⌘ + Enter), or click the Send button to ask your question.
You can review the prompt that Studio 3T will send to the AI model by clicking Review and change prompt data. In the AI Helper Edit Source Fields dialog:
- Use the checkboxes to choose the fields that are included in the prompt. Selecting only the necessary fields helps to reduce token usage.
- Click Review prompt data to view the prompt metadata.
Using the AI-generated MongoDB query
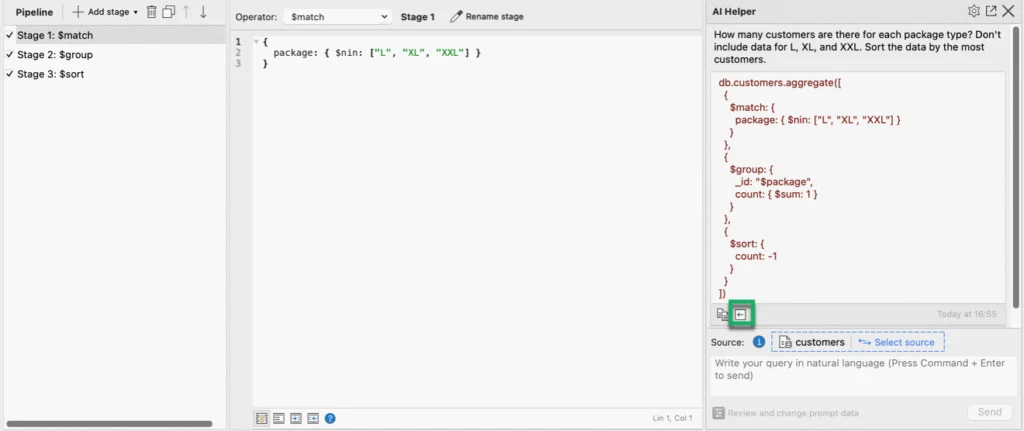
AI Helper displays the question and the corresponding response from the AI model in the form of a MongoDB query, building a history of questions and answers, including the date and time of the response. With Session Restore enabled, Studio 3T automatically loads your history the next time you open the application and AI Helper.
For each response, you can get AI Helper to paste it directly into the query bar or code editor by clicking the Change query or Change script button, depending on whether you’re using it from within the Collection Tab or IntelliShell. If you’re using AI Helper within the Aggregation Editor, it automatically creates the stages of the aggregation pipeline for you when you click the Change pipeline button.
Alternatively, you copy an entire response to the clipboard, by clicking the Copy snippet button.