IntelliShell Script Tasks allow scripts to be loaded from disk and run on a schedule with their output saved to disk.
An IntelliShell Script Task is made up of multiple IntelliShell Script units. When the Task is run, each unit will be executed sequentially.
An IntelliShell Script Unit is made up of two components:
- A source connection, database: The script will start executing, already connected to the source.
- A target file name: A file path and name where the script will write its console output.
The script itself is embedded in the task unit and is edited there.
Creating your first IntelliShell Script Task
Make a New IntelliShell Script Task
- Open Tasks (Click the Tasks icon in the toolbar). The Tasks tab will appear:

- Click/Select New Task. The New Task window will appear.
- Select IntelliShell Script on the New Task window

- Select a connection or database to work with in the Intellishell Script dialog that appears:
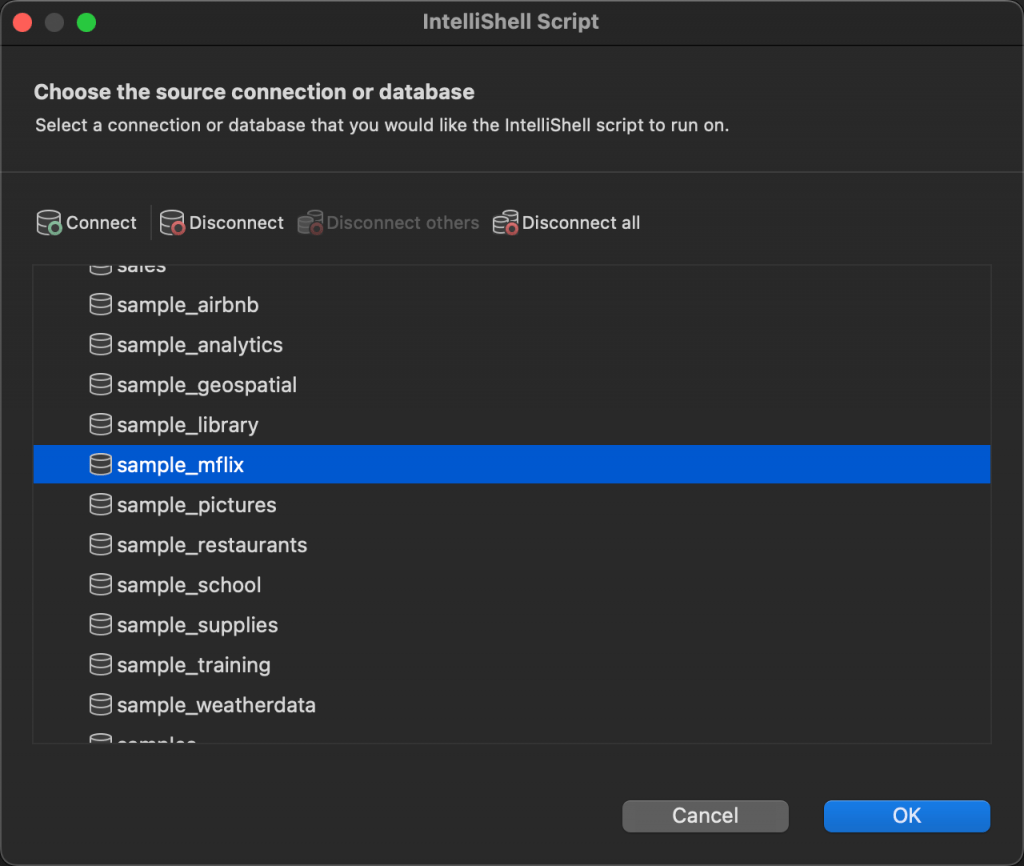
- For this walkthrough, we’ll select the sample_mflix database which is part of the MongoDB Atlas example datasets. Once selected, Click Ok to move on to the script editor:
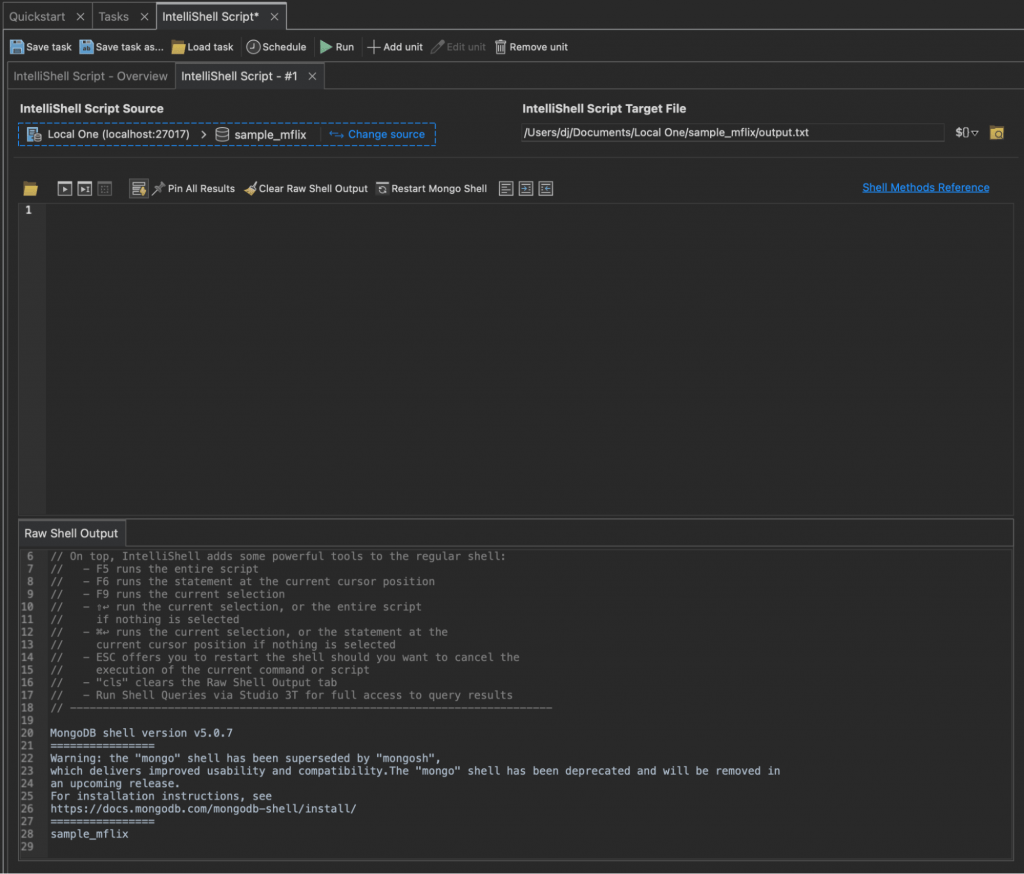
Write the IntelliShell Script
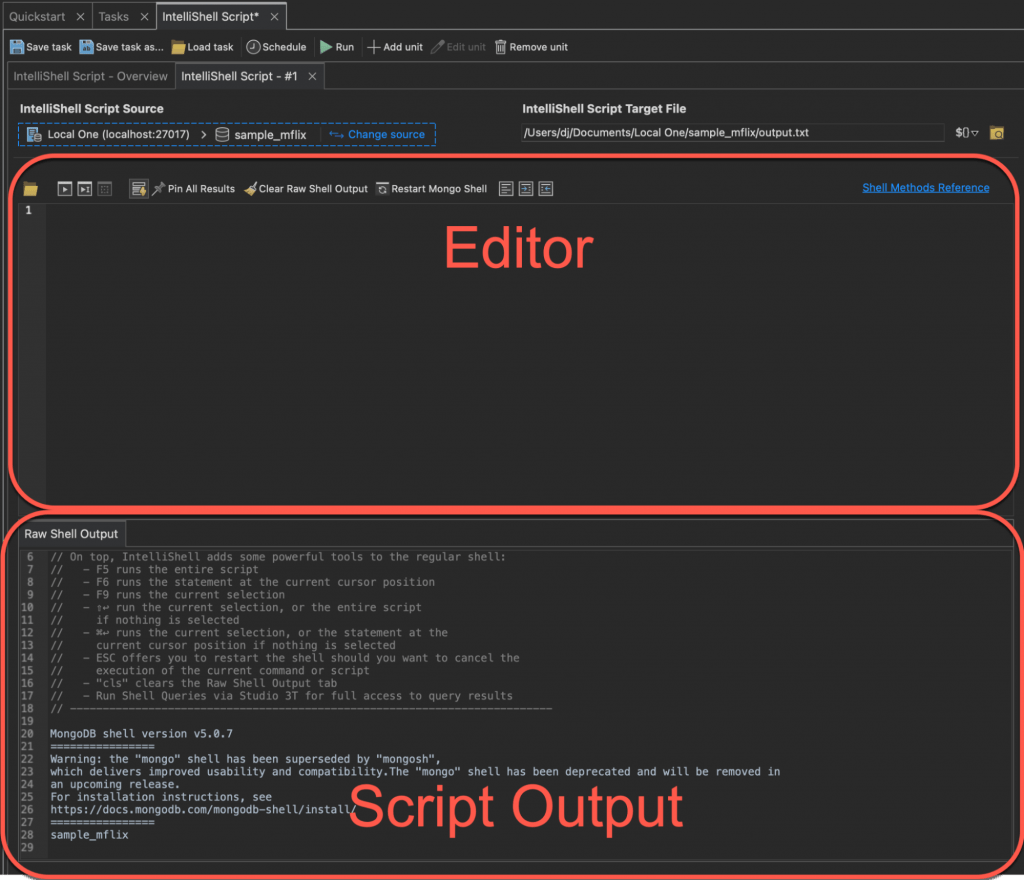
- We can now enter a MongoDB shell script in the editor. Scripts can be a combination of MongoDB queries and JavaScript code. The editor is in the top part of the Script tab:
- Enter a query such as:
db.movies.find({"year":1990})
- Click the Run button.
- The script will run and the output appears in the Script Output area. The raw shell output will appear in the Raw Shell Output tab. If the output is JSON data, it is shown in its own Shell Output tab as a Table, Tree or JSON.
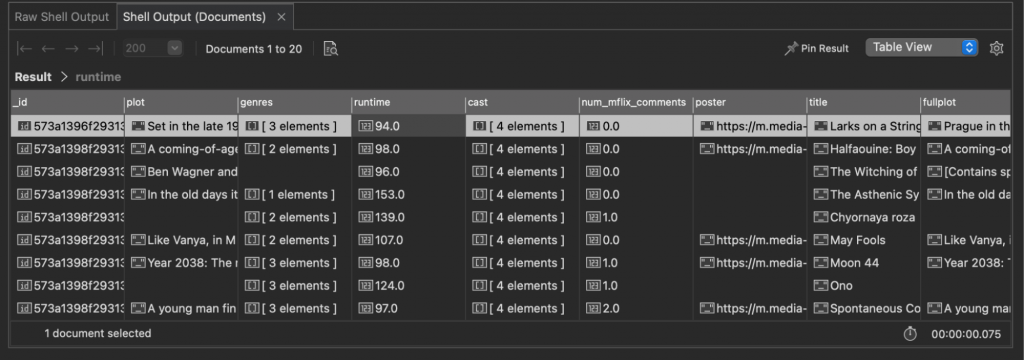
- When your script is run as a Task, its standard output (anything printed to the console/terminal) will be sent to the file selected as the IntelliShell Script Target File. You may edit this to send future output to a different location. For this example, we will leave it as is.
Saving the IntelliShell Script Task

Notice a * in the IntelliShell Script tab. This indicates that there are unsaved changes. Close the IntelliShell Script tab and you will prompted:

- Click on Save and a prompt for a name will appear. This is the name for the Task (not for the specific script) and it will appear in the Task Viewer:

- Enter “Find 1990” and click OK. You will now return to the Task Viewer with your new script task displayed:

- Select the task and click the Run button. The task will run. Its progress will be appear in the Operations Pane:
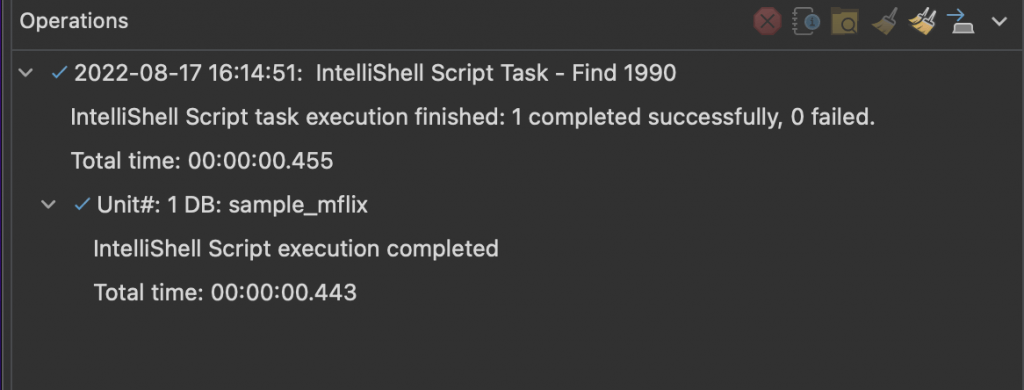
- To view the output, move the cursor over the “IntelliShell Script execution completed” line and right-click for the menu. Then select Reveal in Finder (Mac), Open In Explorer (Windows), or Open in File Explorer (Linux).
- You can now navigate to the output file and view the results.
Notes for all IntelliShell Script Task users:
The results from this query will be output as JSON. There will only be 20 records as a prompt of Type "it" for more. That is because this is the precise output of the Mongo shell; it would normally expect user interaction to prompt it to display more. Bear this in mind when creating IntelliShell Script Tasks.
In this example, to output all the matching records, you would use a query which iterated over all the results and printed them out like so:
db.movies.find({"year":1990}).forEach(function(x){ printjson(x); });
The .forEach(function(x){ printjson(x); }); tells the script to iterate through all the results, and output them.
Let’s see how to fix that and in the process, how to edit an IntelliShell Script Task.
Editing your IntelliShell Script Task
- Return to the Tasks Viewer:

- Select the “Find 1990” IntelliShell Script Task. Then click the Edit button. This will open the overview for the task:
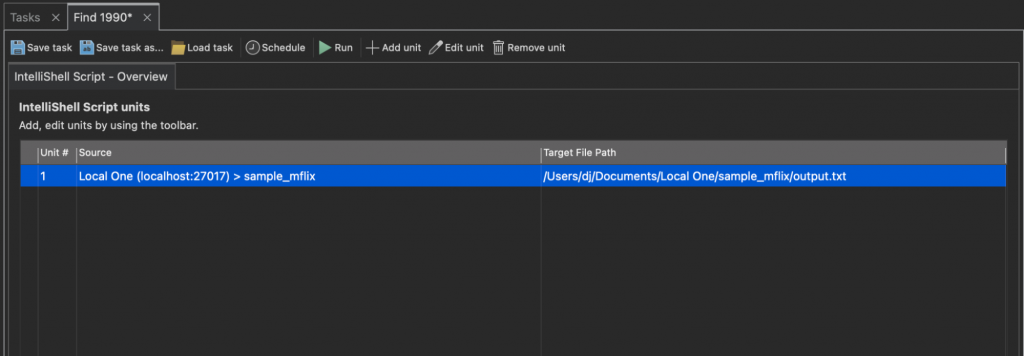
This displays the units available to edit within the IntelliShell Script Task. We only have one unit in this Task as we just created it.
- Select the first unit and select Edit Unit. This will display an overview of the three parts of the IntelliShell Script Task – the source, the target, and the script itself:

- We want to edit the script itself. The script is editable in this display so click into the editor, and position your cursor at the end of the query. There we can add the print function to the query:
.forEach(function(x){ printjson(x); });

- Run the query to test it. Notice the * in the Find 1990 Tab denotes the Task is not saved yet. Click Save Task to save the entire task and update it.
- Close the IntelliShell Script #1 tab and return to the IntelliShell Script Overview Tab.
- Click Run to run the modified Task. View the results using the Operations pane to locate them. You should have a JSON document with all the matching documents now.
You have now completed editing your IntelliShell Script Task.
Script Units
An IntelliShell Script Task is contains multiple IntelliShell Script units. Each unit encapsulates a source database or connection, a target file, and a script. The IntelliShell Script – Overview Tab is where you can add new Script units, and edit or remove existing units. When the Task runs, Studio 3T will execute each script unit sequentially in the order shown in the overview.
If you want to make IntelliShell Script Tasks from existing scripts, save each script to disk, then create a new Task. In the editor for that task, use the Open button ![]() to load your saved script into that unit.
to load your saved script into that unit.
Output Targets
The IntelliShell Script Target File controls which file an IntelliShell Script Task Unit will write its output into.

Edit the field that is directly above the editor and to the right of the IntelliShell Script Source setting. Clicking on the folder icon allows you to select the output file using a GUI file dialog.
The file path and name support filename placeholders. When a task runs, the placeholders in the file name expand to the current date-time, date, or time. This allows you to create Tasks which, when scheduled and run, create output files which do not overwrite existing output files. Learn more about filename placeholders in this introductory article.
Scheduling
Like all other tasks, IntelliShell Script Tasks can be run on a schedule. There are multiple ways to edit the Tasks’ schedule. While editing a Task, you can use the Schedule button in the Task Overview. Or, if you are in the Tasks view, you can select the task and click the Tasks’ view Schedule button. Both options lead to the same Schedule dialog.
