With Studio 3T’s Import Wizard, you can import CSV, JSON, BSON/mongodump, SQL, and another collection to MongoDB.
Download Studio 3T and skip ahead to the relevant section:
- Import CSV to MongoDB
- Import JSON to MongoDB
- Import BSON/mongodump to MongoDB
- Import SQL & Migration to MongoDB (Microsoft SQL Server, MySQL, and PostgreSQL)
- Import a MongoDB collection
Basics
Connect to a MongoDB database and open the Import Wizard by clicking on Import in the Global Toolbar.

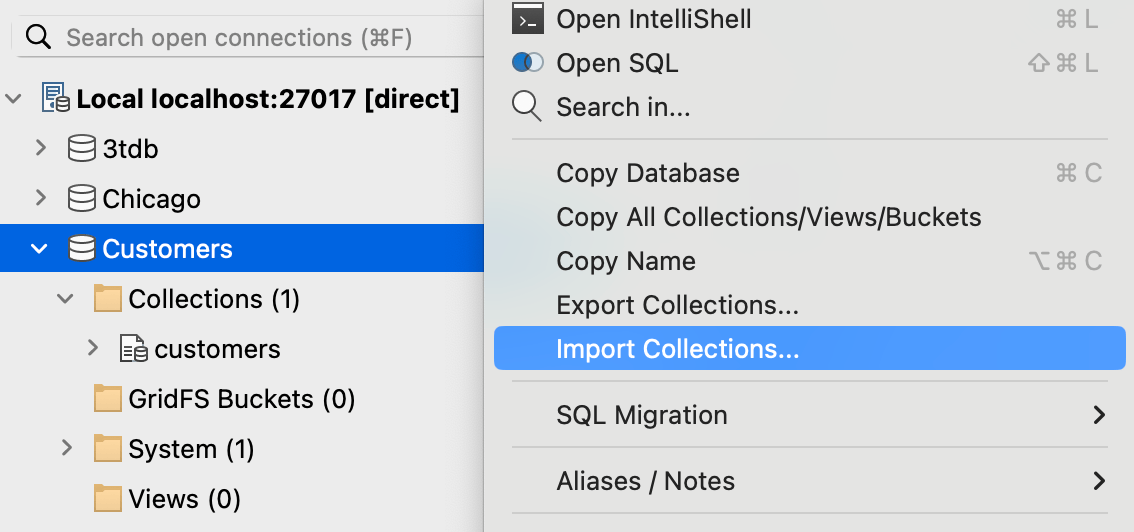
Alternatively, right-click on any server, database, or collection in the Connection Tree and choose Import (Collections, Data).

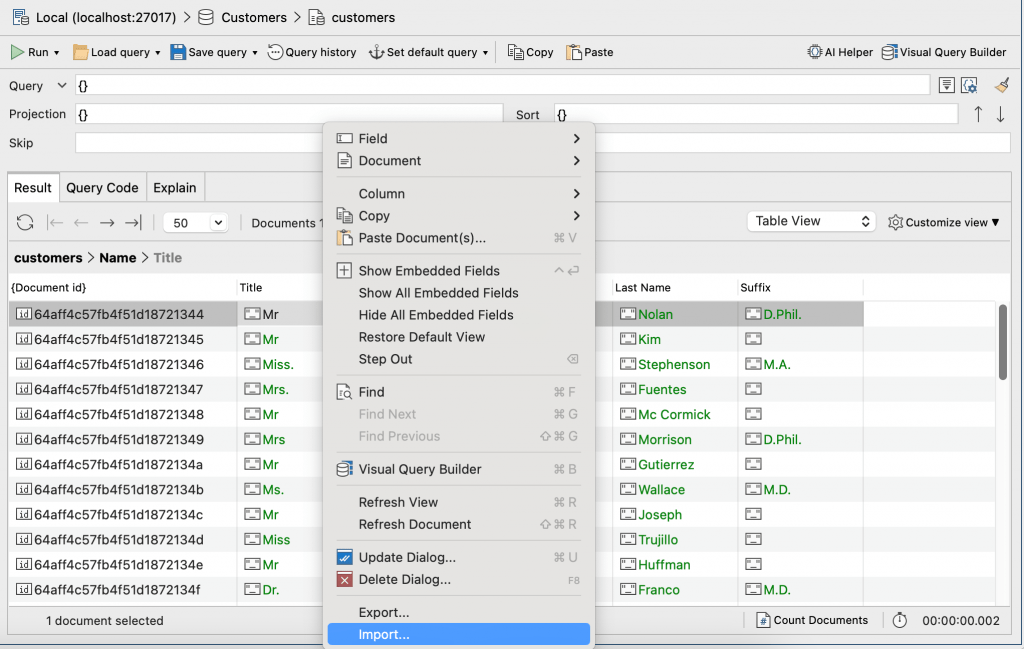
Or right-click anywhere on a Result tab (Collection Tab, SQL Query, IntelliShell), or any input or output panel in Aggregation Editor and choose Import.

From here, choose one of the supported import formats:
- JSON – MongoDB Shell, Studio 3T, mongoexport
- CSV
- SQL database
- BSON – mongodump folder
- BSON – mongodump archive
- Another collection
For all imports, you can choose the following actions from the toolbar:
- Save the import as a task, which you can execute on-demand or schedule for later
- Load saved import tasks
- Run the import immediately
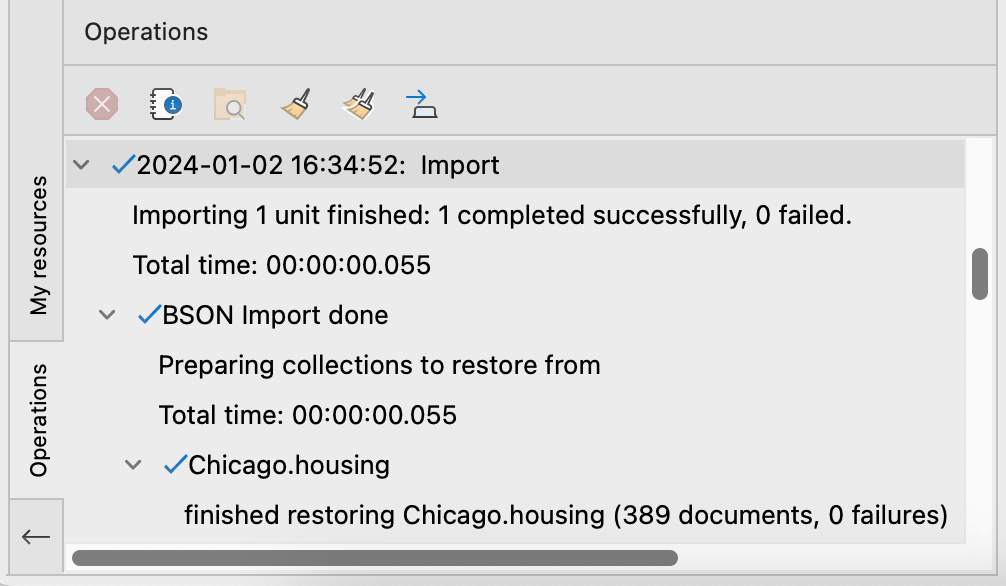
The Operations sidebar in the bottom-left hand corner of Studio 3T tracks the progress of your import.

Automate and schedule imports as tasks
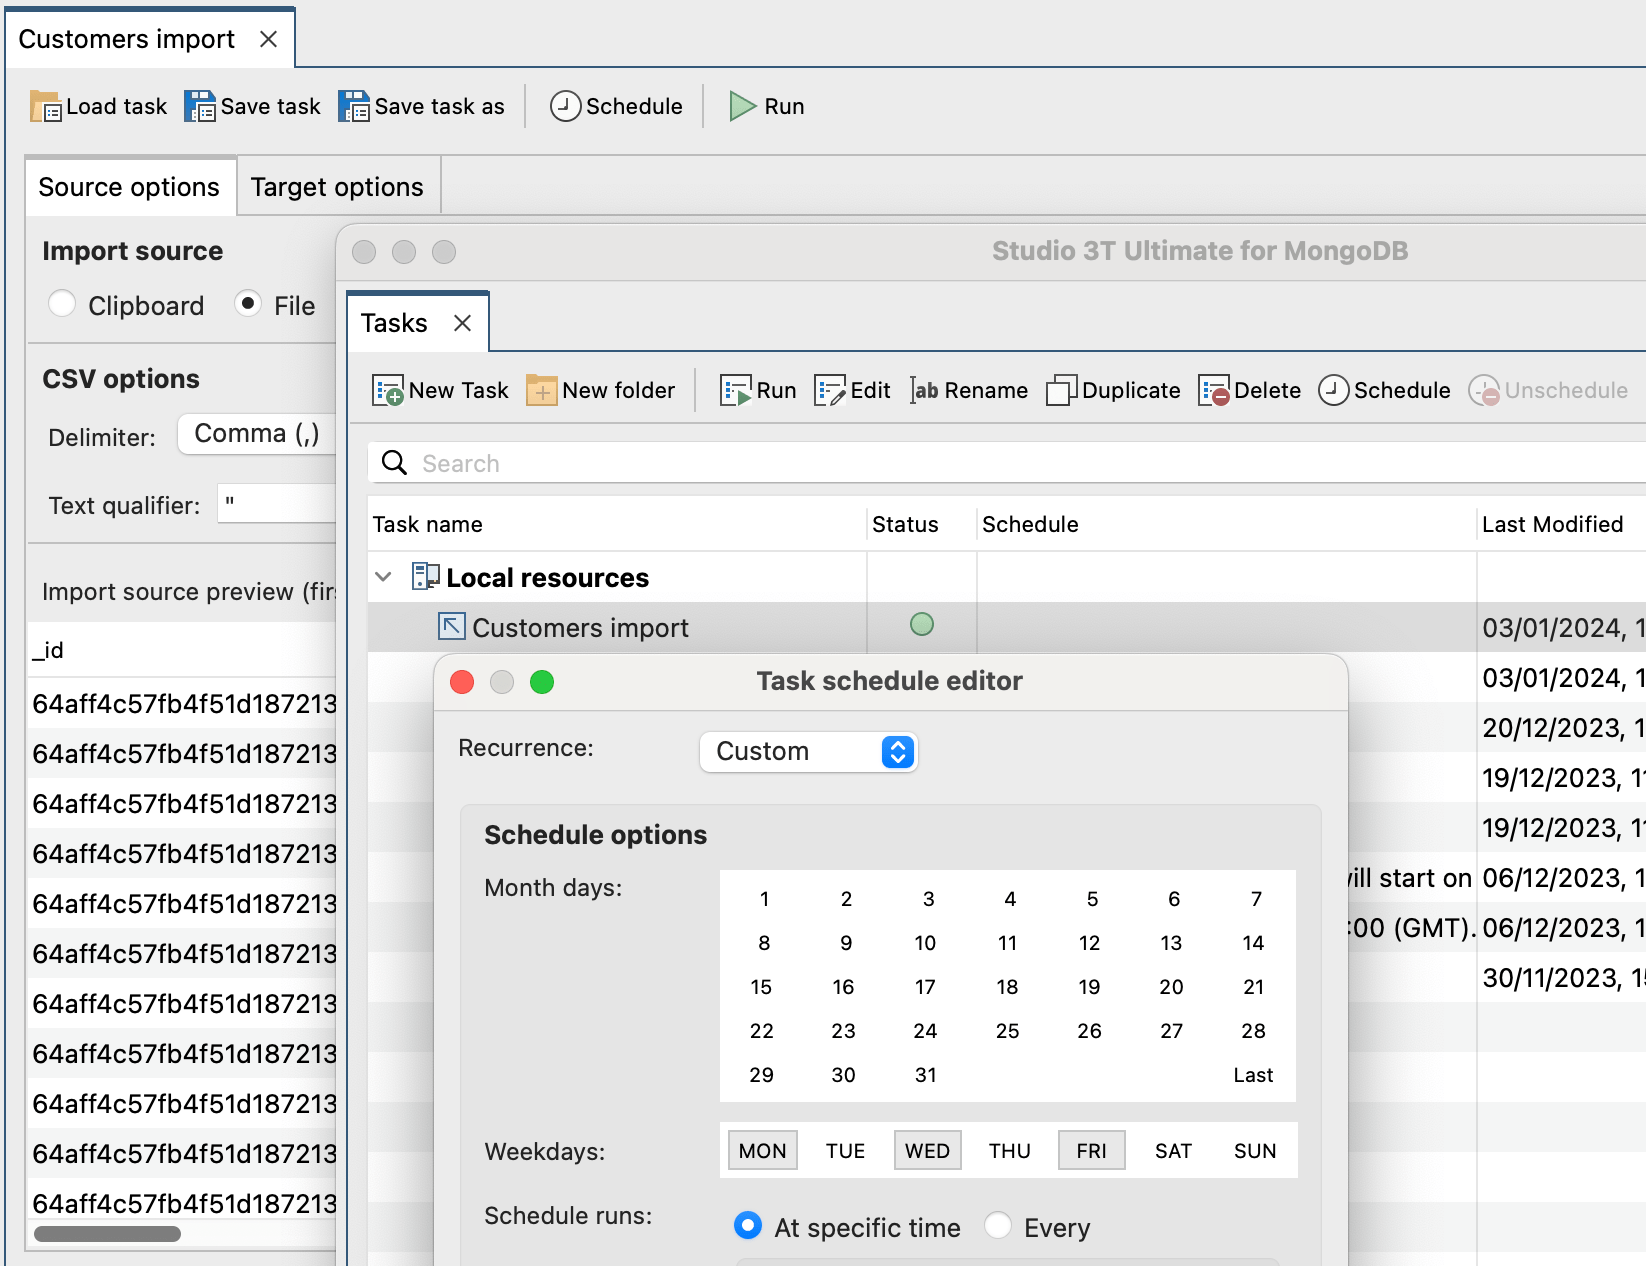
Import Wizard integrates with Tasks and Task Scheduler so that you can save recurring imports as tasks.
Click on Save task (as) to save an import as a task. Name the task, specify where you want to save it, then click Save. This saves the task in the Task Viewer, from which you can schedule and run the task.

Import CSV to MongoDB (e.g. Excel)
Open the Import Wizard, select CSV as the import format, and click Configure.
Studio 3T opens an Import tab with two sub-tabs: Source options and Target options.
Import from clipboard
If you already have copied data, click Clipboard. Studio 3T automatically shows a preview of the detected rows.

Import from CSV file
Click File, then click the folder icon to locate and select the CSV file you want to import. Studio 3T shows a preview of the rows, the same as above.
Update the settings to configure your import:
- Delimiter – Character that separates values in a row (for example comma, tab, semicolon).
- Text qualifier – All symbols between the text qualifiers are parsed as one field.
- Skip first <n> lines – Skips the first <n> lines from the beginning of the file. Usually this is set if the file contains a preamble or leading comments.
- File contains header with field names – Select/clear as required. If the file does not have a header, field names are generated as field_0, field_1, field_2, and so on.
Click the Target options tab to further configure the CSV import.

Specify the target collection by clicking Select target or Change target or drag a collection from the Connection Tree and drop it in the blue-dotted box. Imported data is added to the collection you specify.
To import data into a new collection, you’ll need to specify the collection name. To do this, click Select target or Change target. Connect to the server if you haven’t already done so, select the required database, and click Add collection. The new collection name is displayed in the blue-dotted box but the collection isn’t created until you run the import. You can always add a collection in the Connection Tree by right-clicking a database and selecting Add collection.
Update the settings to configure your import:
- Insertion mode – Select an insertion mode from the list.
- Empty fields – Choose how to treat empty fields (Import as Null, Import as empty string, or Exclude).
- Trim spaces – Choose to trim none, leading, trailing, or all spaces.
- Unescape control characters in strings (with ) – Control characters \r, \n, delimiter (,), escape () are prepended with \
- Don’t infer document structure – By default dots (.) in header names are interpreted as embedded documents. Choose this option to replace all dots with underscore (_) and make all documents flat.
- Don’t detect arrays – Header names such as arr.0, arr.1, arr.2, etc. are detected as part of an array. Choose this option to disable array detection.
Choose which fields to import by selecting/clearing the checkboxes in the Import options section.
You can specify data masking rules to obfuscate field data by clicking Open field masking editor.
Check that you’re satisfied with the import configuration in the JSON output preview.
After configuring the import, you can run the import immediately by clicking Run in the toolbar. Alternatively, you can save your import as a task, which you can then run on demand or schedule to run later.
Supported date formats
CSV import supports the following date formats:
- ISO
- Locale
- MDY
- DMY
- YMD
- MYD
- DYM
- YDM
The date format XXX supports all order variations of the year, month, and day fields, as well as three separators: “-“, “/” and “.”
Both ISO and Locale formats accept their respective variations such as date only, date with short or long time, and so on.
Upon CSV import, Studio 3T tries to detect a suitable date format for all the values of a column and automatically uses one based on the following criteria:
- The above date formats are tested in the given order with all the values of a column/field
- The first format to match all values is selected as suggested the date type for the field or column
But of course, as with all data types, you can override the selection.
Import JSON to MongoDB
Open the Import Wizard, select JSON as the import format, and click Configure.
Click Add source to choose a JSON file to import or Paste from clipboard to paste JSON data from your clipboard. To remove an entry from the list, click Remove source.

To specify the target connection, click Change target to open the Connection Manager.
To specify the target database or collection, double-click a cell under the Target Database or Target Collection columns and type the required name.
Under the Insertion Mode column, double-click a cell to select one of the insertion modes from the list.
You can specify data masking rules to obfuscate field data by clicking Open field masking editor.
Check that you’re satisfied with the import configuration in the JSON output preview.
If you want Studio 3T to check if the JSON data is valid, select the Validate JSON before import option. Note that this option is not available for clipboard data. Selecting this option slows down the import because the file is scanned twice.
After configuring the import, you can run the import immediately by clicking Run in the toolbar. Alternatively, you can save your import as a task, which you can then run on demand or schedule to run later.
Import BSON/mongodump to MongoDB
Open the Import Wizard, select BSON – mongodump folder or BSON – mongodump archive as the import format, and click Configure.
For both types, you need to configure a ‘mongorestore’ executable under Preferences > External tools > MongoDB tools.

If you’re importing a mongodump folder, click the select folder icon and choose the root mongodump folder you want to import. If the folder is valid, the databases and collections from the mongodump are displayed in the Import sources section.

Select the collections as required to include or exclude them in the import.
If you’re importing a mongodump archive, click the select file icon and choose the archive file you want to import. To import a single database or collection from the archive file, specify the details under Import options.
Under BSON options, select the configuration options as required.
After configuring the import, you can run the import immediately by clicking Run in the toolbar. Alternatively, you can save your import as a task, which you can then run on demand or schedule to run later.
Import SQL & Migration to MongoDB
Open the Import Wizard, select SQL database as the import format, and click Configure.

To define the source SQL connection, click Click here to connect to a server which opens the SQL Connection Manager.

Select the connection and click OK.
Next, choose the source SQL table by clicking on Click here to select a table. This displays a list of all SQL tables in your database.

Type to filter or simply choose the source table from the list, and click OK.
Next, define the Target Collection by clicking Select target or Change target and selecting the collection in the Import target dialog. Alternatively, drag a collection from the Connection Tree and drop it in the blue-dotted box.

Choose an insertion mode from the list.
Additional settings you can configure:
- SQL NULL values – Choose how to handle SQL NULL values.
- On error – Choose how to handle errors on data import.
- Array creation – Choose how to handle mongo field names in dot notation for sub-fields that have numeric names.
- Enable embedded document creation – Check/uncheck as necessary.
Choose which fields to import by selecting/clearing the checkboxes in the Import options section. To specify field names and field types, double-click on any cell under the Field name or Mongo type columns.
You can specify data masking rules to obfuscate field data by clicking Open field masking editor.
Check that you’re satisfied with the import configuration in the JSON output preview.
After configuring the import, you can run the import immediately by clicking Run in the toolbar. Alternatively, you can save your import as a task, which you can then run on demand or schedule to run later.
Import another collection
Open the Import Wizard, select Another collection as the import format, and click Configure.
Define the Target collection by clicking Select target or Change target and selecting the collection in the Import target dialog. Alternatively, drag a collection from the Connection Tree and drop it in the blue-dotted box.
Now that we’ve configured the target collection, let’s define the source collection. Click Select source/Change source and select the collection in the Import source dialog.
Studio 3T shows a preview of the JSON output.
Next, choose an insertion mode from the list.
You can specify data masking rules to obfuscate field data by clicking Open field masking editor.
After configuring the import, you can run the import immediately by clicking Run in the toolbar. Alternatively, you can save your import as a task, which you can then run on demand or schedule to run later.
This article was originally published by Dakota Karlsson and has since been updated.


