A document is the basic unit of data in MongoDB. MongoDB documents are comprised of field/value pairs which are written in BSON format.
A field is the name/value pair in a MongoDB document while a value is the specific value of a document’s field/value pair. A group of documents is known as a collection.
Fields in a MongoDB document can be of any BSON data type. See the MongoDB documentation for a full list of types.
The most important thing to remember is that each MongoDB document requires a unique _id field, which serves as the primary locator key for each document.
If you don’t specify an _id field when creating a new document, MongoDB automatically creates the ObjectId value represented as a string of numbers. This is shown in the examples below:
ObjectId (default)
{
     _id: ObjectId("57d28452ed5d4d54e8687098"),
     first: "Hugh",
     last: "Manatee",
     email: "[email protected]",
}
The _id field is immutable and you cannot change it, however you can add a new document with an _id field of any BSON data type other than array.
An example of a custom ID (in this example, string)
{
     _id: "Studio3TMascot",
     first: "Hugh",
     last: "Manatee",
     email: "[email protected]",
}
The maximum document size is 16 MB, however MongoDB uses GridFS to accommodate larger documents.
In the following examples, we’ll show you how to run document-related CRUD commands through Studio 3T.
Insert MongoDB documents to a collection
Right-click on any cell (or document) while viewing a collection in Table, Tree, or JSON View, and select Document > Insert Document. Alternatively, use the shortcut Ctrl + D (⌘ + D).
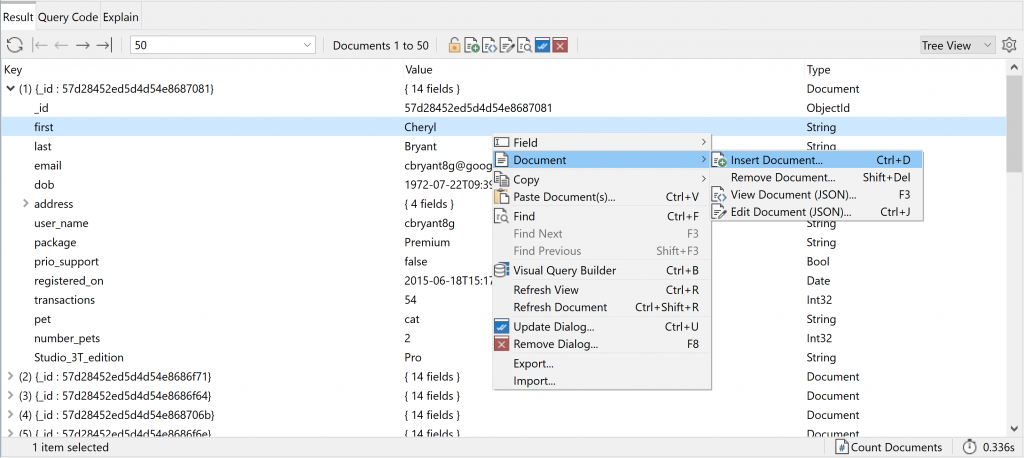
This opens the Insert JSON Document dialog.
Type the fields you want to add in JSON format. There is no need to add an _id field, as MongoDB creates this for you and assigns the document a unique ObjectId value.
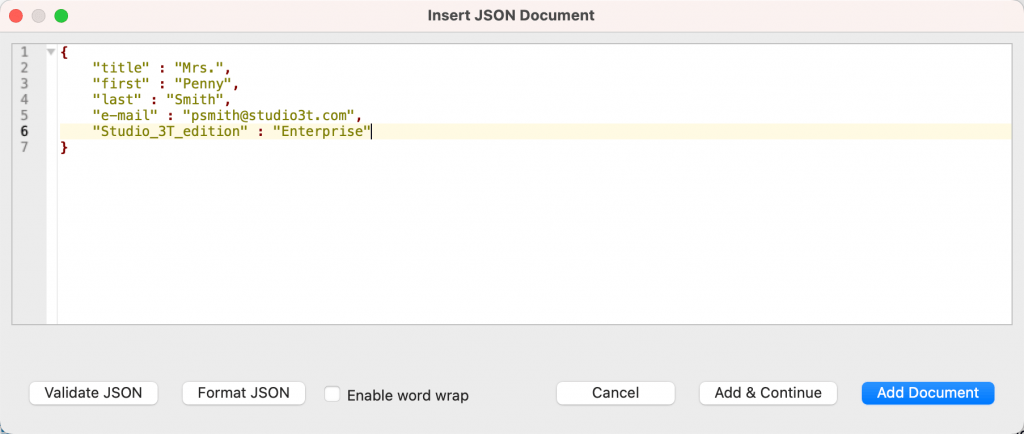
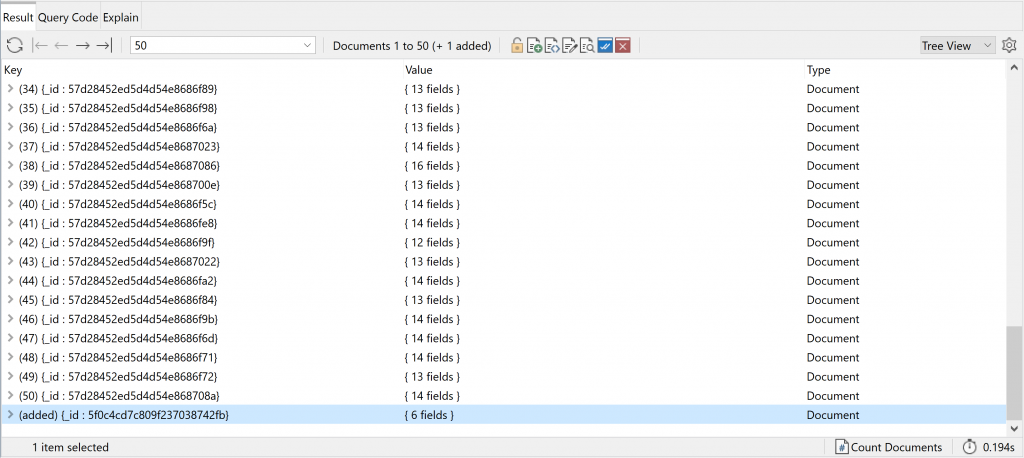
Click on Add Document, or Add & Continue if you want to add more documents. The new document is displayed in the collection’s Result tab.
Update MongoDB documents (updateone, updatemany)
Studio 3T offers a number of ways to update a single document, multiple documents, or all documents in a collection. In-Place Data Editing takes care of most updates to a single document.
Update a single document
With Table and Tree View, all you need to do is double-click on any cell to edit its value.
Locate the target document, in this case our customer Phyllis Grey, and double-click on the target field last to edit its value.
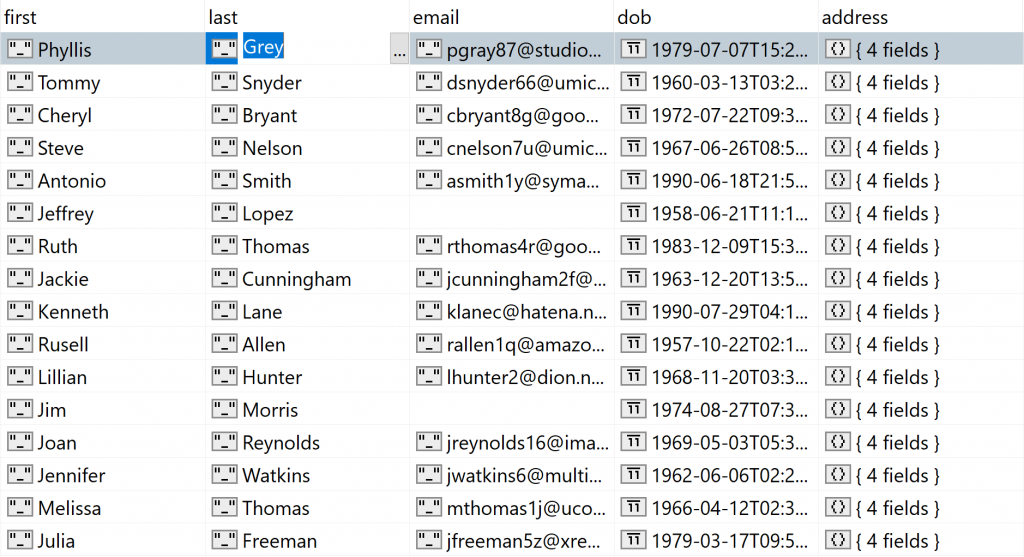
Type the new value and press Enter.
With JSON View, right-click on the target document and select Document > Edit Document (JSON).
Find the target field and type in the new value. Validate the code (if needed).
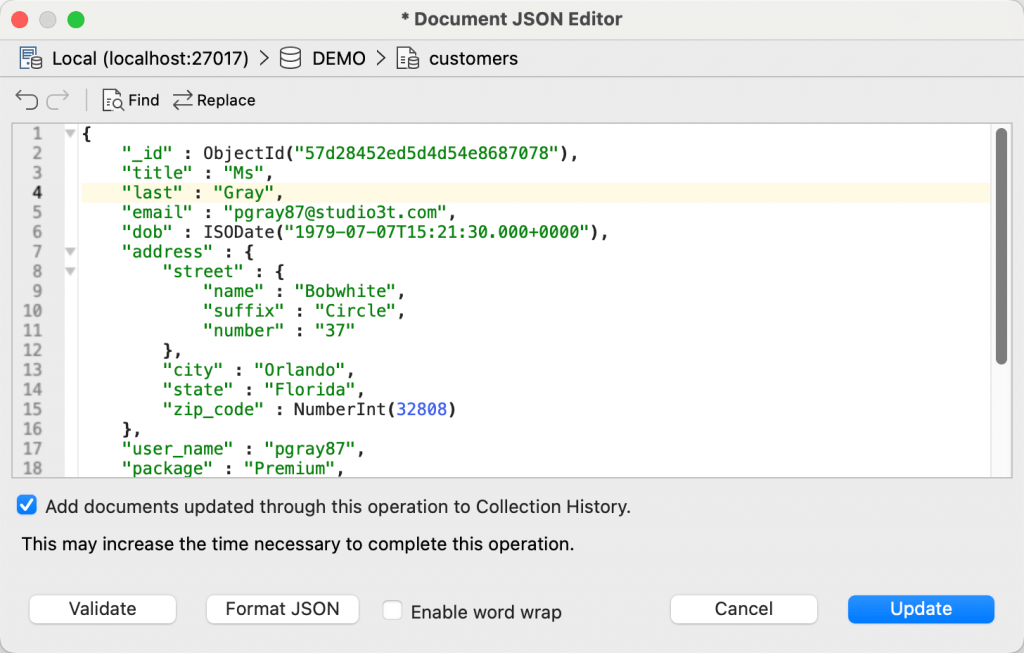
If Add documents updated through this operation to Collection History is selected, the documents are stored locally on your computer and you can restore the original value at a later date using the Collection History.
Click Update.
Update multiple documents (e.g. matching the query criteria, all documents)
In the example below, the XXL package has been discontinued, so we’ve built the query (through the Visual Query Builder) that gives us the list of 197 customers who need to be moved to the Premium package.
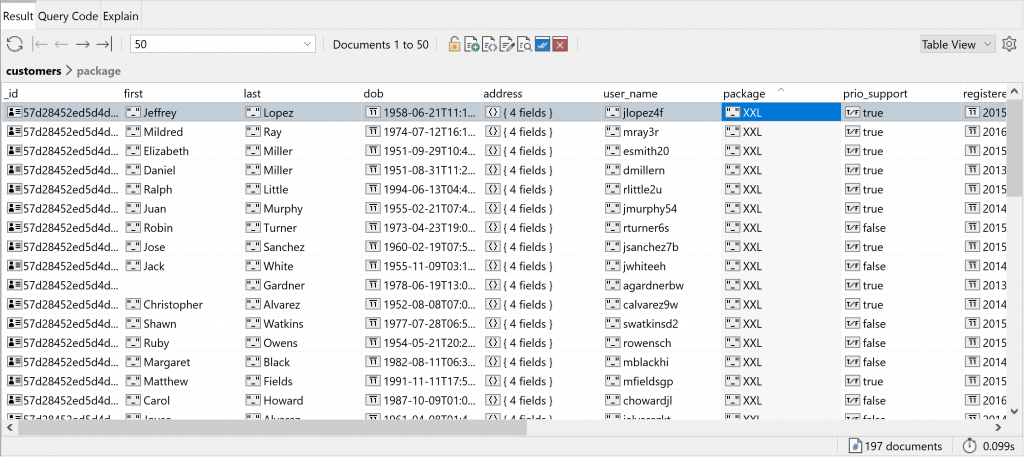
In Table or Tree View, right-click on the target field, which in this case is package and select Field > Edit Value/Type.
Update the value from XXL to Premium.
Choose to set the fields as follows:
- Documents matching query criteria
- Documents matching query criteria that have this field
- Documents matching query criteria that do not have this field
- All documents in collection
- All documents in collection that have this field
- All documents in collection that do not have this field
In this example, we’ll choose Documents matching query criteria.
If Add documents updated through this operation to Collection History is selected, the documents are stored locally on your computer and you can restore the original values at a later date using the Collection History.
Click Set Value.
If you wanted to update all documents in a MongoDB collection, you’d need to choose All documents in collection.
Delete MongoDB documents
While in Tree, Table, or JSON View, right-click on the document you want to delete and select Document > Delete Document or press Shift + Fn + Backspace.
If Add documents deleted through this operation to Collection History is selected, the documents are stored locally on your computer and you can restore the documents at a later date using the Collection History.
Managing the Collection History
To turn on the Collection History, in the Preferences dialog, on the Collection History page, select the Enable Collection History option. To store deleted documents on your computer, select Record document deletion. To store updated documents on your computer, select Record document update.
The Collection History page also tells you how much local disk space is being used to store deleted or updated document files. There are purge options to automatically delete document files that are older than a specified period or when file storage exceeds a specified size. You can delete all the stored document files using the Clear all Collection History items button.
To override the global Collection History settings at the connection level, in the Edit Connection dialog in the Connection Manager, select the Collection History tab. You can specify if document files are stored for that particular connection and choose to store delete operations or update operations (or both).
Restore deleted MongoDB documents
When you delete documents, if you add them to the Collection History, you can restore them.
The Collection History is stored locally on your computer, so you can only restore documents that you deleted.
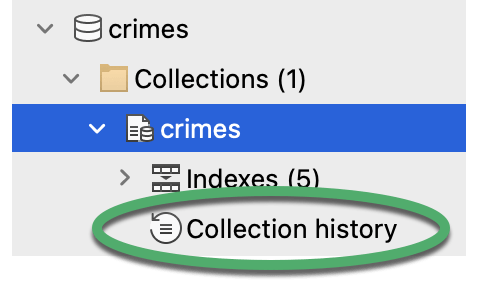
To restore documents, in the Connection tree, locate the target collection and double-click Collection history.
The Collection History tab displays a list of operations for the current collection. For example, if you deleted 4 documents in one operation, this is displayed as a single Delete action.
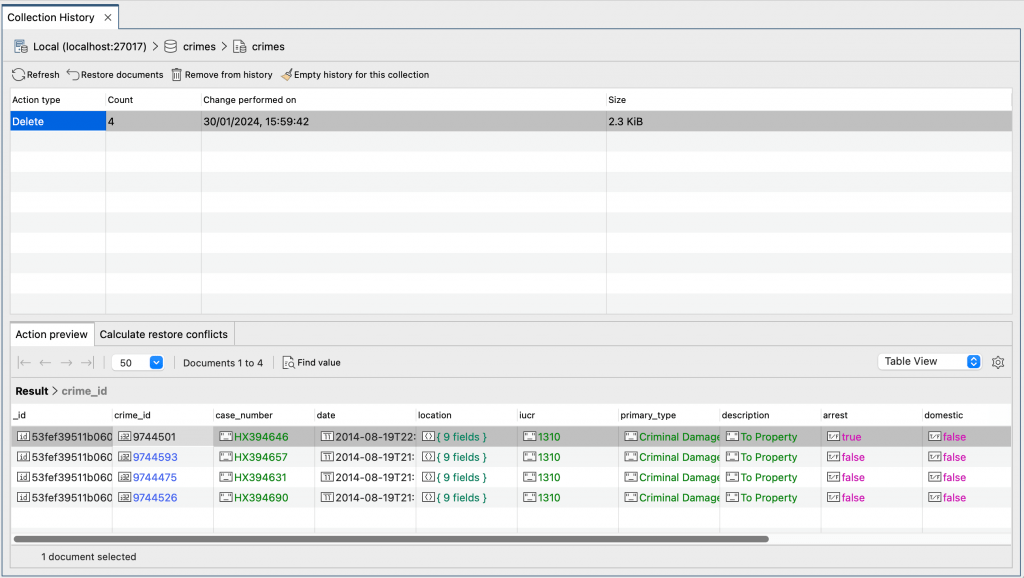
You can view all the documents in the delete operation in the Action preview tab. The Calculate restore conflicts tab shows you if it is safe to restore your documents.
The Change performed on column shows you when you deleted the documents. You can remove the document files from your computer using Remove from history or Empty history for this collection to clear the Collection History.
To restore documents, select the delete operation in the list and click Restore documents or press Enter.
If there are conflicts, for example if the document already exists in the collection, the Resolve restore conflicts dialog allows you to apply a resolution strategy to all documents or individual documents in the delete operation. You can delete the documents from the Collection History, overwrite the documents, or insert the documents as new documents with a unique identifier.
Restore updated MongoDB documents
When you update documents, if you add them to the Collection History, you can restore them. You can restore values, deleted fields, field names, and field types.
The Collection History is stored locally on your computer, so you can only restore documents that you updated.
To restore documents, in the Connection tree, locate the target collection and double-click Collection history.

The Collection History tab displays a list of operations for the current collection. For example, if you updated 997 documents in one operation, this is displayed as a single Update action.
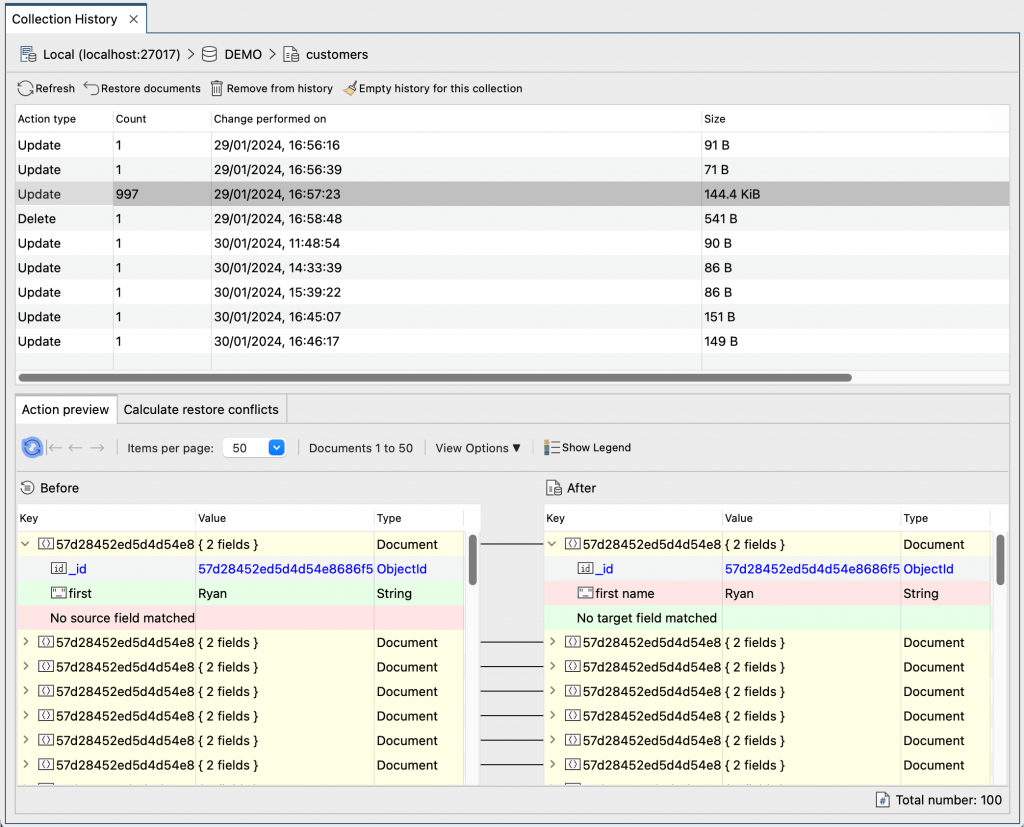
The Action preview tab shows a color-coded comparison of the updated fields in the documents before and after the changes you made.
The Calculate restore conflicts tab displays information about conflicts that may occur when you restore the documents. On the left side, Virtual document shows the document as it will be when it’s restored. The right side shows the current document.

The Change performed on column shows you when you updated the documents. You can remove the document files from your computer using Remove from history or Empty history for this collection to clear the Collection History.
To restore documents, select the update operation in the list and click Restore documents or press Enter. If there are conflicts, for example if the document already exists in the collection, the Resolve restore conflicts dialog allows you to apply a resolution strategy to all documents or individual documents in the update operation. You can delete the documents from the Collection History, overwrite the documents, or insert the documents as new documents with a unique identifier.
Rename MongoDB fields
Every now and then, you may need to rename MongoDB fields. In Studio 3T, you can do this for a single document, for all the documents returned by a particular query, or all the documents in a collection.
Rename a field in a single document
The simplest of these tasks is changing a field name in a single document.
To do this, locate the document, right-click the field you want to rename and select Field > Rename field.
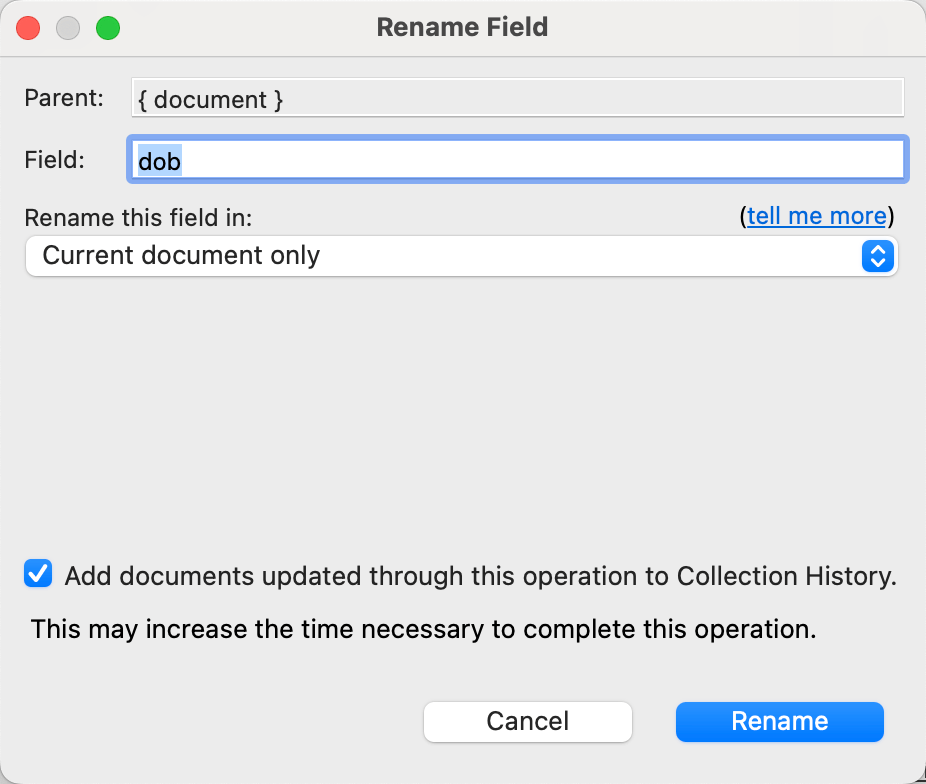
Type the new name in the Field box and click Rename.
If Add documents updated through this operation to Collection History is selected, the documents are stored locally on your computer and you can restore the original field name at a later date using the Collection History.
Rename fields within documents matching a query
If you want to change all the documents matching a particular query, you can also do this in just a few steps. In this example, we’re changing the “dob” field in all documents relating to customers with the last name “Miller”.
To do this, type the query {last:”Miller”} and press Enter. Right-click one of the “dob” fields and select Field > Rename Field. Type the new field name “date_of_birth”. Select Documents matching query criteria from the dropdown box and click Rename.
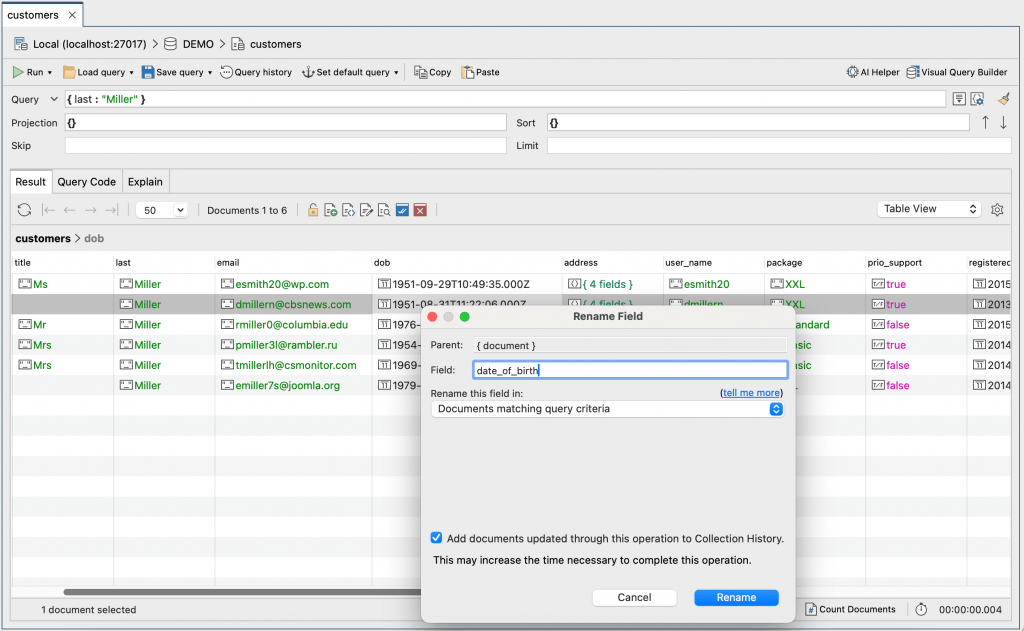
If Add documents updated through this operation to Collection History is selected, the documents are stored locally on your computer and you can restore the original field names at a later date using the Collection History.
Rename fields in all documents within a collection
Finally, to rename a field in all documents in a collection, right-click the field you want to rename and select Field > Rename Field. Type the new field name, for example “date_of_birth”. Select All documents in collection from the dropdown box and click Rename.
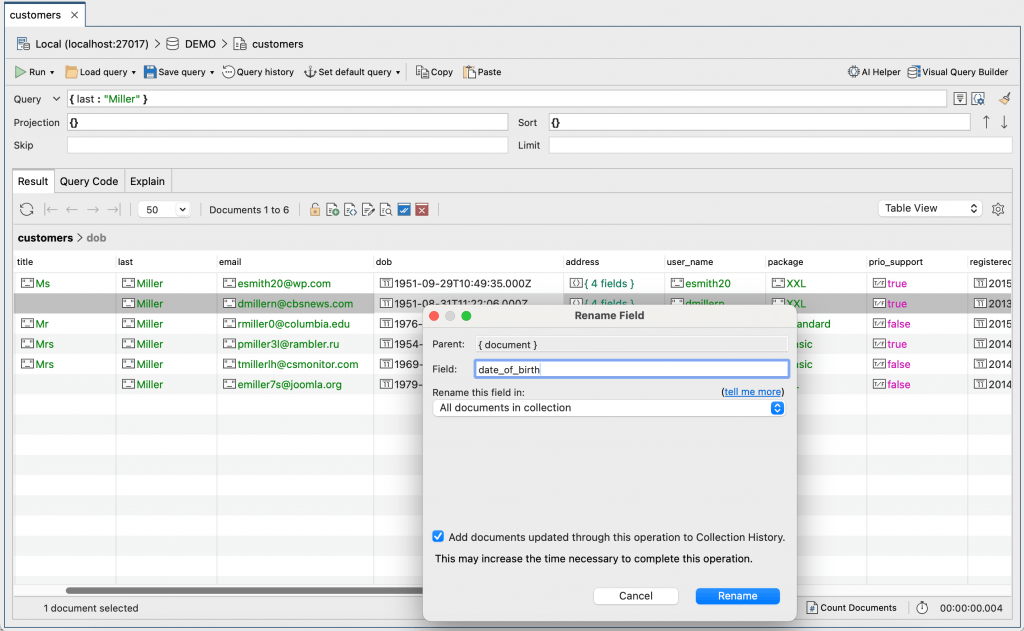
If Add documents updated through this operation to Collection History is selected, the documents are stored locally on your computer and you can restore the original field names at a later date using the Collection History.
This article was originally published by Thomas Zahn and has since been updated.
