In this post, we’ll show you how to connect to MongoDB Atlas, MongoDB’s fully-managed DBaaS, using Studio 3T.
Don’t have a MongoDB Atlas account? Here’s a tutorial on how to set up a free M0 cluster.
If you’re having issues connecting to MongoDB Atlas, we recommend our troubleshooting guide instead.
Prerequisites
- Get your first MongoDB Atlas cluster for free.
- Download the latest Studio 3T version on your Windows, Mac, or Linux machine.
1. Get the connection string from MongoDB Atlas
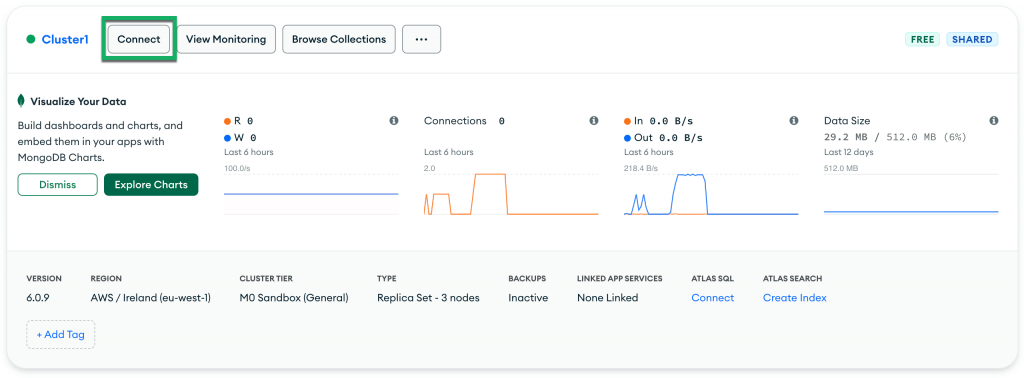
Log in to your MongoDB Atlas account. This will take you to the overview of your cluster.
Click on Connect.
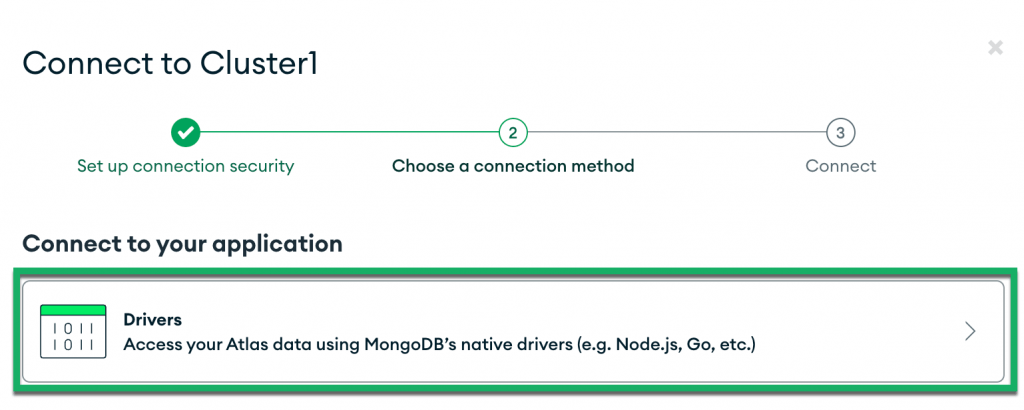
Choose Drivers under Connect to your application.
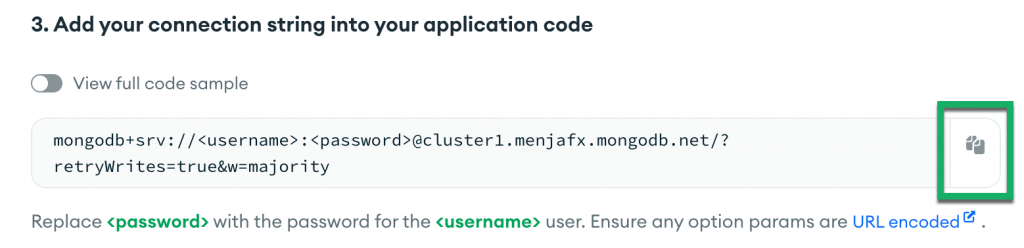
Choose your driver and driver version. We use Java and Version 4.3 or later in this example, but the latest version of any driver should also generate a compatible connection string.

You don’t need to do anything for Step 2 because the driver is packaged with Studio 3T.

Copy the generated connection string. This is what you’ll need to paste in Studio 3T.
2. Whitelist your IP address
If you have a dynamic IP address, it’s worth double-checking the MongoDB Atlas IP Access List.
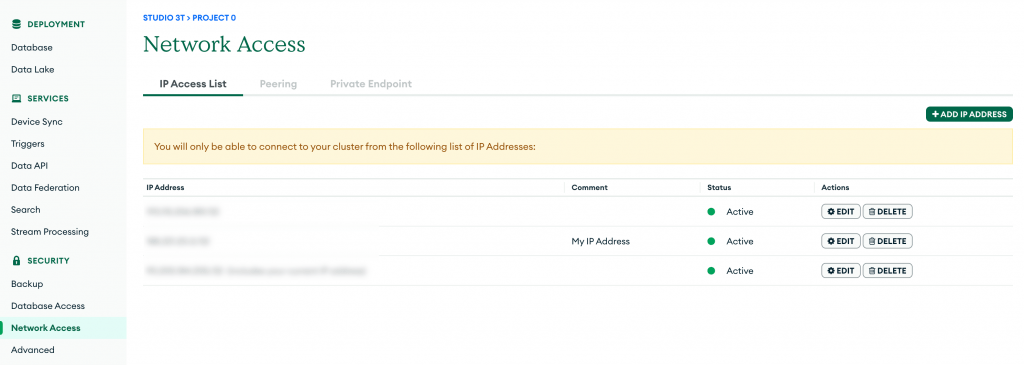
Click on Network Access under the Security section on the left-hand sidebar. This will take you to the IP Access List.
Click on Add IP Address in the top-right corner.
On the Add IP Access List Entry dialog, click on Add current IP address.
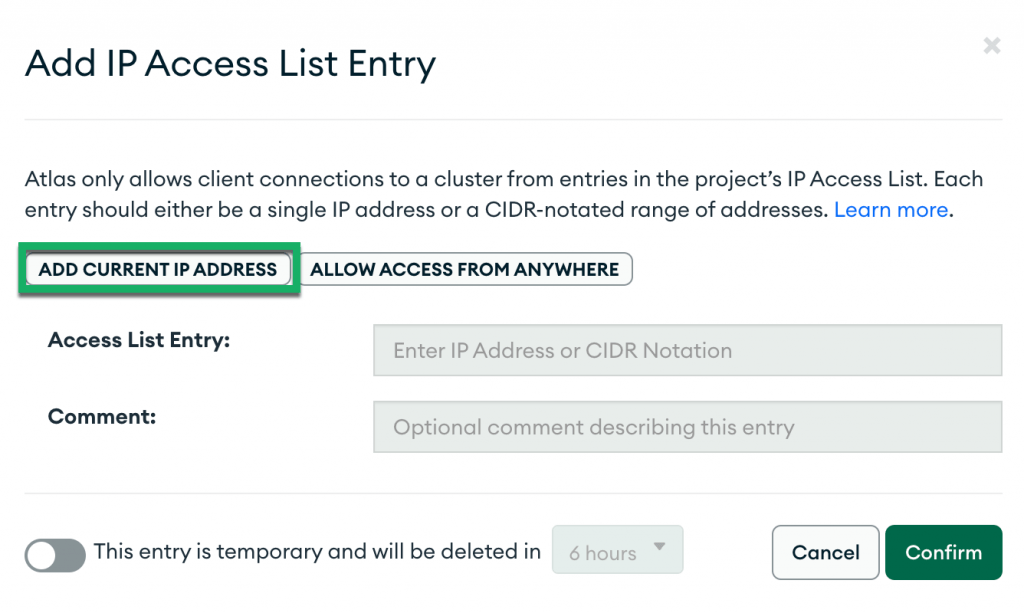
MongoDB automatically detects your current address. Click Confirm.
3. Connect to Studio 3T
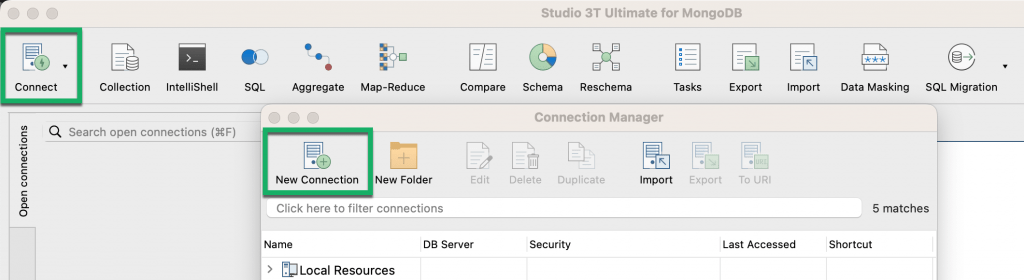
Open Studio 3T and click on Connect in the top-left corner of the toolbar. This will open the Connection Manager.
Click on New Connection in the top-left corner.
In the New Connection dialog, paste the connection string you copied from MongoDB Atlas.
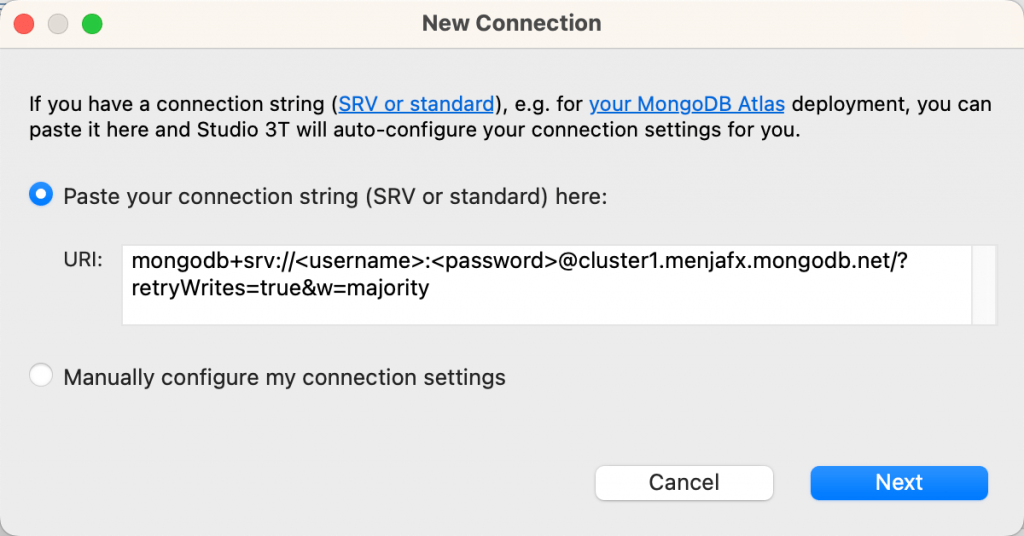
Replace the placeholders <username> and <password> with the actual username and password. Make sure to replace the brackets too, and click Next.
You’ll be prompted that ‘Your connection has been successfully auto-configured.’ Click OK.
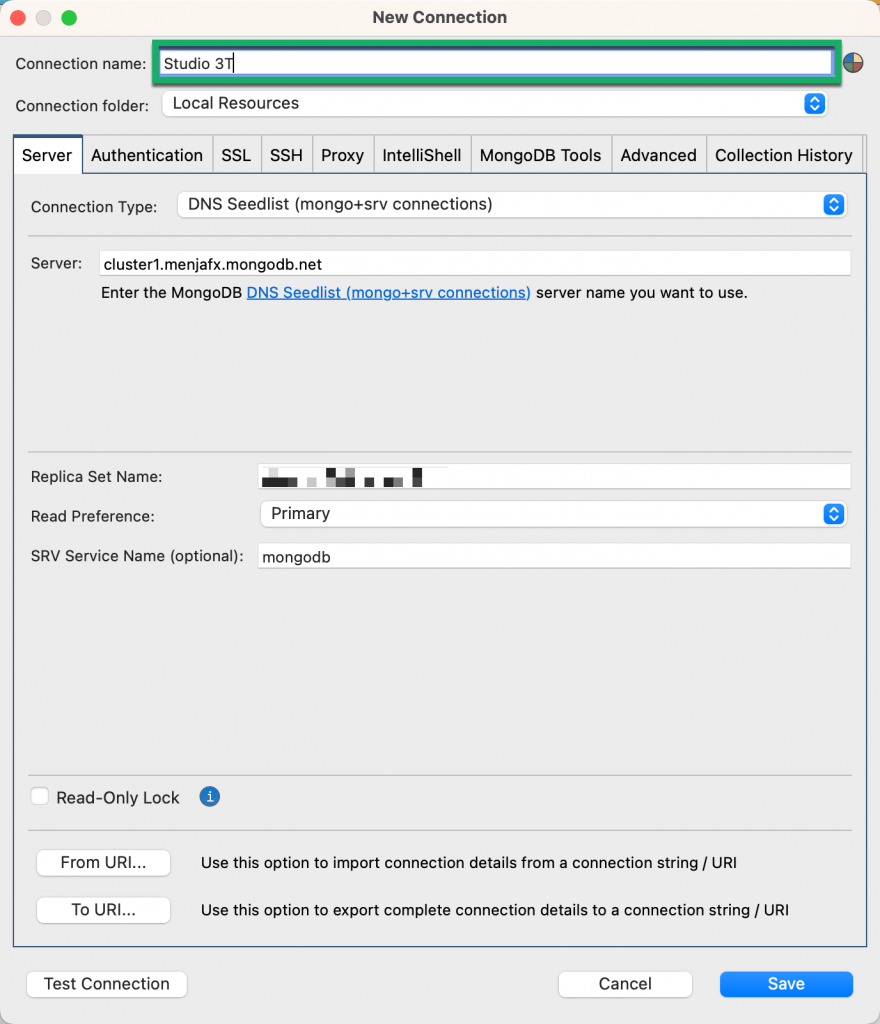
On the New Connection dialog, Studio 3T will automatically extract the information and pre-populate the fields in the Server, Authentication, SSL, SSH tunnel, and Advanced tabs. It will also save the connection for later use. Name your connection.
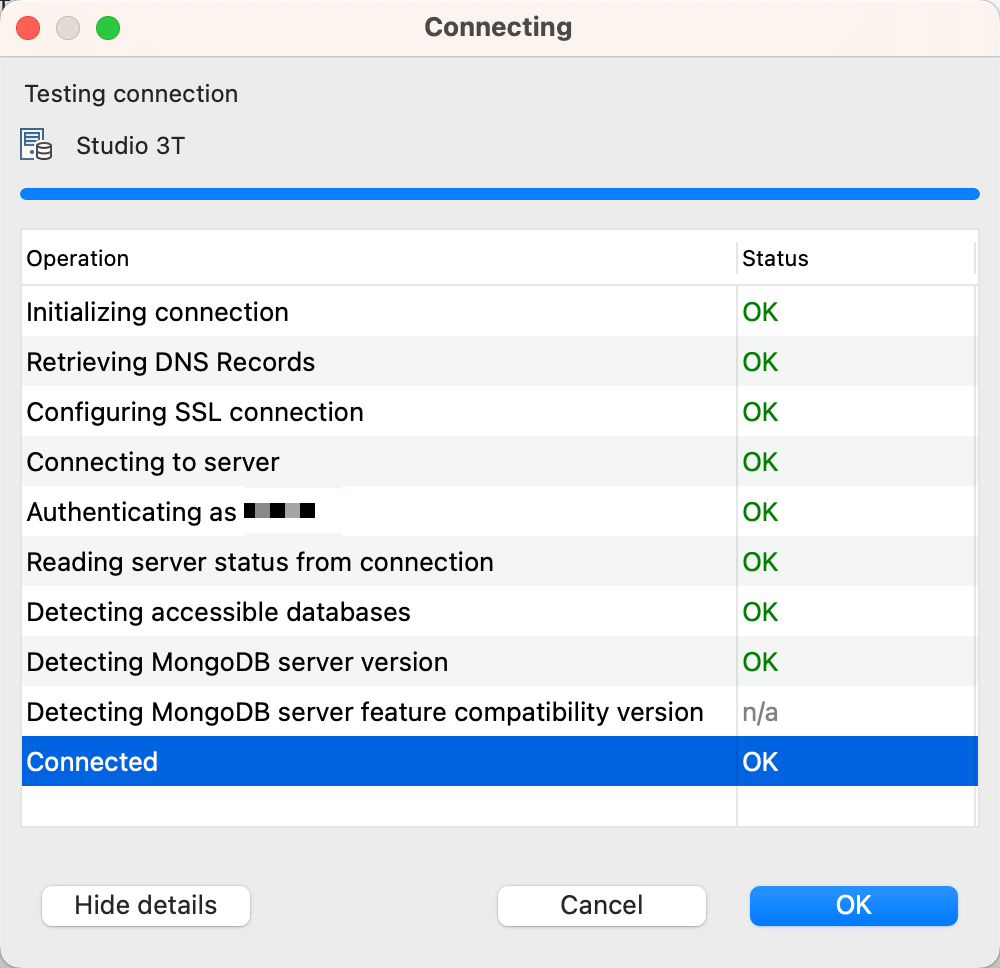
Click on Test Connection. A successful test will look like this:
Click OK to close the dialog. On the New Connection dialog, click Save. On the Connection Manager dialog, click Connect.
4. Import data in JSON, CSV, BSON/mongodump or SQL
If you have an empty cluster, you can easily import JSON, CSV, BSON/mongodump or SQL to MongoDB with Studio 3T’s Import Wizard:
5. Explore MongoDB data
Double-click on a collection in the Connection Tree to open a Collection Tab, which is the starting point of all data exploration in Studio 3T.
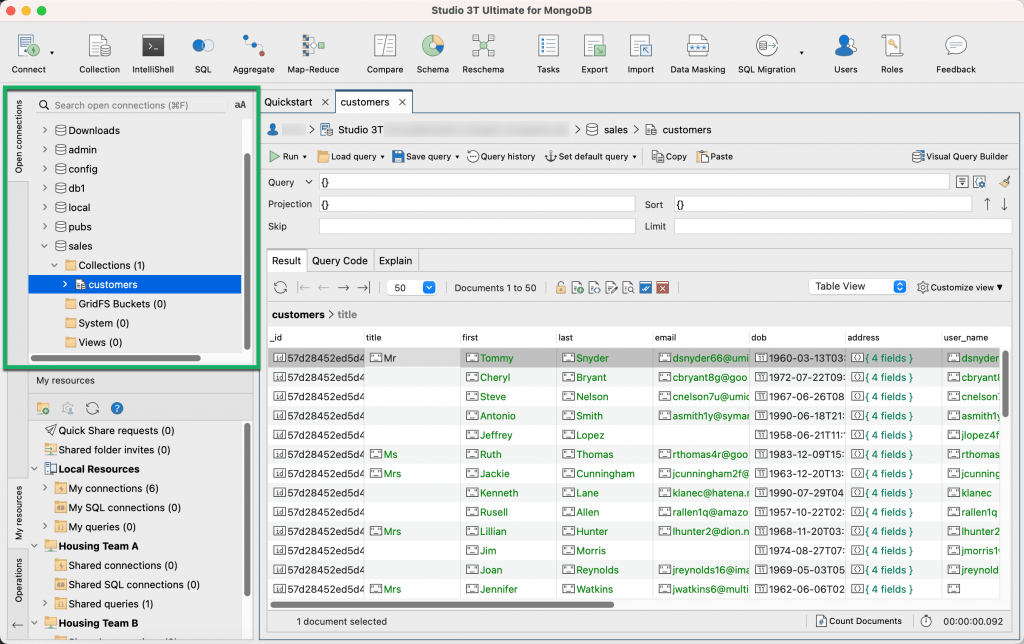
Here you can view the contents of your MongoDB collection in either Table View, Tree View, or JSON View:
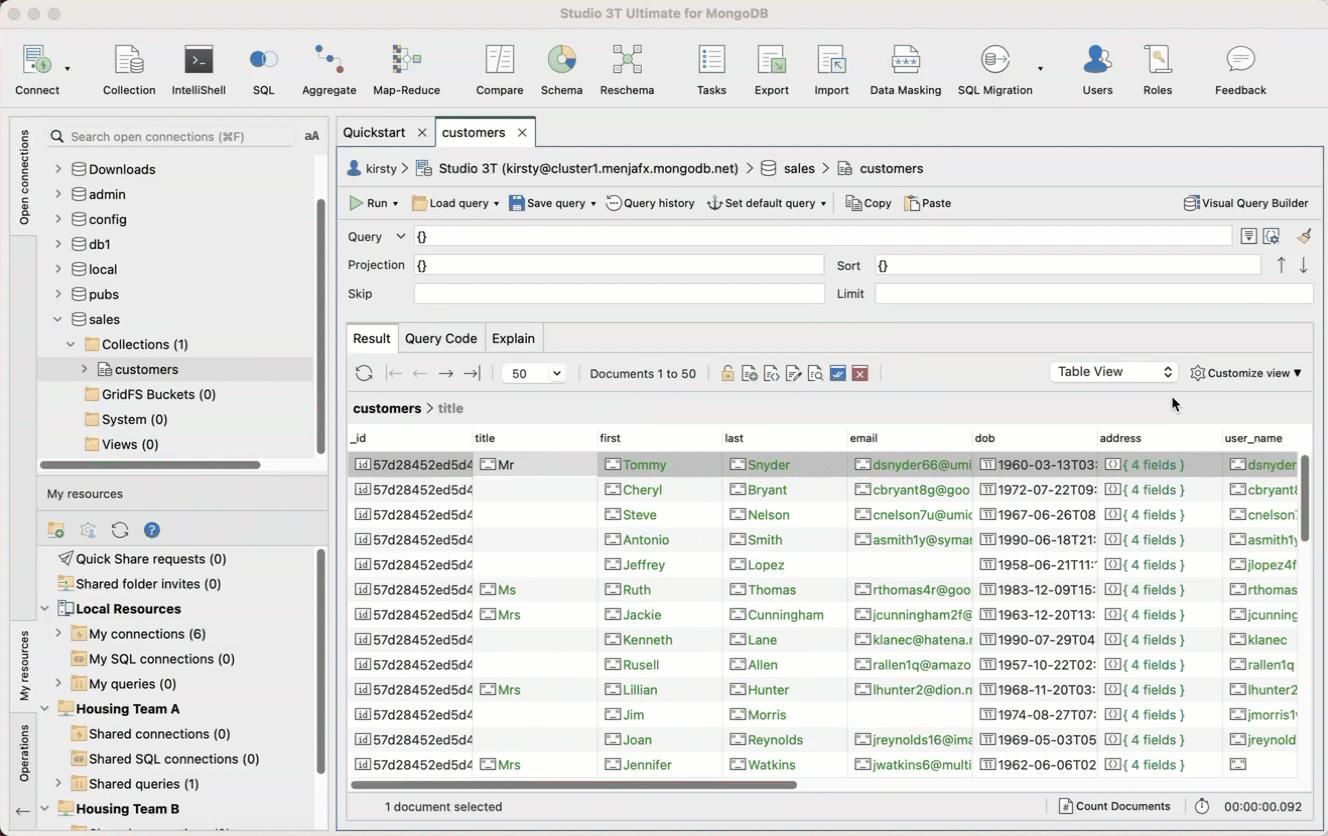
Or access the Visual Query Builder, a drag-and-drop MongoDB query builder ideal for both newcomers and pros:
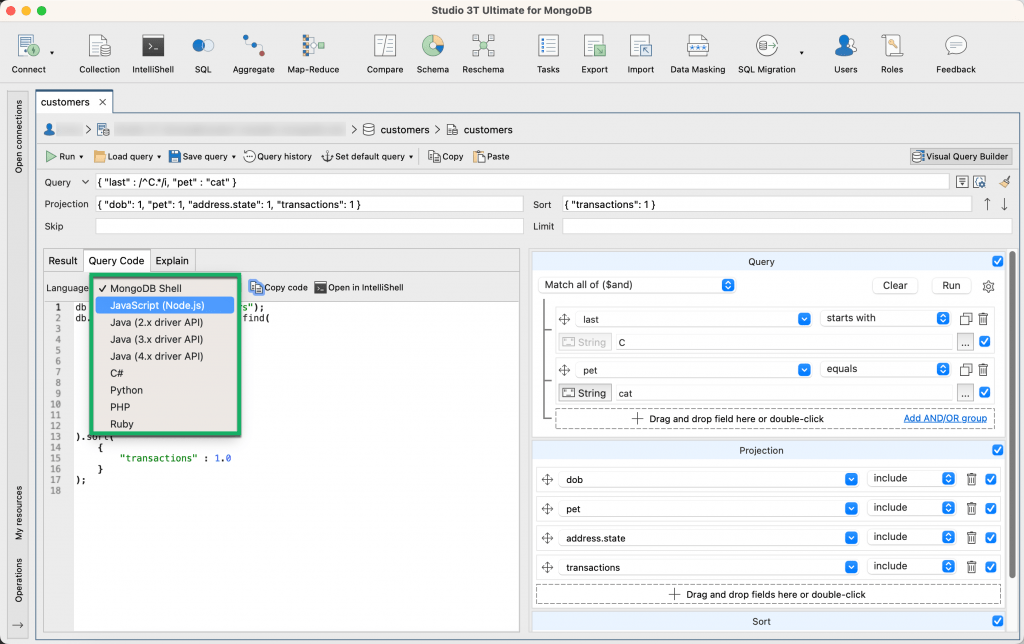
Once you’ve built your query, click on Query Code tab to see how it translates to Java, Node.js, PHP, C#, Python, Ruby, and the mongo shell language:
And that’s just one way of querying data in Studio 3T. There’s also IntelliShell, the built-in mongo shell with robust auto-completion; Aggregation Editor, the stage-by-stage aggregation query builder; and SQL Query, which lets you write SQL to query your MongoDB database.
Related reading
- A roundup of the best MongoDB Atlas tools for data migration, data modeling, performance tuning, and more
- Tips on how to reduce your MongoDB Atlas monthly bill
- Find MongoDB tutorials in Academy 3T
- Search for MongoDB tutorials in the Studio 3T Knowledge Base
- Pressed for time? Subscribe to the Studio 3T YouTube Channel for quick MongoDB tips, tricks, and how-tos