Are you dealing with collections with complex arrays and embedded fields? In this post, we’ll show you how to use Table View, the spreadsheet view in Studio 3T, to flatten nested MongoDB collections.
Then vs. Now
If you’re a MongoDB user, chances are you’ve seen such a mongo shell output:
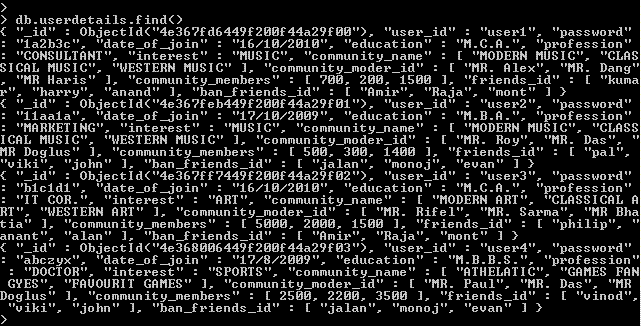
And pretty() can only do so much.
Sure, MongoDB has its perks, but with mongo shell as the out-of-the-box MongoDB interface, many longed for a spreadsheet view in MongoDB, similar to the familiar interface found in SQL databases.
With Studio 3T’s MongoDB Table View, you can explore complex, nested MongoDB collections without sacrificing performance.
Show embedded fields
Table View makes it possible to view nested fields with the rest of the tables, so that you don’t have to step into and out of embedded objects (or cells/columns) one at a time.
Simply expand fields and arrays right next to other columns in the table by right-clicking on a field and choosing Show Embedded Fields.
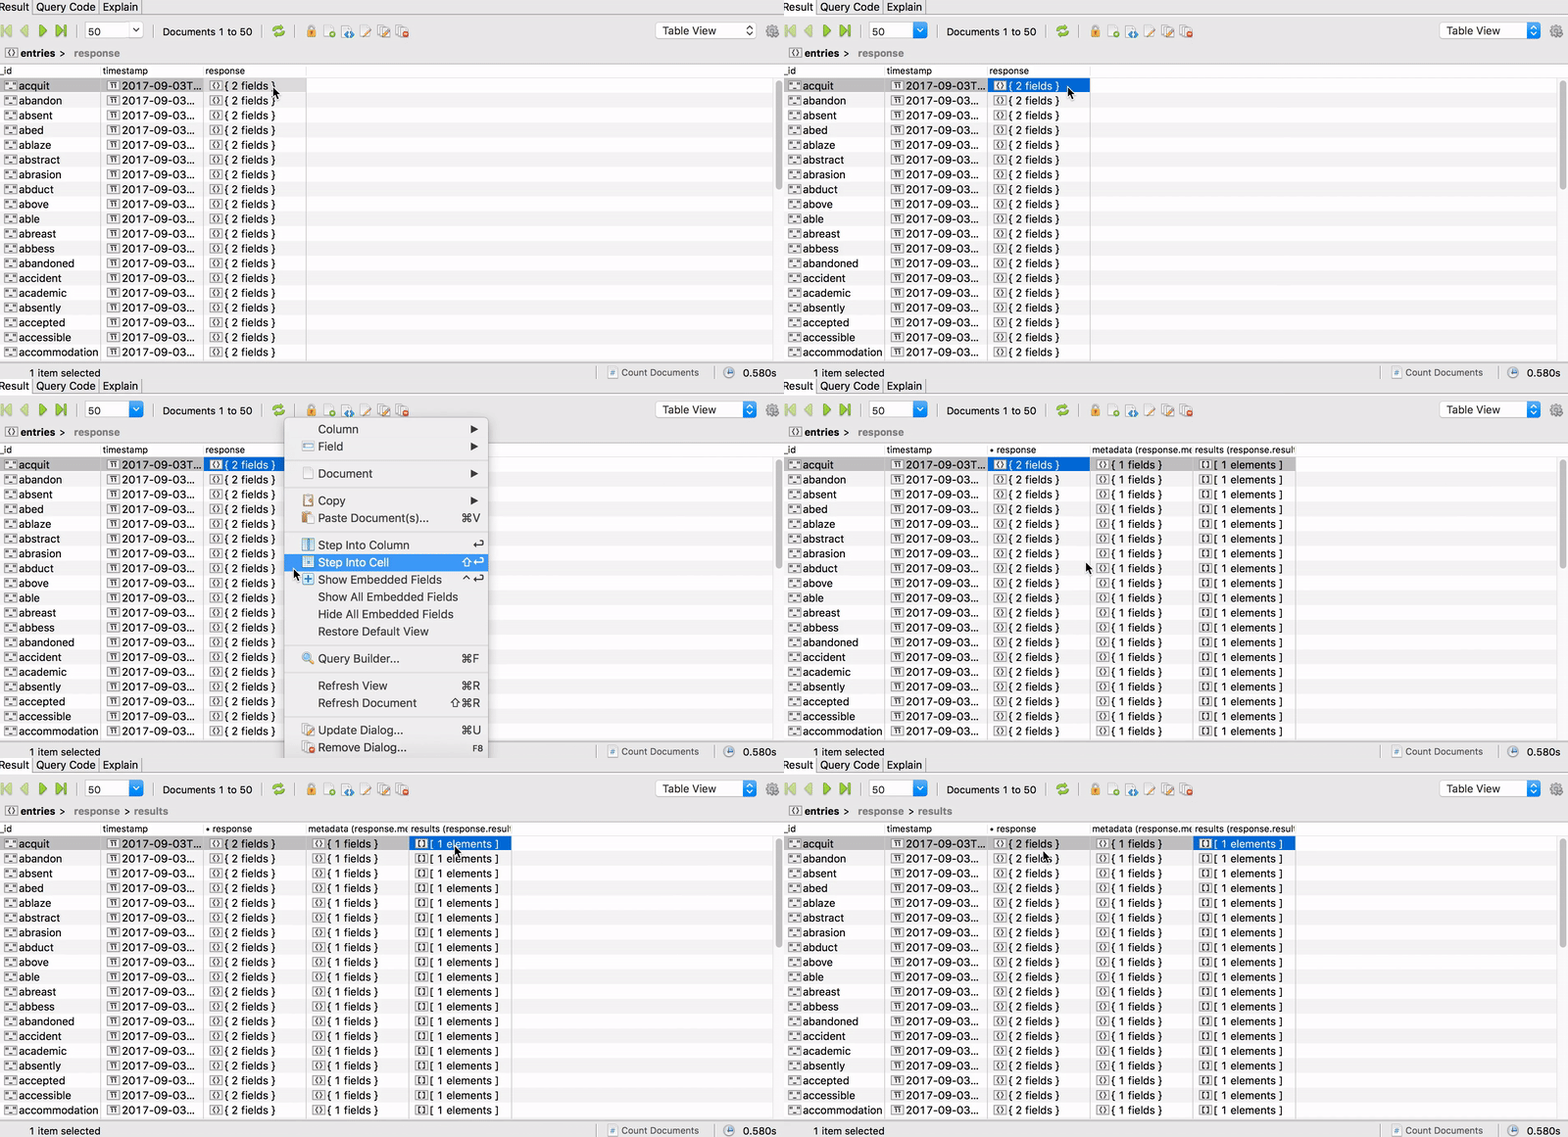
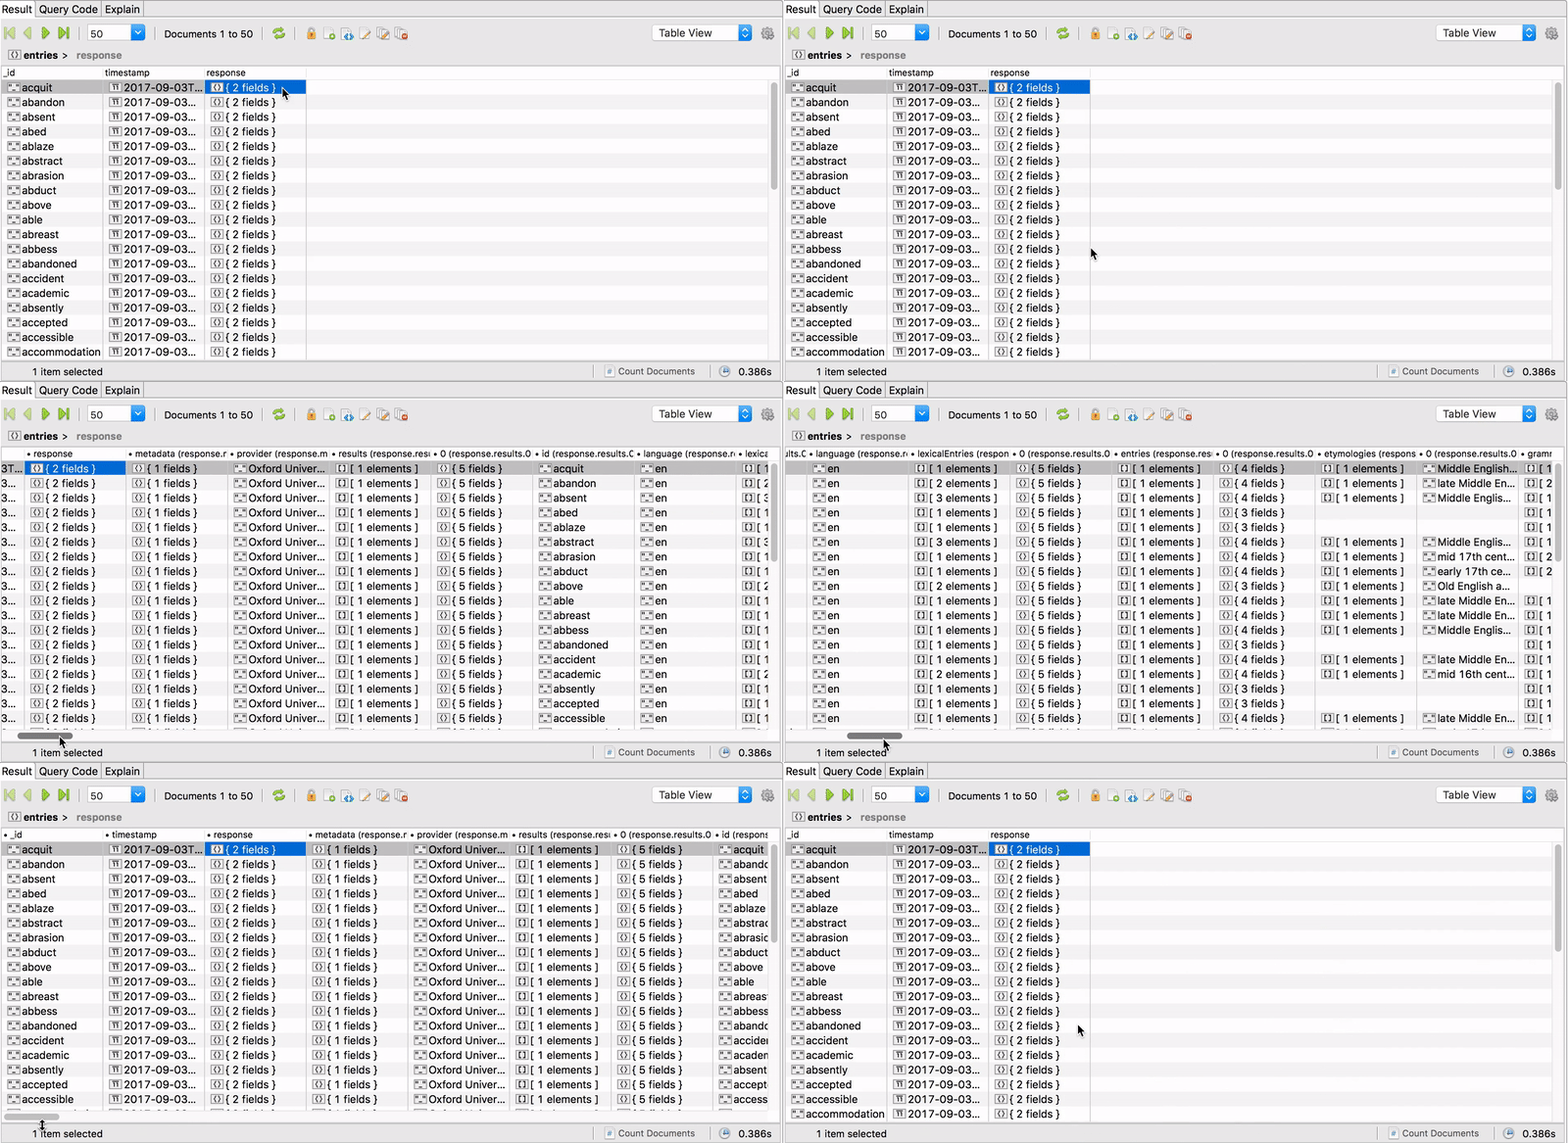
You can also show and hide all embedded fields in one click. Simply right-click any field and choose Show (or Hide) All Embedded Fields.
Track expanded fields
Table View also lets you see which columns or fields you’ve expanded. Now, when you show embedded fields, the parent field will show a dot right before it, indicating that its nested fields have been expanded.
To make navigating data even easier, each nested field will also show its complete JSON path, so you’re always aware of a field’s context within the overall data set.
For example, let’s show the embedded fields of the parent field: response.
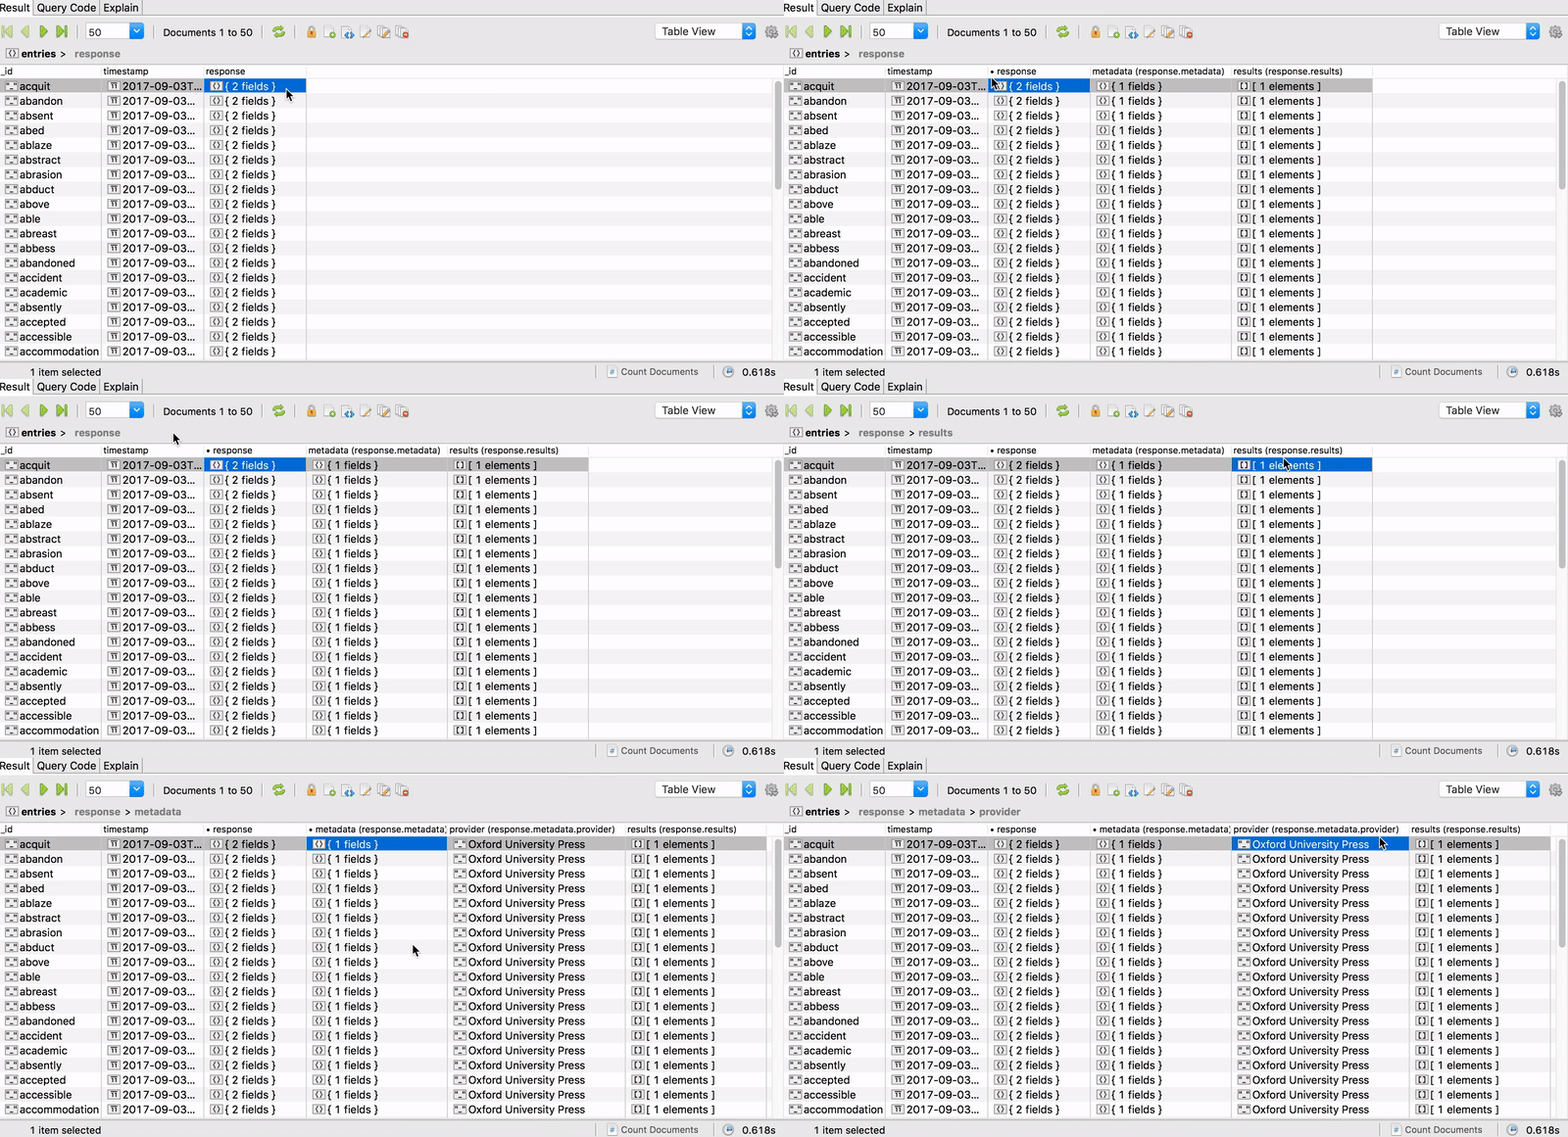
You’ll see a dot appear right before the field name once its expanded. The embedded fields metadata and results will also show the complete JSON paths response.metadata and response.results.
Let’s now show the embedded fields of the field metadata. Once expanded, it will also be marked by a dot and its only embedded field – provider – will show the JSON path response.metadata.provider, which reflects its hierarchy within the data.
In addition to these visual indicators, we’ve also designed the breadcrumbs to be responsive, so hidden columns and expanded fields are easier to track.
Step into array-valued columns
You can also step into a whole column of arrays at the same time, which means array elements will be displayed with increasing index on a single line, each line representing another array.
Thanks to the newly introduced column pagination, views with a lot of columns (in this case a lot of array elements) won’t cause performance issues even when viewing massive datasets.
Let’s take a look at the example field sentences, which contains 108 array elements. To step into this array-valued column, just right-click on the field and select Step Into Column.
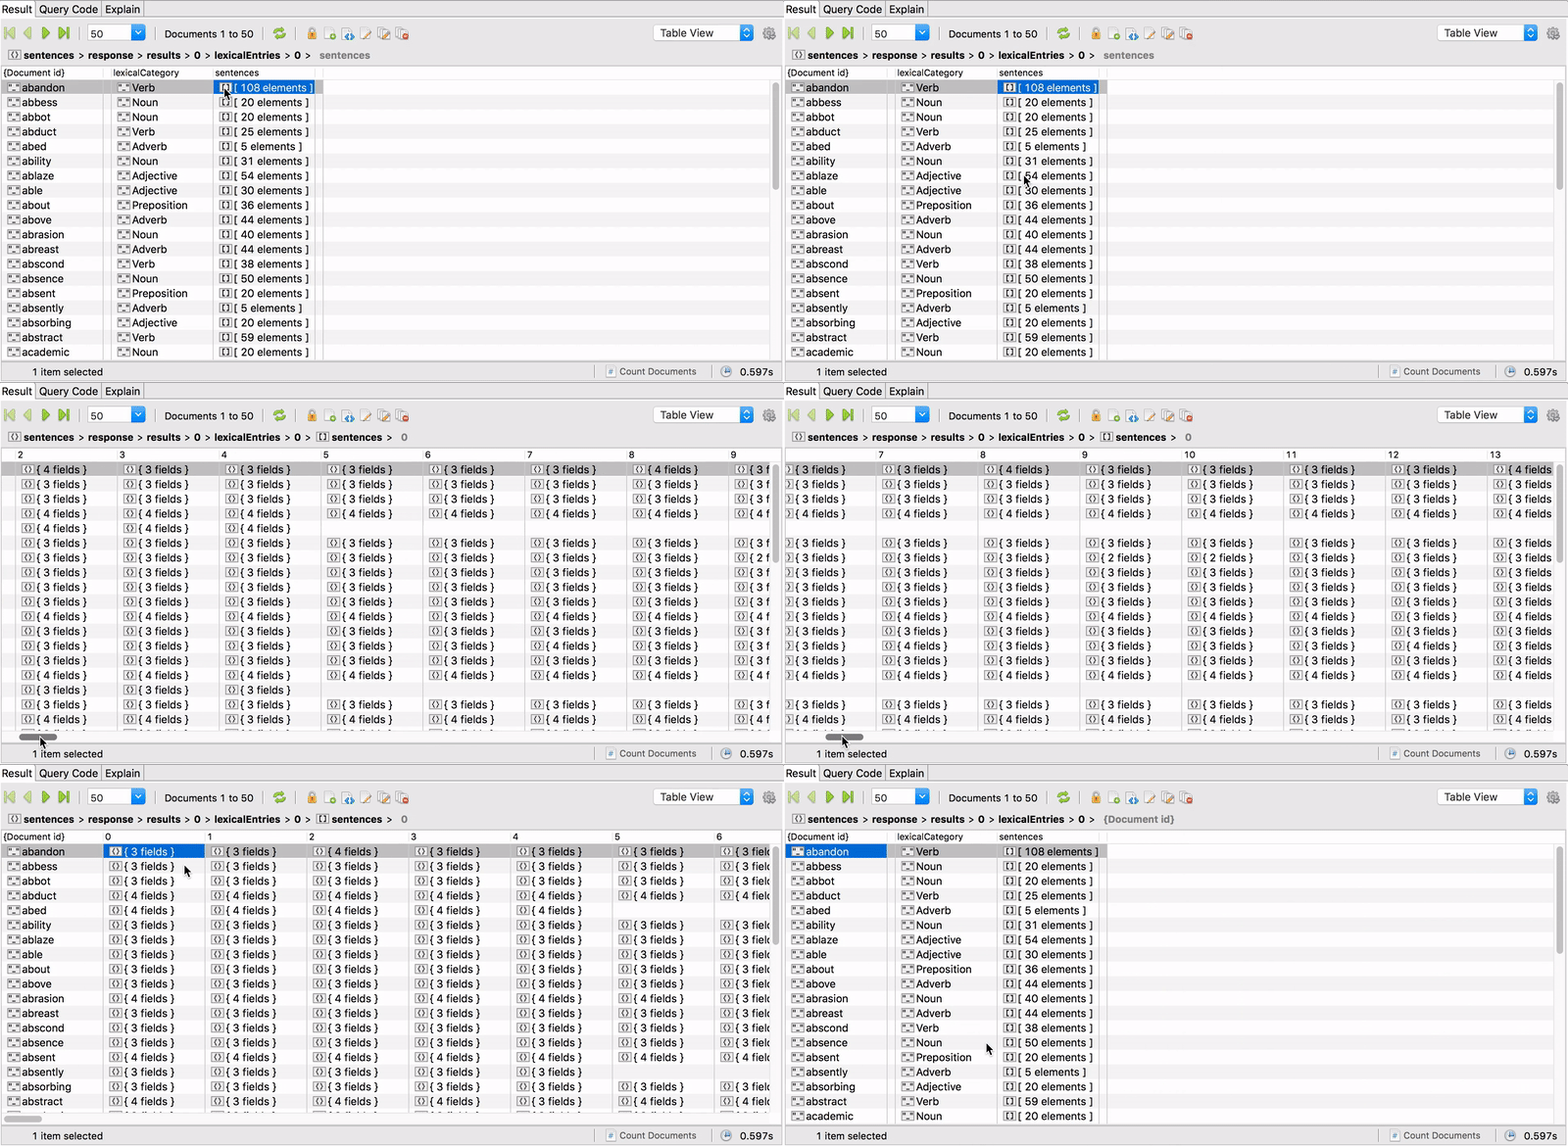
This will then show all the array elements for all the documents (in this example, words starting with a), instead of just one individual document. It also neatly displays the 108 array elements in individual, clearly numbered columns.
To return to the previous view, simply right-click and choose Step Out.
Hide and show columns
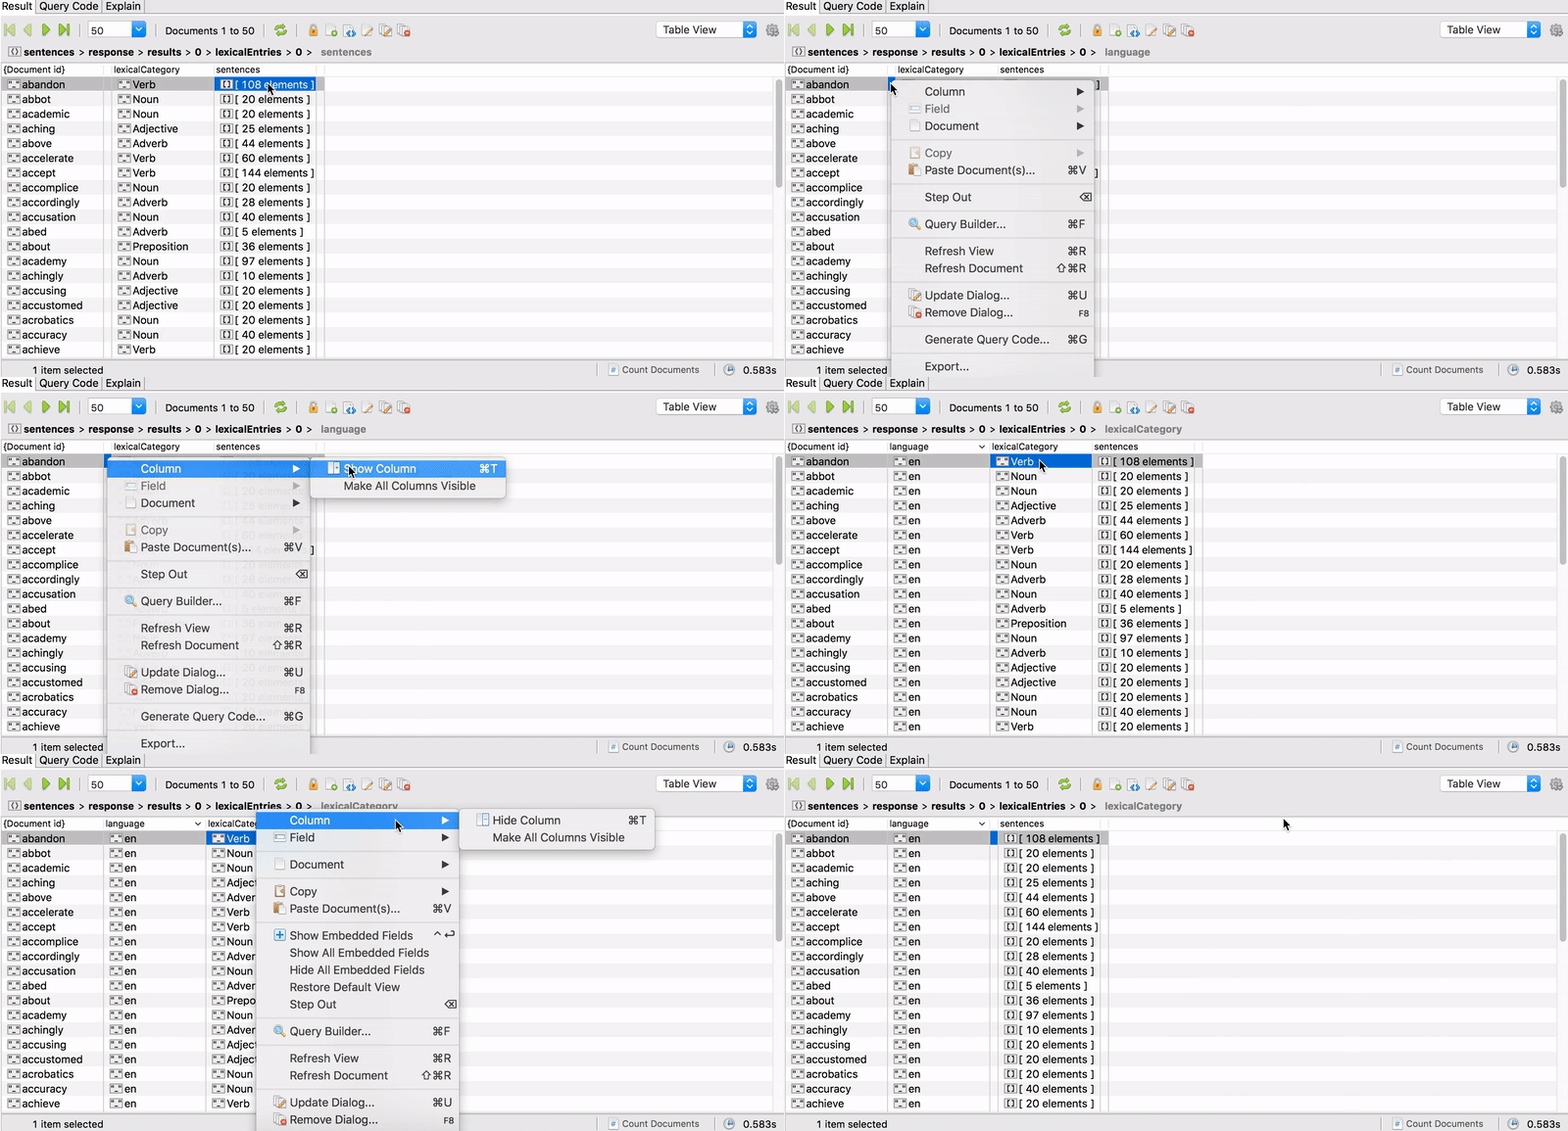
The Show Embedded Fields and the Step Into functionalities are undeniably handy, but they could easily result in columns that might clutter your view.
The good news is, the new Table View supports hiding columns with a simple right-click or a quick keyboard shortcut – just like one would in Excel – so you don’t have to fiddle with the MongoDB $projection operator. Hidden columns are always visually indicated as collapsed columns.
Go back to the start
So now that you’ve expanded nested arrays, shown embedded fields, hidden columns, and changed column widths, what if you want to revert to the default view, as you had it when you first opened your collection?
We made this handy, too. We introduced a Restore Default View option so all you need to do is right-click on any column, choose Restore Default View, and it will show your collection as you had it from the start, standard column widths and all.
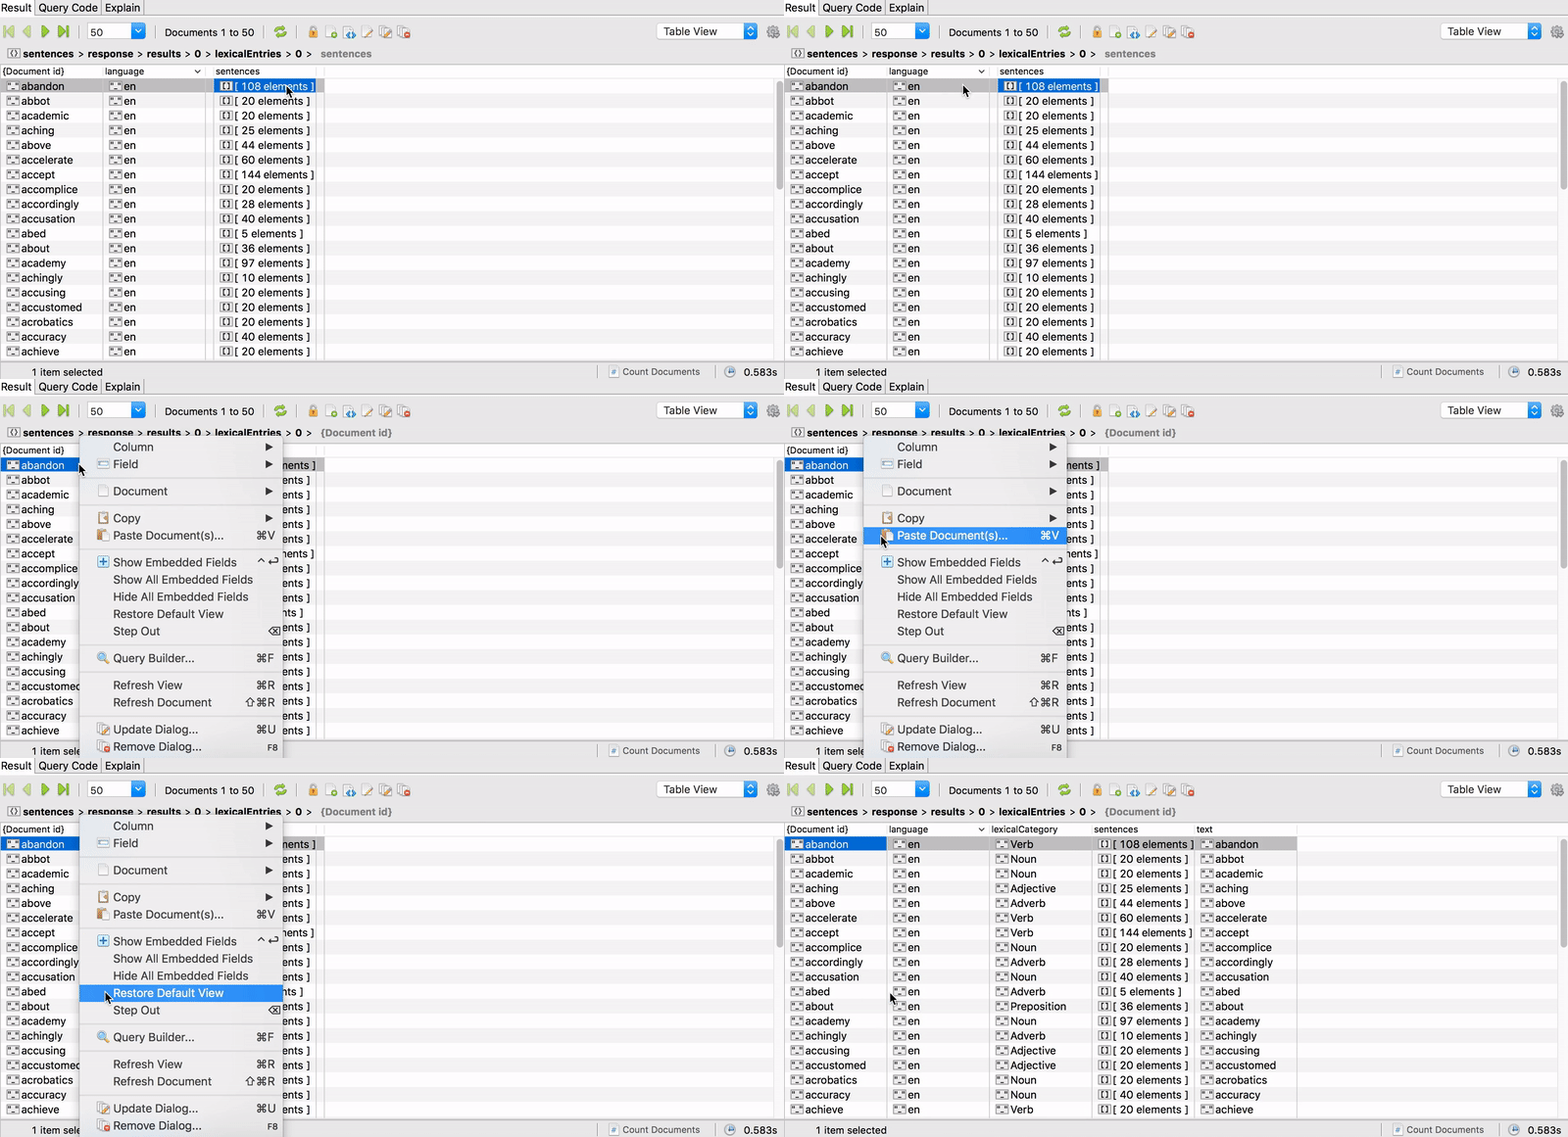
If you don’t revert to the default view, settings like hidden columns, column widths, and expanded embedded fields are saved between app restarts, so you’re spared this time-consuming task.
Copy MongoDB documents to CSV
Once you’re done exploring collections, we’ve included this handy shortcut within Table View, so you don’t have to go through the Export Wizard to export selected documents to a CSV file.
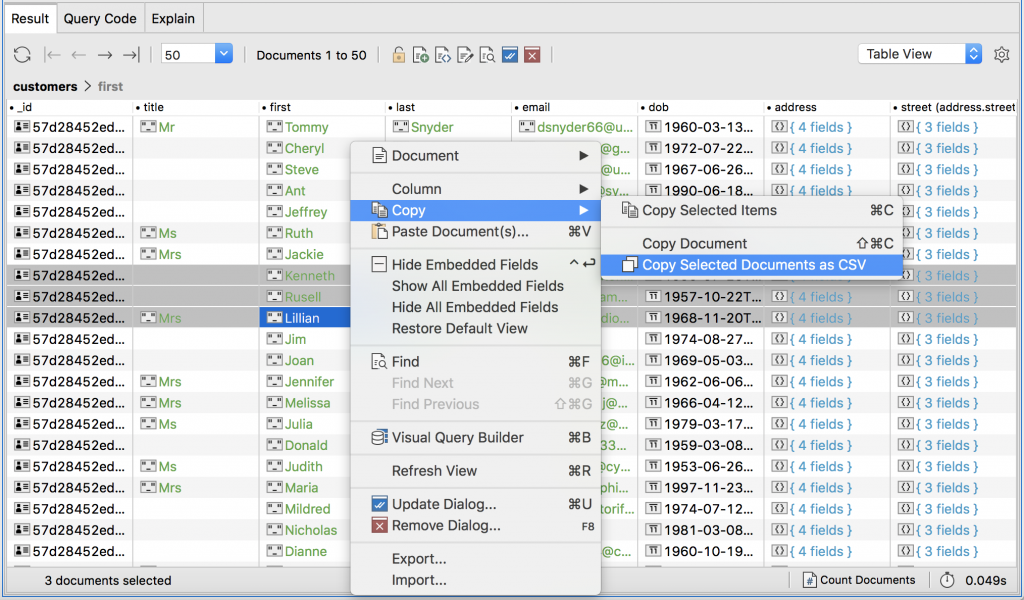
Select the documents you want to export while on any Result Tab (Visual Query Builder, IntelliShell, SQL Query, Aggregation Editor), right-click, and choose Copy > Copy Selected Documents as CSV.
Shortcuts
Shave even more seconds off through these shortcuts:
- Ctrl + Enter to show and hide embedded fields
- Ctrl + T to hide and show columns
- Enter to step into columns
- Shift + Enter to step into cells
You can find the complete list of Studio 3T shortcuts here.
Implications
Studio 3T’s Table View is a game changer for MongoDB professionals and newcomers alike.
If you’re a MongoDB user working with large datasets, the ability to show embedded fields in as many individual columns (think thousands), makes MongoDB data exploration much quicker and easier. Now you can also view the fields they need side-by-side, whether it’s embedded or not, which makes data visualization simpler all around.
If you’re a newcomer to MongoDB from relational databases, the ability to view data in a table already bridges a huge gap. With Table View, you can easily navigate your way around MongoDB instead of wrangling command lines in the mongo shell. A massive leg up, especially as one learn the ropes of the MongoDB query language.
