Skip to content
Studio 3T - The professional GUI, IDE and client for MongoDB
  • Tools
    • Aggregation Editor
    • IntelliShell
    • Visual Query Builder
    • Export Wizard
    • Import Wizard
    • Query Code
    • SQL Query
    • Connect
    • Schema Explorer
    • Compare
    • SQL ⇔ MongoDB Migration
    • Data Masking
    • Task Scheduler
    • Reschema
    • More Tools and Features
  • Solutions
  • Resources
    • Knowledge Base
    • MongoDB Tutorials & Courses
    • Tool/Feature Documentation
    • Blog
    • Community
    • Testimonials
    • Whitepapers
    • Reports
  • Contact us
    • Contact
    • Sales Support
    • Feedback and Support
    • Careers
    • About Us
  • Store
    • Buy Now
    • Preferred Resellers
    • Team Pricing
  • Download
  • My 3T
search

Studio 3T® Knowledge Base

  • Documentation
  • Tutorials
  • Workshops
Take the fastest route to learning MongoDB. Cover the basics in two hours with MongoDB 101, no registration required.
Start the free course

Connecting Studio 3T to DigitalOcean Managed MongoDB

Posted on: 26/08/2021 (last updated: 06/09/2021) by Dj Walker-Morgan

In this guide, we shall walk through the process of creating a DigitalOcean Managed MongoDB database and connecting Studio 3T to that database. DigitalOcean offers MongoDB as part of their managed databases offering, with single node deployments for development and three node deployments for production use.

Prerequisites

  • A DigitalOcean account. If you don’t have one, you can sign up as a new user with $100 credit.
  • A copy of Studio 3T

If you have already provisioned your Managed MongoDB on DigitalOcean, skip to the next section, Connecting Studio 3T to DigitalOcean. Otherwise, continue here as we step through the steps to deploy your first MongoDB database on DigitalOcean.

Creating a DigitalOcean Managed MongoDB database

If you have already provisioned your Managed MongoDB on DigitalOcean, skip to the next section, Connecting Studio 3T to DigitalOcean.

On your DigitalOcean account, select Create A Managed Database. This takes you to the Create a Database Cluster page:

Creating a Managed MongoDB Cluster on DigitalOcean

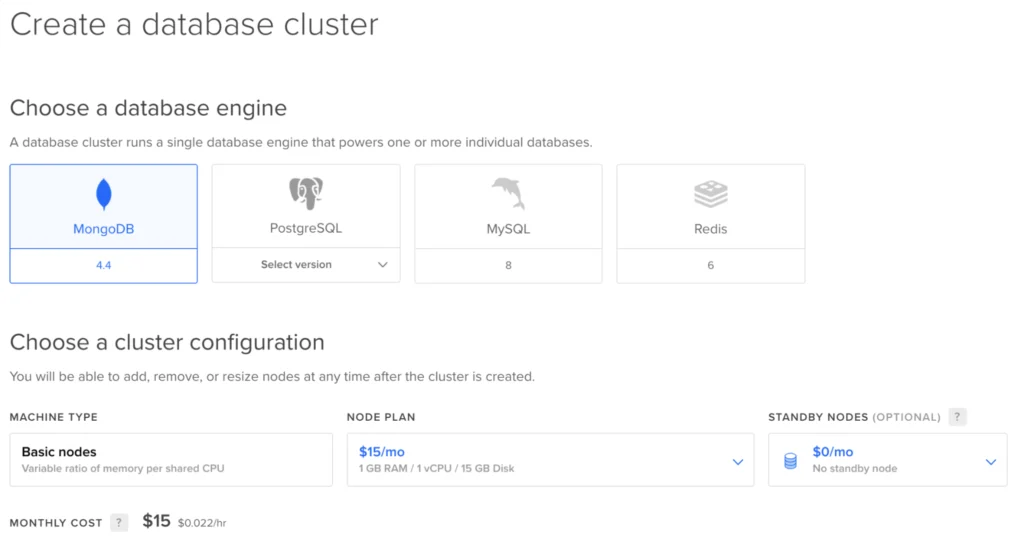
Select, if it isn’t selected already, MongoDB. For a cluster configuration, the default of a single node with no standby nodes is suitable for development and exploration.

On the same page, you can select where your cluster’s droplets will be provisioned. Finally, you can choose a name for the database instance and attach it to a relevant DigitalOcean project.

Completing the creation of the cluster

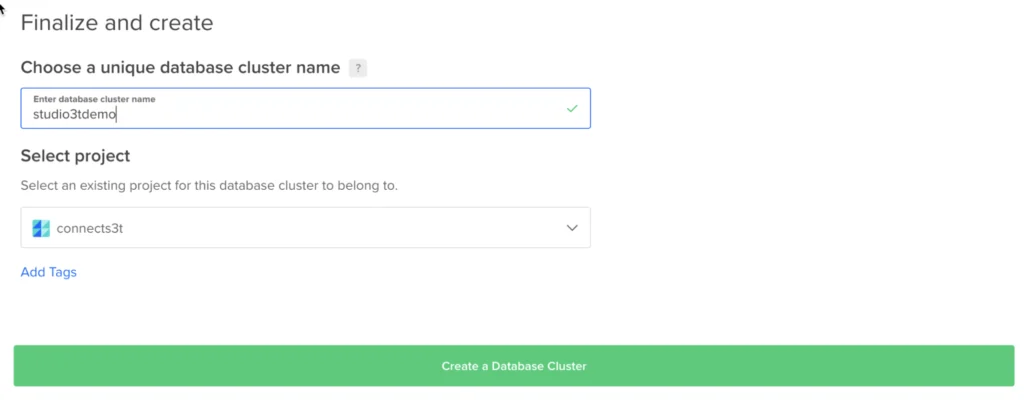
You can then click the Create Database Cluster button at the bottom of the page to begin the creation process. The next page you see will be the database overview. It may show you an assistant to do some initial tasks, but we’ll assume that you have skipped those steps and your database has completed provisioning. Your screen should look something like this:

The DigitalOcean overview for a MongoDB cluster

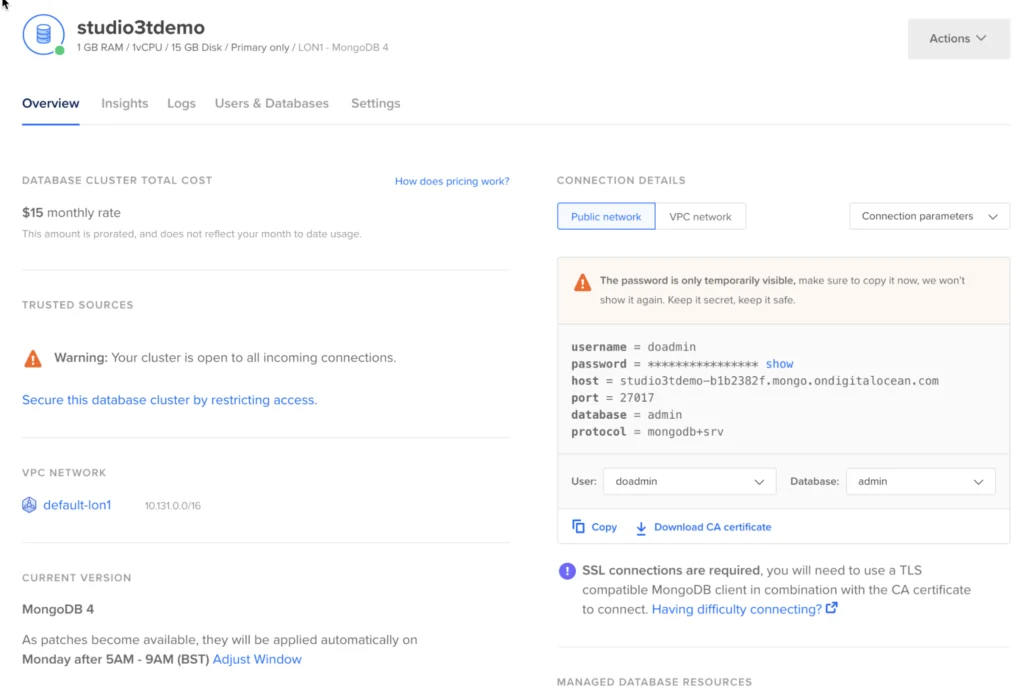
On the right, in the Connection Details, you will see an obscured password for connections. Reveal and make a secure note of that password.

Click on Download CA Certificate to download a copy of the TLS root certificate which you will need to make connections. Save it in a memorable location.

Right now, your database is open to connections from anywhere on the internet. DigitalOcean recommends you secure it with an allow list of trusted sources. To add your own system to the allow list, click on Settings in the top tab bar:

The DigitalOcean settings for MongoDB

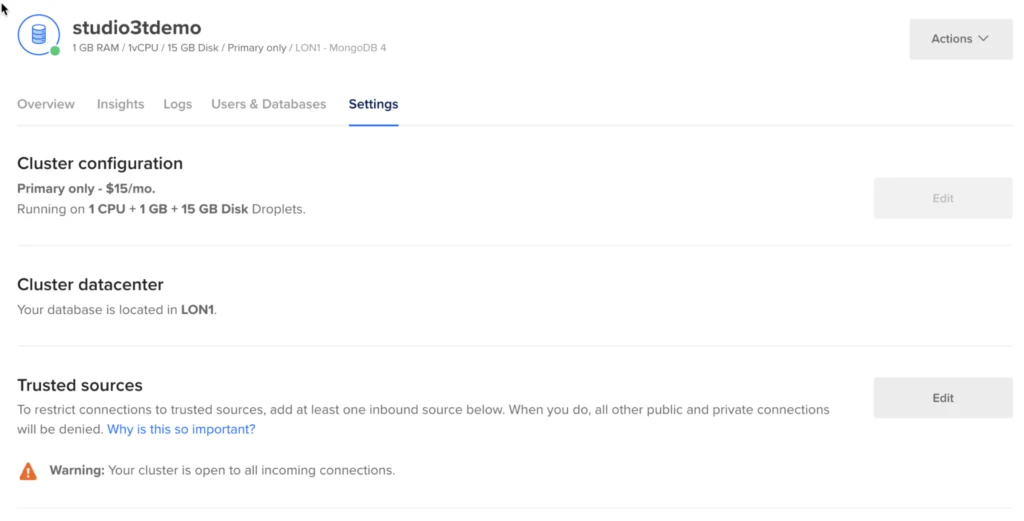
Go to the Trusted sources section and click on Edit

Selecting a trusted source

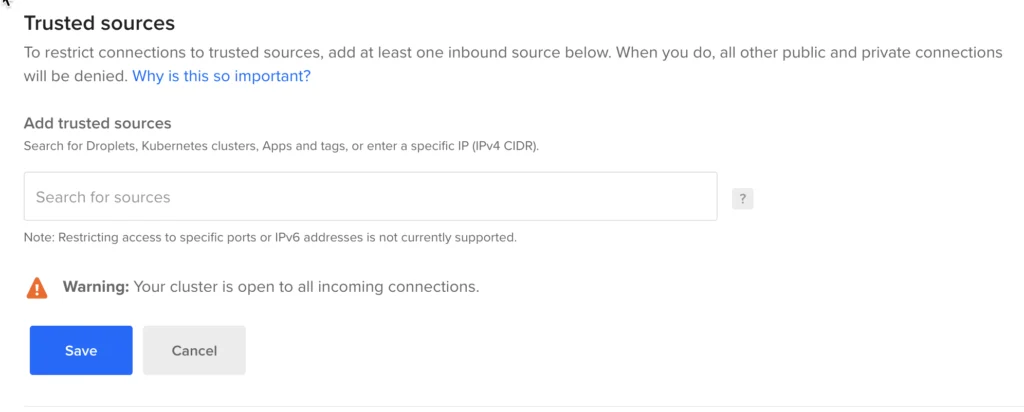
Click on the Search for sources field. It will drop down a list of suggested sources which should include your system’s current IP address. Add that source and then click Save.

With your database now created and secured, we can move on to connecting Studio 3T to it.

Connecting Studio 3T to DigitalOcean

Navigate to your DigitalOcean project and find your MongoDB database under the Resources section for Database Clusters. Here’s an example:

Locating clusters in the Resources tab

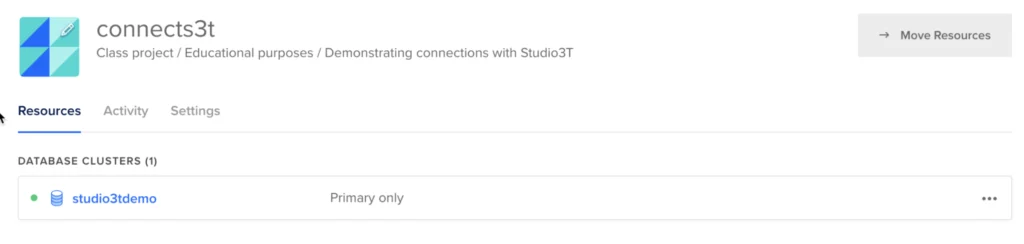
Click on the database to view the overview. We can now gather the information we need to connect.

The overview dashboard for a recently created cluster

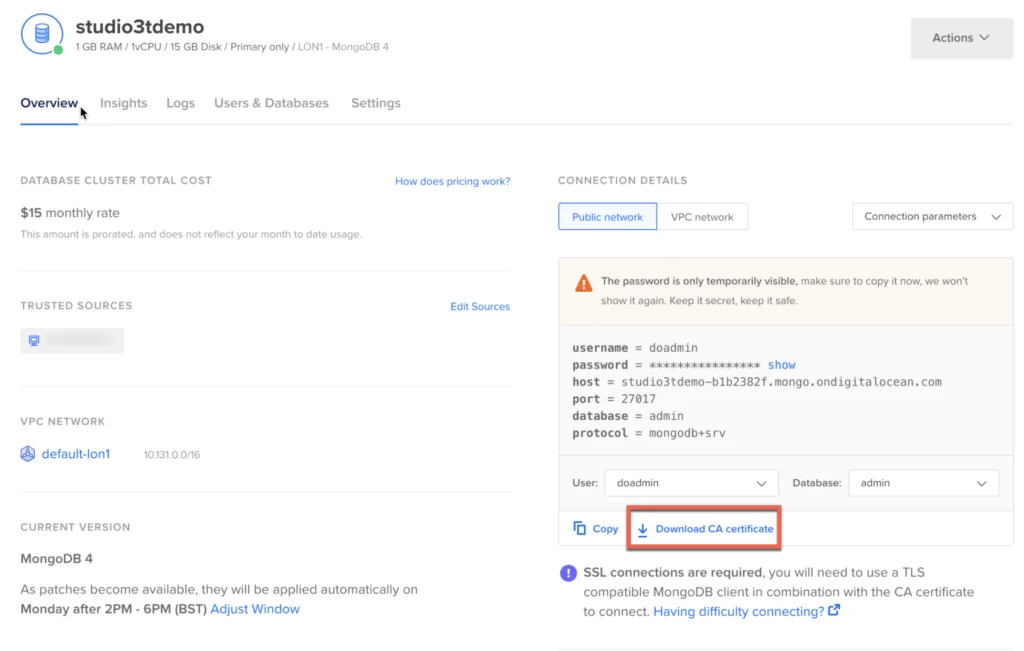
 Immediately after creating a database, the admin user password will be temporarily visible. After that it will show as <replace-with-password>. If you don’t know the user’s password, you can go to the Users & Databases tab where you can get a password reset for a user.

Make sure you have also downloaded the root CA certificate too. You can download it with the button/link marked on the screenshot above. We will need that later.

We now need the Connection String. Set the drop down box at the top right of the Connection Details to Connection String. The panel will change to showing just a string rather than a set of parameters:

The MongoDB connection string is easier to copy than separate details

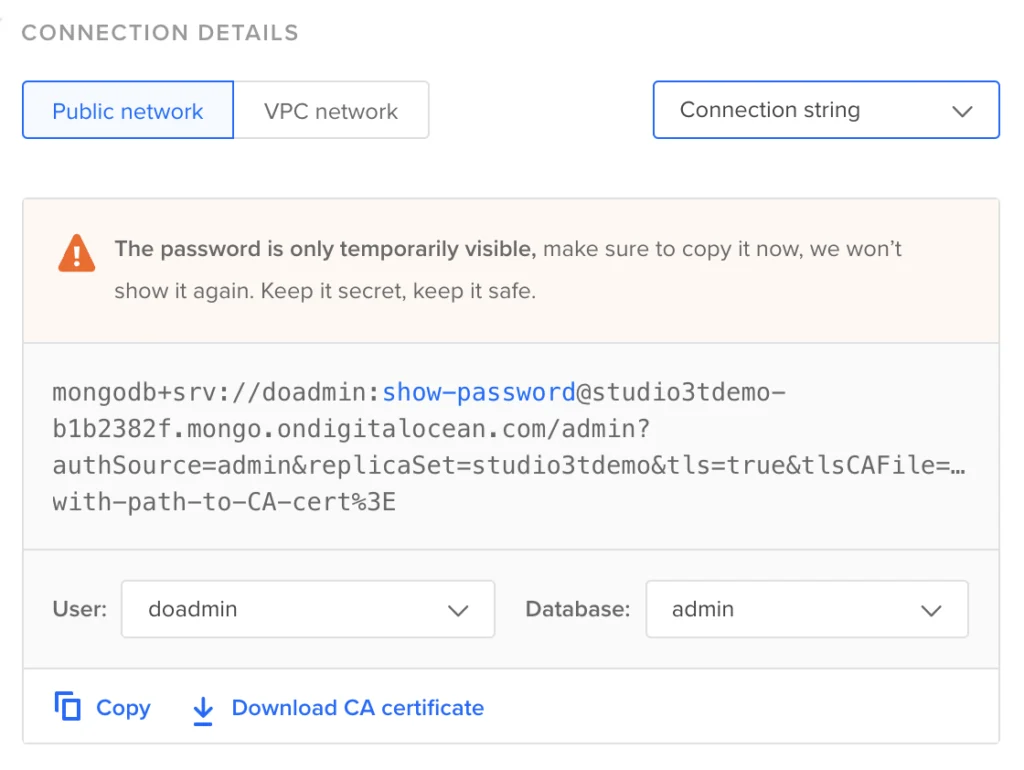
If the password is temporarily visible, you can click on show-password to reveal it in place and click the copy button to copy the whole connection string in one. If the password is being hidden, show-password will be replaced by “<replace-this-password>”. Use the copy button to copy the connection string; we’ll fix that in Studio 3T.

Go to the Studio 3T Connection Manager and select New Connection:

The New Connection dialog, unpopulated

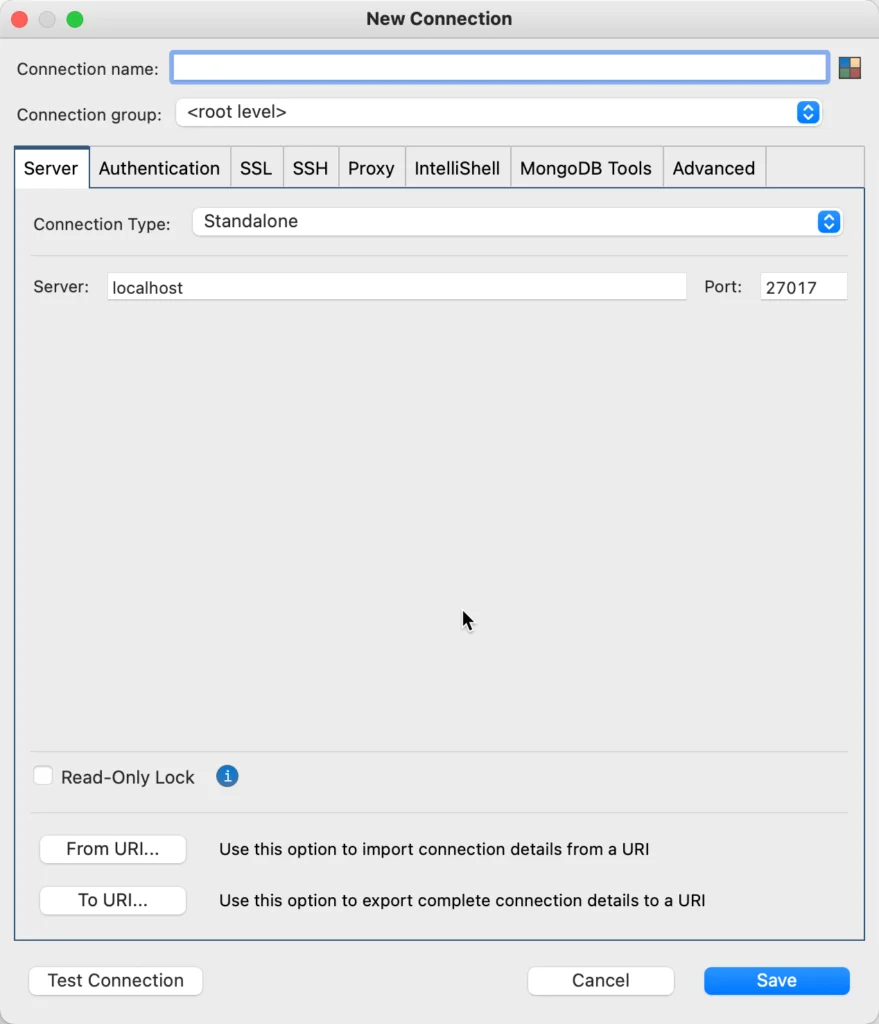
A blank connection dialog will appear. Now click on From URI to import our connection details and paste in the connection string from DigitalOcean.

The Import URI prompt - paste your DigitalOcean URI here
The Import URI prompt – paste your DigitalOcean URI here

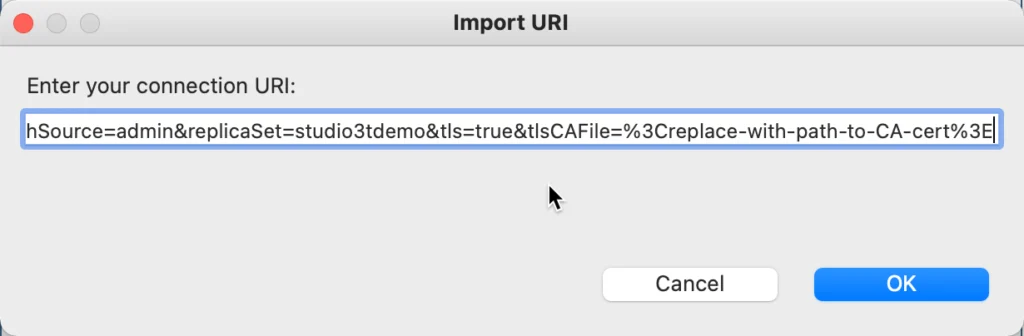
Click OK and Studio 3T will interpret that connection string into the required settings.

The Connection Dialog populated from the connection string

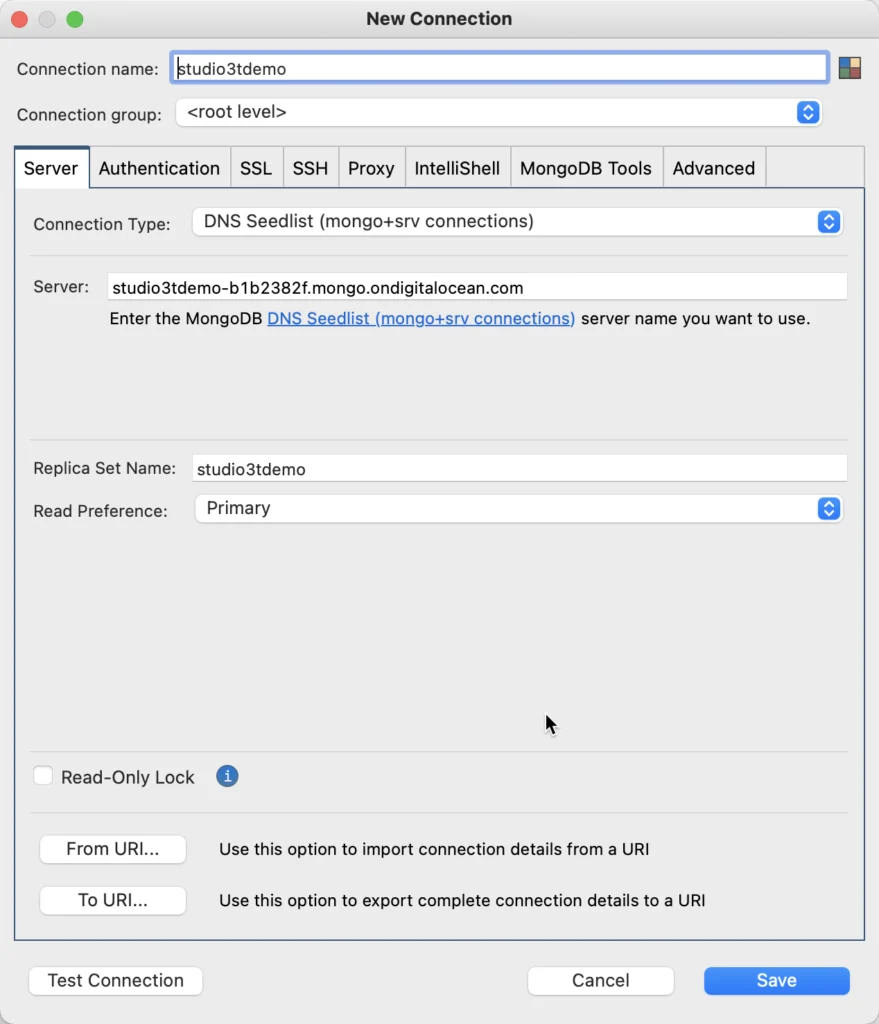
There are a few things to change though, we still need to enter the password and set the root CA certificate.
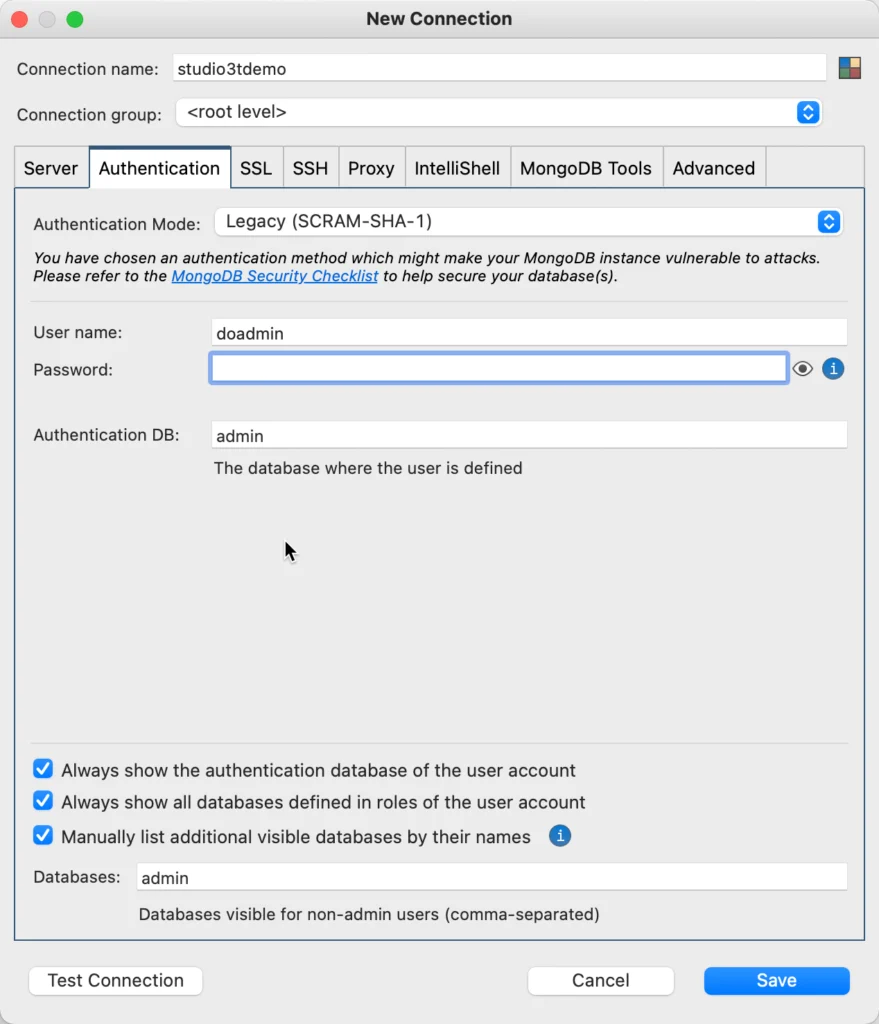
Enter the password

Go to the Authentication tab on the Connection dialog. Click on the eye icon next to the password field to see what has been set. If it’s one of the placeholder phrases (“show-password” or “<replace-with-password>”) delete the current contents and paste in the password we obtained earlier. Otherwise, check that it is the correct password and move on to the next step.

Enter the password for the "doadmin" user
Enter the password for the “doadmin” user

Setting the Root CA certificate

We downloaded the Root CA Certificate file earlier.

Note that this file appears to be unique to each MongoDB database on DigitalOcean. That means that when creating more than one server, you should make sure that you store the file and clearly show what database instance it belongs to

Go to the SSL tab on the Connection dialog.

Setting the CA Root file to the downloaded CA root file

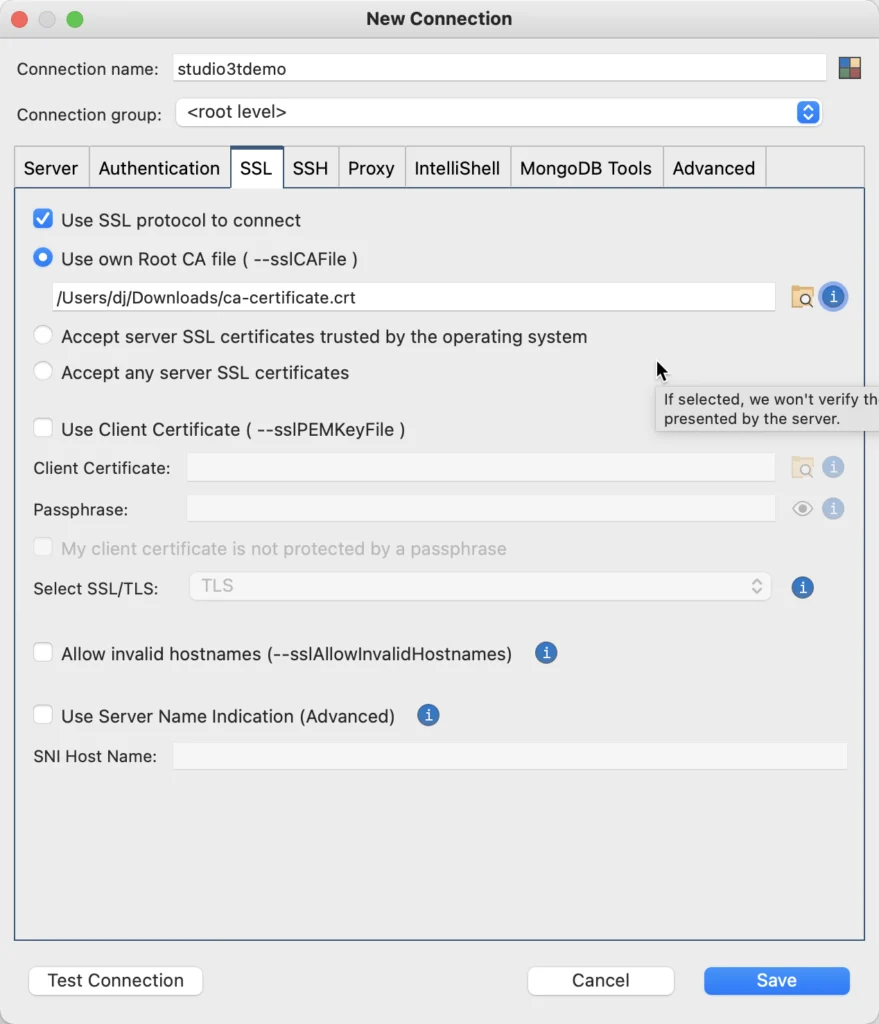
Click on the Use own Root CA file checkbox. Then click on the folder icon that follows the file name field. Now you can browse to the CA Certificate file and select it.

Test the DigitalOcean MongoDB connection

With the Root CA set, click Test Connection. If all is well you should see something like this:

Testing the Studio 3T connection to DigitalOcean

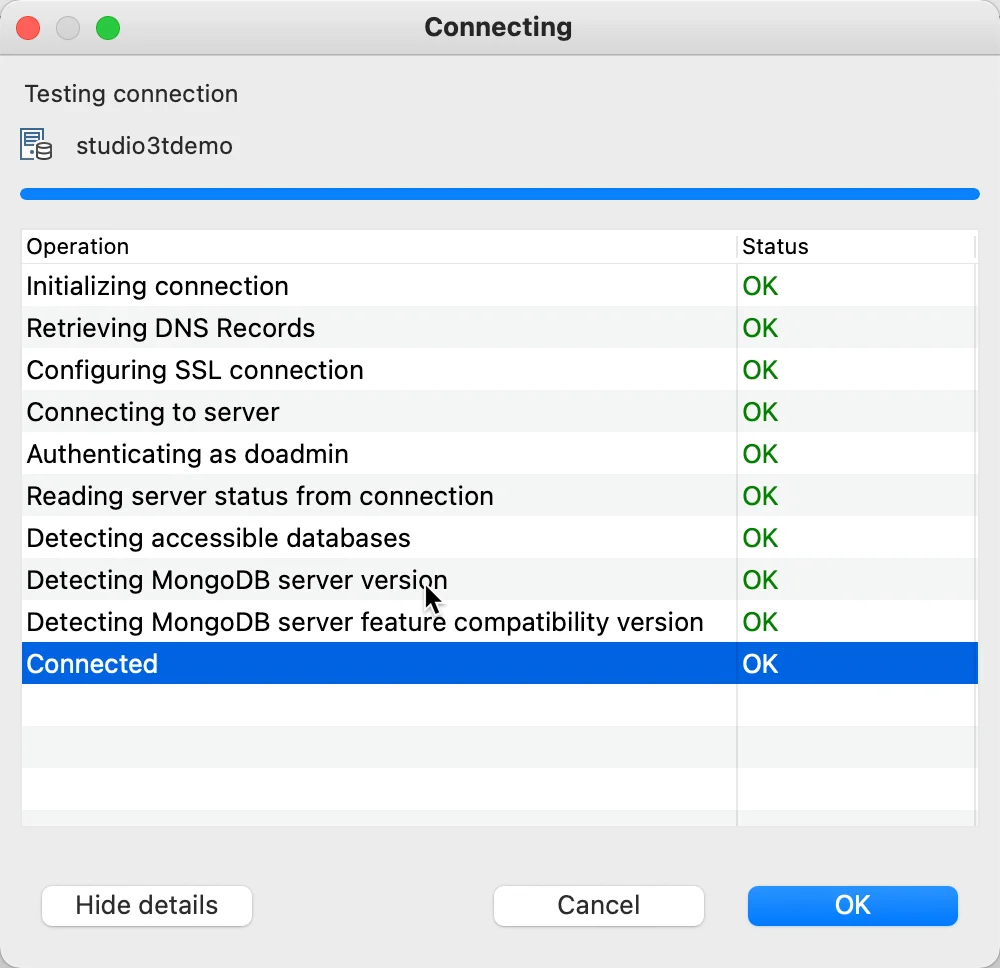
Click Ok then Save. Double click your new connection in the Connection Manager and you’ll be connected to your (new) Managed MongoDB Database on DigitalOcean.


How helpful was this article?
This article was hideous
This article was bad
This article was ok
This article was good
This article was great
Thank you for your feedback!

About The Author

Dj Walker-Morgan

Dj has been around since Commodore had Pets and Apples grew everywhere. With a background in Unix and development, he's been around the technology business writing code or writing content ever since.

Article navigation

Related articles

  • Test your skills: Connecting to MongoDB
  • What’s New in Studio 3T 2020.10 | Data Masking, Reschema & The Fastest Studio 3T Version Yet
  • Test your skills: Introduction to MongoDB and Studio 3T
  • Doing Multiple MongoDB Exports At Once With Studio 3T #Studio3T_AMA
  • MongoDB to win further mainstream adoption with bi-directional SQL Migration release from Studio 3T

Studio 3T

MongoDB Enterprise Certified Technology PartnerSince 2014, 3T has been helping thousands of MongoDB developers and administrators with their everyday jobs by providing the finest MongoDB tools on the market. We guarantee the best compatibility with current and legacy releases of MongoDB, continue to deliver new features with every new software release, and provide high quality support.

Find us on FacebookFind us on TwitterFind us on YouTubeFind us on LinkedIn

Education

  • Free MongoDB Tutorials
  • Connect to MongoDB
  • Connect to MongoDB Atlas
  • Import Data to MongoDB
  • Export MongoDB Data
  • Build Aggregation Queries
  • Query MongoDB with SQL
  • Migrate from SQL to MongoDB

Resources

  • Feedback and Support
  • Sales Support
  • Knowledge Base
  • FAQ
  • Reports
  • White Papers
  • Testimonials
  • Discounts

Company

  • About Us
  • Blog
  • Careers
  • Legal
  • Press
  • Privacy Policy
  • EULA

© 2023 3T Software Labs Ltd. All rights reserved.

  • Privacy Policy
  • Cookie settings
  • Impressum

We value your privacy

With your consent, we and third-party providers use cookies and similar technologies on our website to analyse your use of our site for market research or advertising purposes ("analytics and marketing") and to provide you with additional functions (“functional”). This may result in the creation of pseudonymous usage profiles and the transfer of personal data to third countries, including the USA, which may have no adequate level of protection for the processing of personal data.

By clicking “Accept all”, you consent to the storage of cookies and the processing of personal data for these purposes, including any transfers to third countries. By clicking on “Decline all”, you do not give your consent and we will only store cookies that are necessary for our website. You can customize the cookies we store on your device or change your selection at any time - thus also revoking your consent with effect for the future - under “Manage Cookies”, or “Cookie Settings” at the bottom of the page. You can find further information in our Privacy Policy.
Accept all
Decline all
Manage cookies
✕

Privacy Preference Center

With your consent, we and third-party providers use cookies and similar technologies on our website to analyse your use of our site for market research or advertising purposes ("analytics and marketing") and to provide you with additional functions (“functional”). This may result in the creation of pseudonymous usage profiles and the transfer of personal data to third countries, including the USA, which may have no adequate level of protection for the processing of personal data. Please choose for which purposes you wish to give us your consent and store your preferences by clicking on “Accept selected”. You can find further information in our Privacy Policy.

Accept all cookies

Manage consent preferences

Essential cookies are strictly necessary to provide an online service such as our website or a service on our website which you have requested. The website or service will not work without them.

Performance cookies allow us to collect information such as number of visits and sources of traffic. This information is used in aggregate form to help us understand how our websites are being used, allowing us to improve both our website’s performance and your experience.

Google Analytics

Google Ads

Bing Ads

Facebook

LinkedIn

Quora

Hotjar

Reddit

Functional cookies collect information about your preferences and choices and make using the website a lot easier and more relevant. Without these cookies, some of the site functionality may not work as intended.

HubSpot

Social media cookies are cookies used to share user behaviour information with a third-party social media platform. They may consequently effect how social media sites present you with information in the future.

Accept selected