In this article, we’ll show you how to set up a local installation of MongoDB on your Mac and connect Studio 3T to the local MongoDB.
Prerequisites
You’ll be using the Homebrew package manager to install and manage your local installation of MongoDB. But first, you’ll need to install Apple’s Xcode command-line tools.
Install Xcode
In the Terminal app, run the following command:
xcode-select --install
Install Homebrew
In the Terminal app, run the following command:
/bin/bash -c "$(curl -fsSL https://raw.githubusercontent.com/Homebrew/install/HEAD/install.sh)"
Find out more about the Homebrew brew package on the Homebrew site.
Install MongoDB
You’ll be installing MongoDB Community Edition. Find out more about this installation in the MongoDB documentation.
You’ll use the MongoDB Homebrew tap to install and start MongoDB.
- Add the MongoDB Homebrew tap. In the Terminal app, run the following command:
brew tap mongodb/brew
- Install the MongoDB Community Edition:
brew install mongodb-community
This installs the latest version of MongoDB. To install an older version, specify the version number, for example:brew install [email protected]
- Run MongoDB. To start MongoDB as a service:
brew services start mongodb-community
- Check that the MongoDB service is running:
brew services list
If it is running, mongodb-community is listed as started.
Find out more about the MongoDB Homebrew tap, including stopping the MongoDB service or manually starting MongoDB and running it as a background process in the GitHub documentation.
Connect to Studio 3T
If you haven’t already done so, download and install the latest version of Studio 3T (Intel or Apple Silicon) for your Mac.
Open Studio 3T.
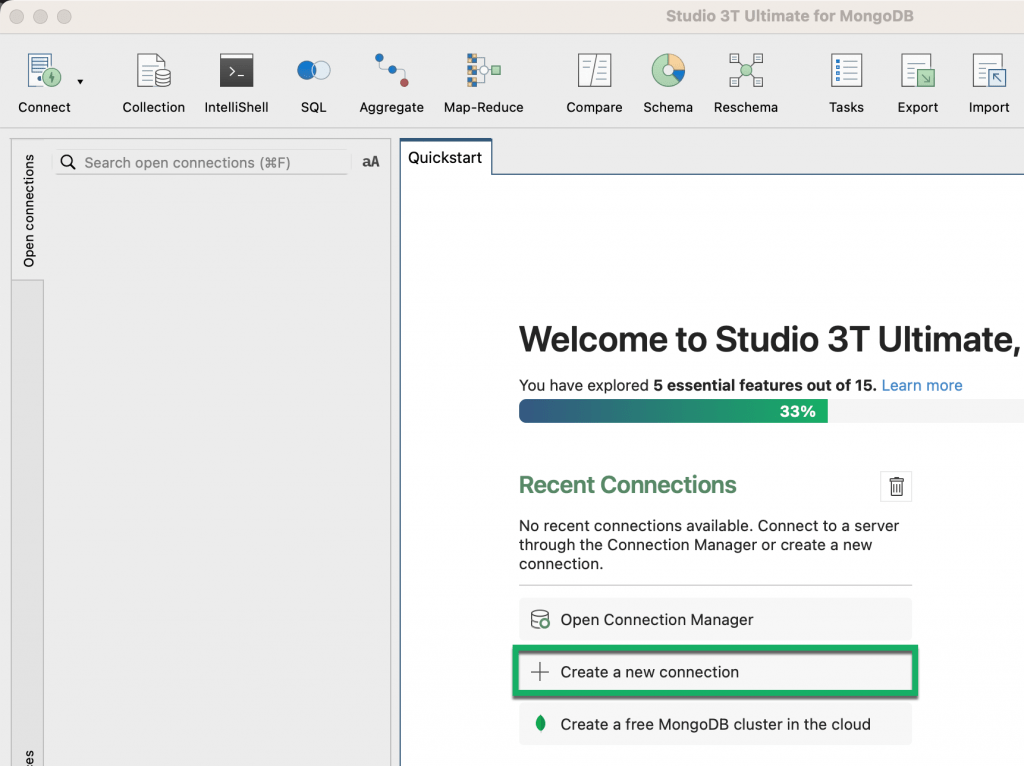
Click the Connect button in the top-left corner of the toolbar, and then click the New Connection button in the top-left corner of the Connection Manager dialog.

Or, on the Quickstart tab, click Create a new connection.
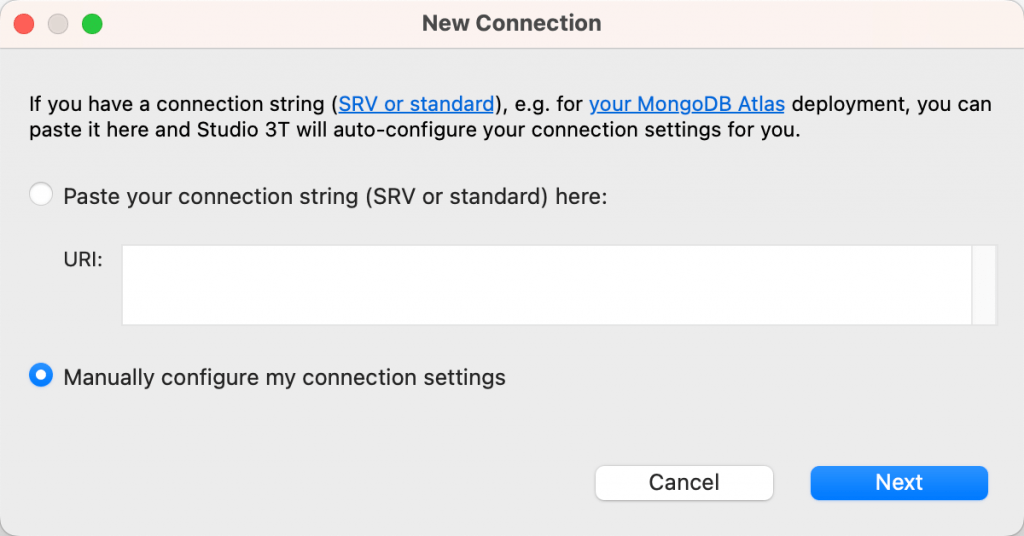
In the New Connection dialog, select Manually configure my connection settings and click Next.
Name the connection and select Standalone from the Connection Type list. Set the Server and Port fields to localhost and the default port 27017.
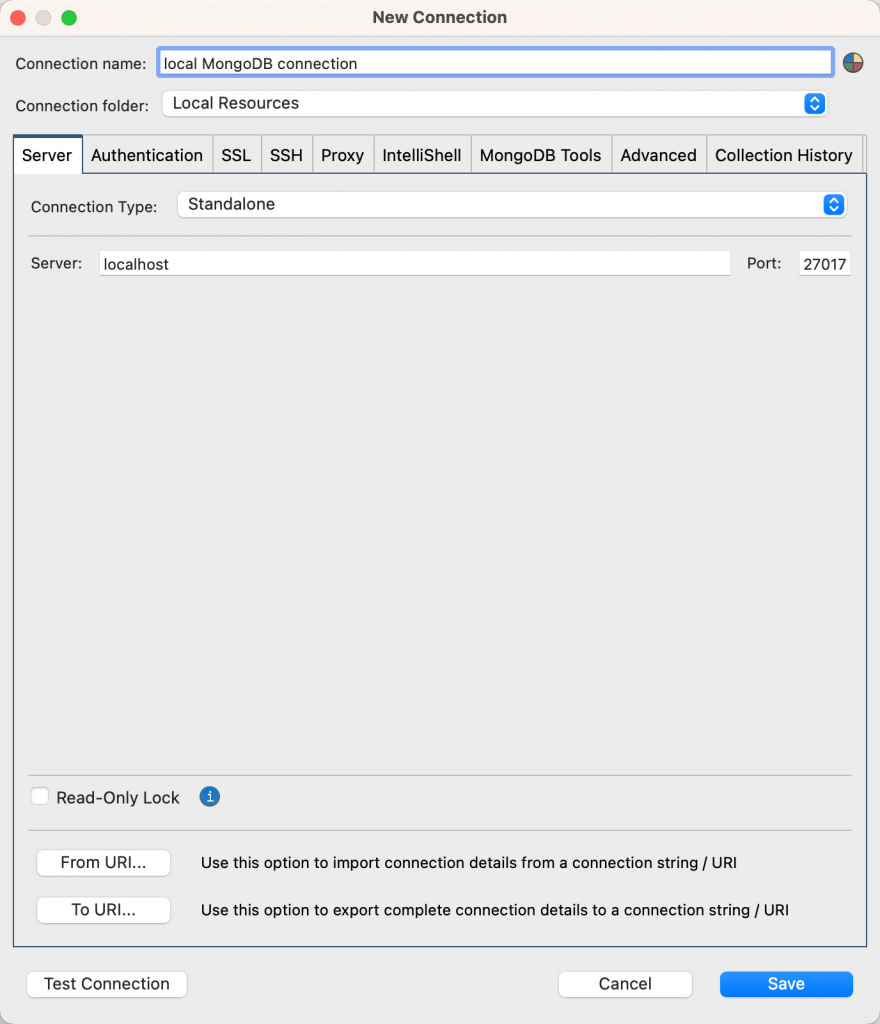
You can check that the connection works by clicking Test Connection.
Click Save. On the Connection Manager dialog, select the connection and click Connect.
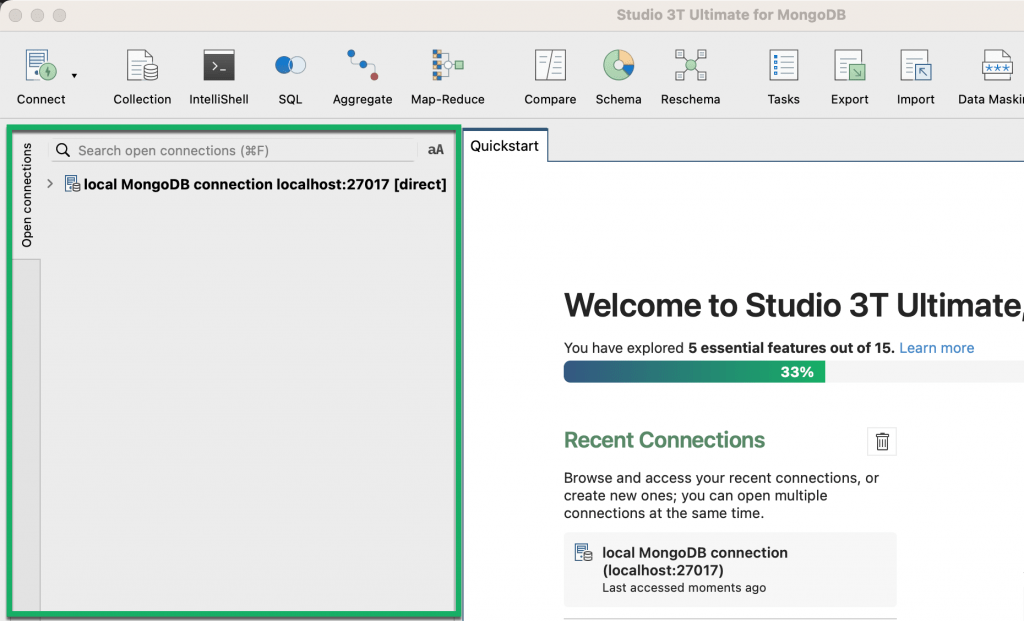
The connection tree shows your connection to your local MongoDB.
You’re now ready to start importing data.
