MongoDB’s schema-less nature is great for on-the-fly development, until you:
- Spot schema mistakes and need to fix them, maybe even in production
- Find arrays that have become too nested, or documents that have grown too large over time
- Need to update your schema incrementally because your data has changed (e.g. it now makes more sense to embed parent fields within other fields)
- Find multiple document or schema versions in the same collection
- Need to implement schema suggestions to help improve performance
Reschema provides an easier way to update MongoDB collection schema, without needing to run migration scripts or rely on document/schema versioning. It lets you move an existing collection (or view) to a new collection that conforms to the schema you design.
Open Reschema
Launch Studio 3T, then connect to a MongoDB instance.
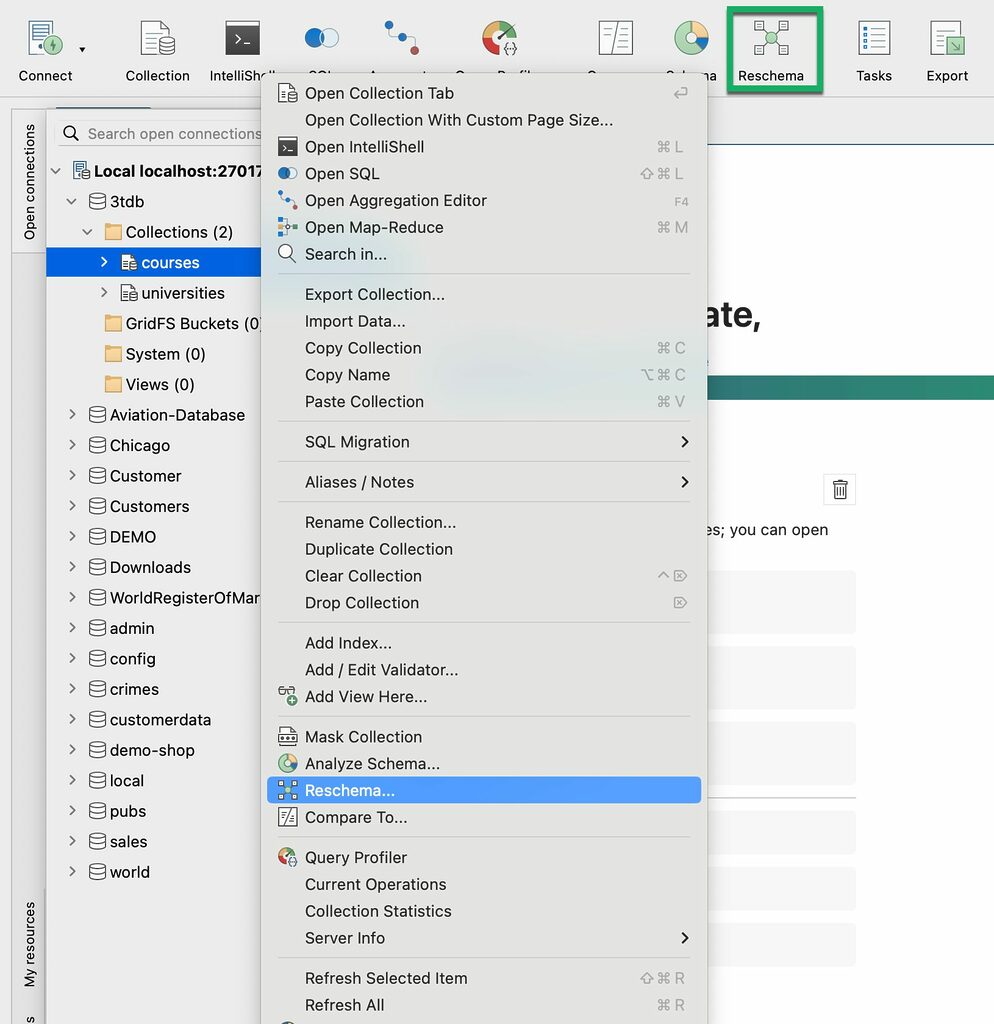
Select a source collection from the Connection Tree, then click on the Reschema button in the global toolbar.
Alternatively, right-click on the collection and choose Reschema.
Choose a scan method
You will be prompted to choose a scan method:
- Quick scan scans the first 200 documents. This is the less time-consuming option, but it might not detect the full schema.
- Full scan scans the entire collection, which might take a while but it will discover the full schema.
- Custom lets you define the number of first, last or random documents to be scanned.
Click on Finish. The number of detected fields will be shown in the notification on the bottom-right and a new Reschema unit tab will open.
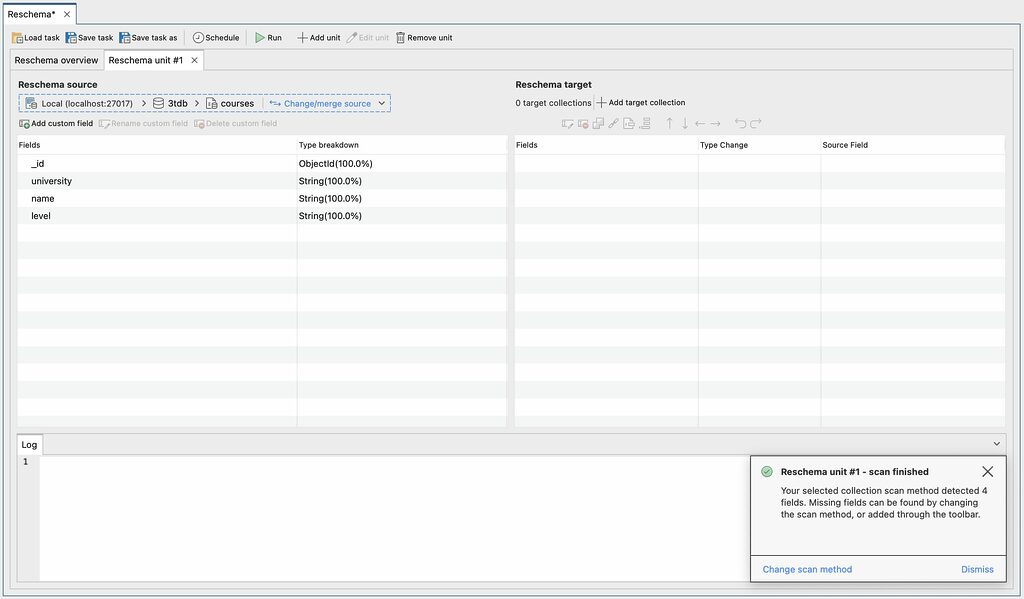
The Reschema unit tab displays three panels: the Reschema source on the left, the Reschema target on the right, and the Log and Preview tabs on the bottom.
Each Reschema unit corresponds to a source collection whose schema you will transform. You can add as many Reschema units as needed. They will be listed in the Reschema overview tab.

Define the source collection or view
Click on Change/merge source to change the source collection or merge data from other collections.
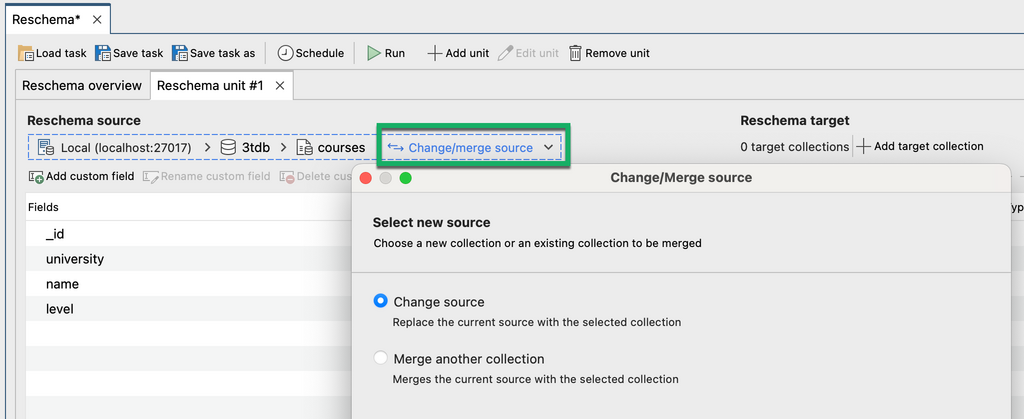
Change source
Clicking on Change source will open a wizard showing the connection tree, from which you can select the new source collection.
If the collection is in a different MongoDB instance, click on Connect.
Choose a collection, then click on Next.
You will again be prompted to choose a scan method, then click Finish. The new source collection should now be displayed.
Merge collections
The Merge another collection option replaces having to run a $lookup aggregation stage manually to join data from other collections.
Local fields are those found in the original source collection. Foreign fields are those found in the additional source collection – or the lookup collection.
As with all $lookup operations, the source collections must be on the same database.
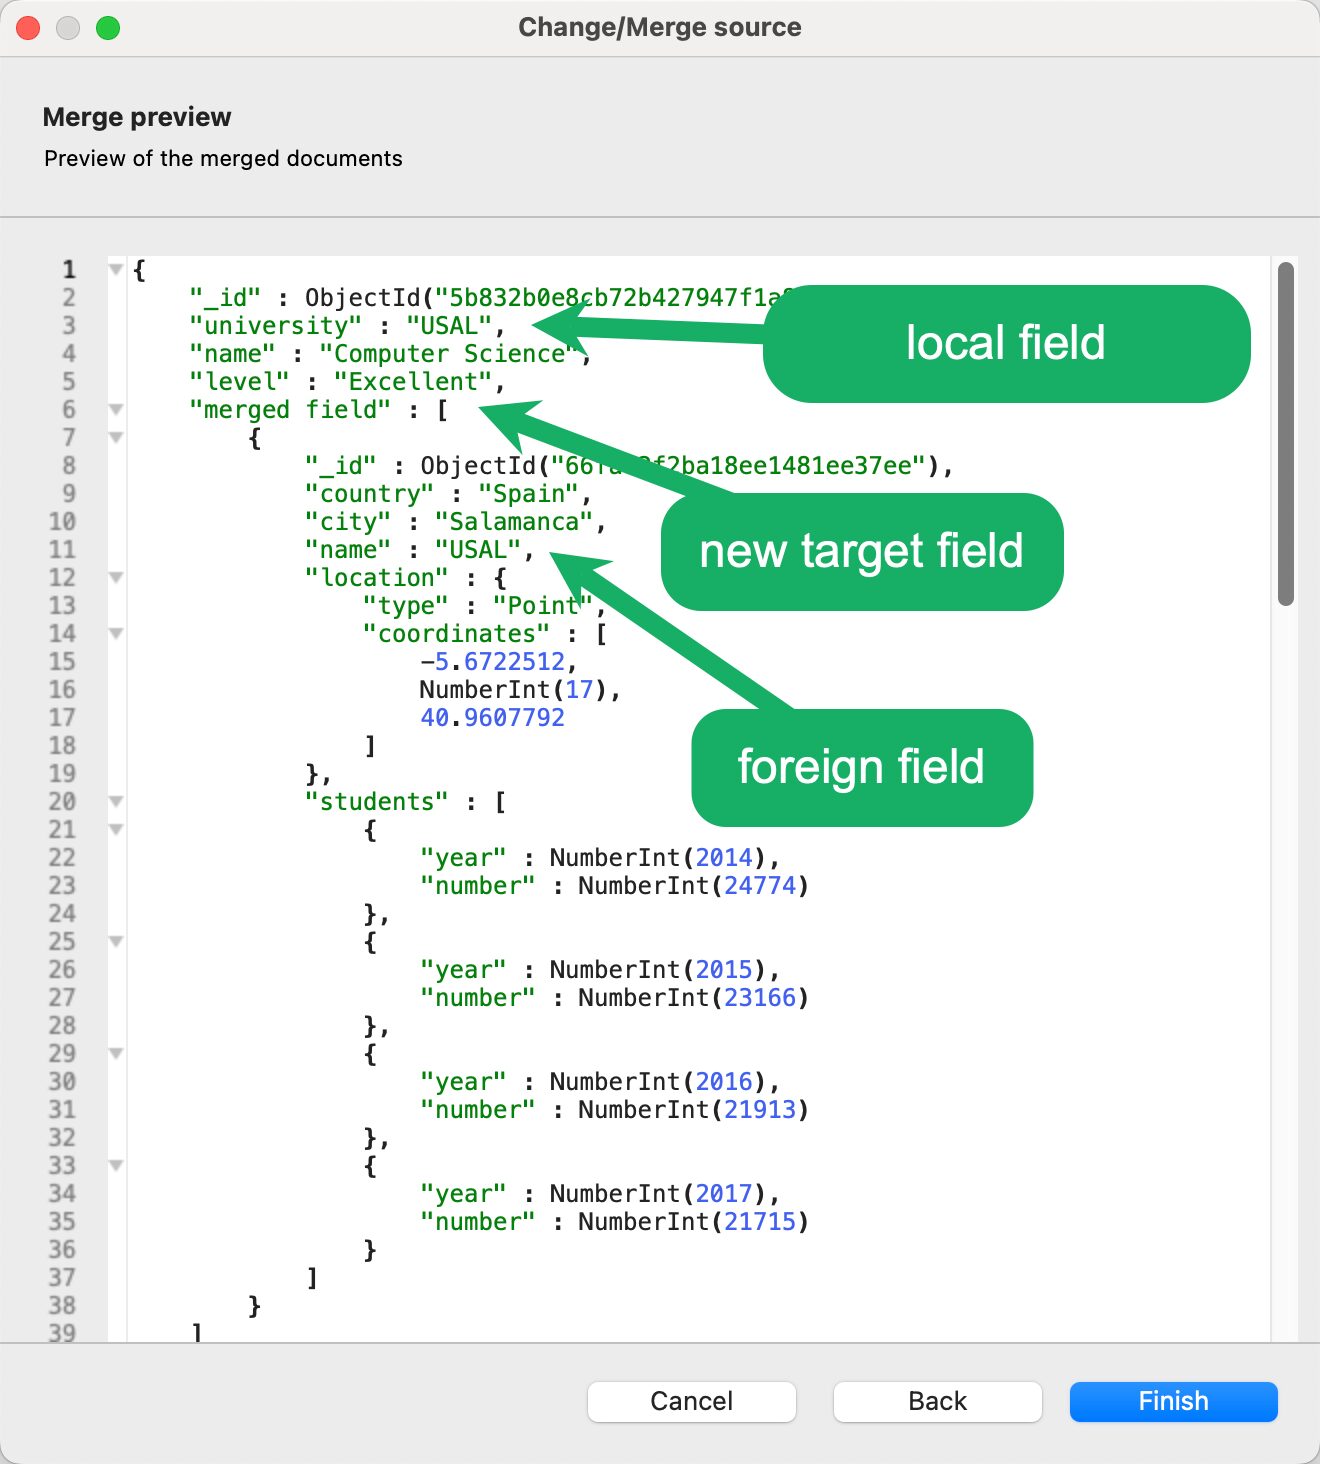
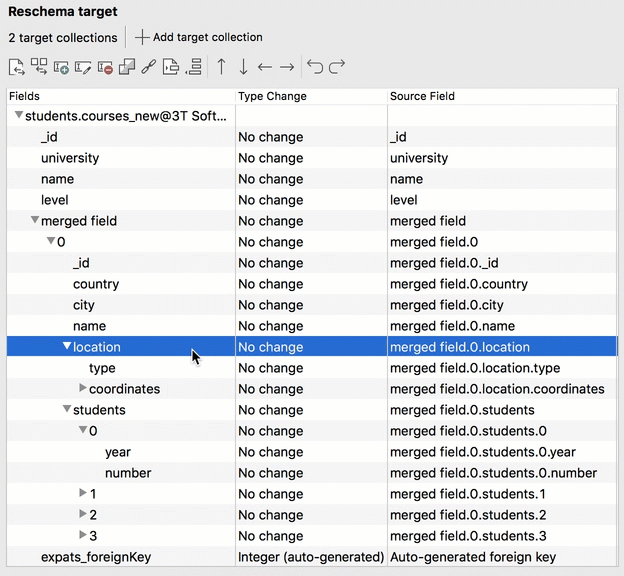
The merged results will be stored in a new target field – an embedded document in the source collection – only in documents where there is a value match on the local and foreign fields.
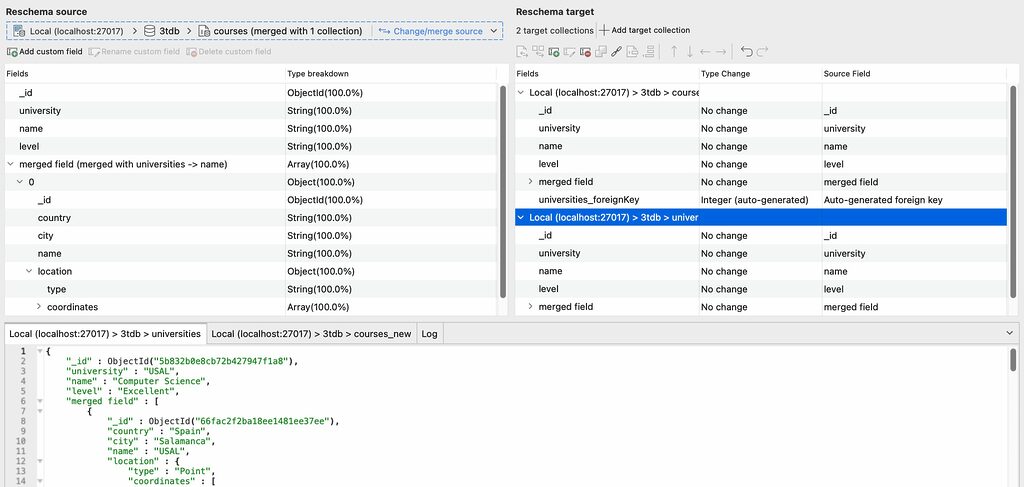
For example, let’s take the source collection courses (left). It contains the local field university, whose values match those of the foreign field name in the universities collection (right).
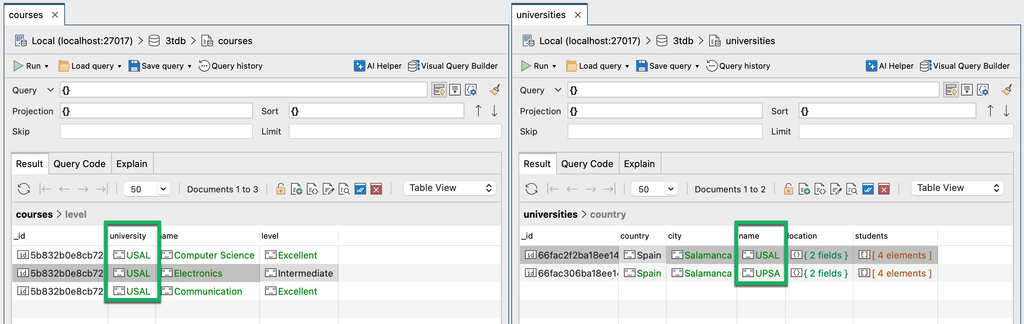
When we merge these fields, we expect to see a new embedded document whenever there is a value match.
Choose Merge another collection and click Next.
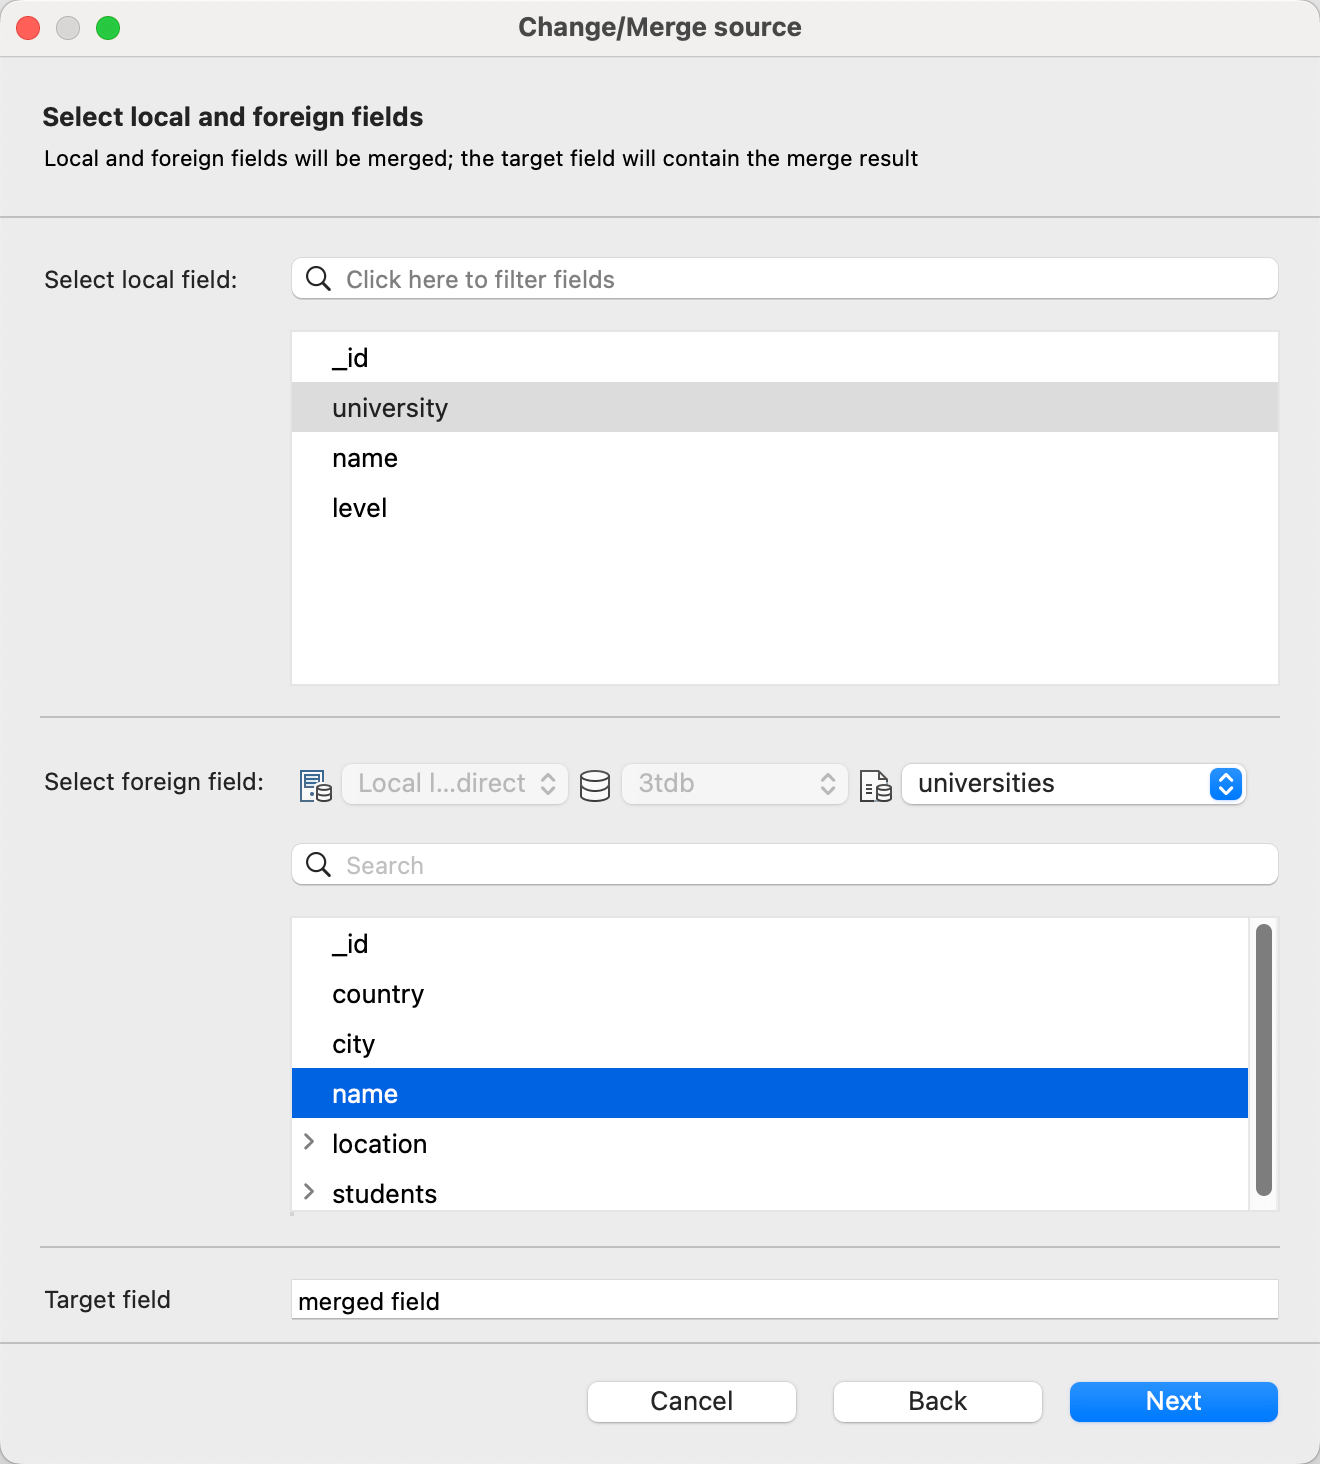
1. Select the local field (e.g. university).
2. Next, choose the other source collection. Reschema will then do a quick scan of its fields.
3. Select the foreign field to match on (e.g. name)
4. Name the target field (e.g. merged field). This will appear as an embedded document wherever there is a value match.
5. Click Next.
6. You will be prompted to choose a scan method. Click Next.
7. A preview of the merged documents will appear.
If all looks correct, click Finish. The new target field should appear in the Reschema source panel.
Merge other source collections as needed.
Define the target collection
The target collection’s schema is what you will transform field by field.
You can either select an existing target collection or create a new collection (recommended). You can also choose to have multiple target collections.
Create a new target collection
Click on Add target collection.
Select the database where the new collection should be created. (Note: You might need to click on the database twice to trigger the Add new collection button).
If the database is in a different MongoDB instance, click on Connect.
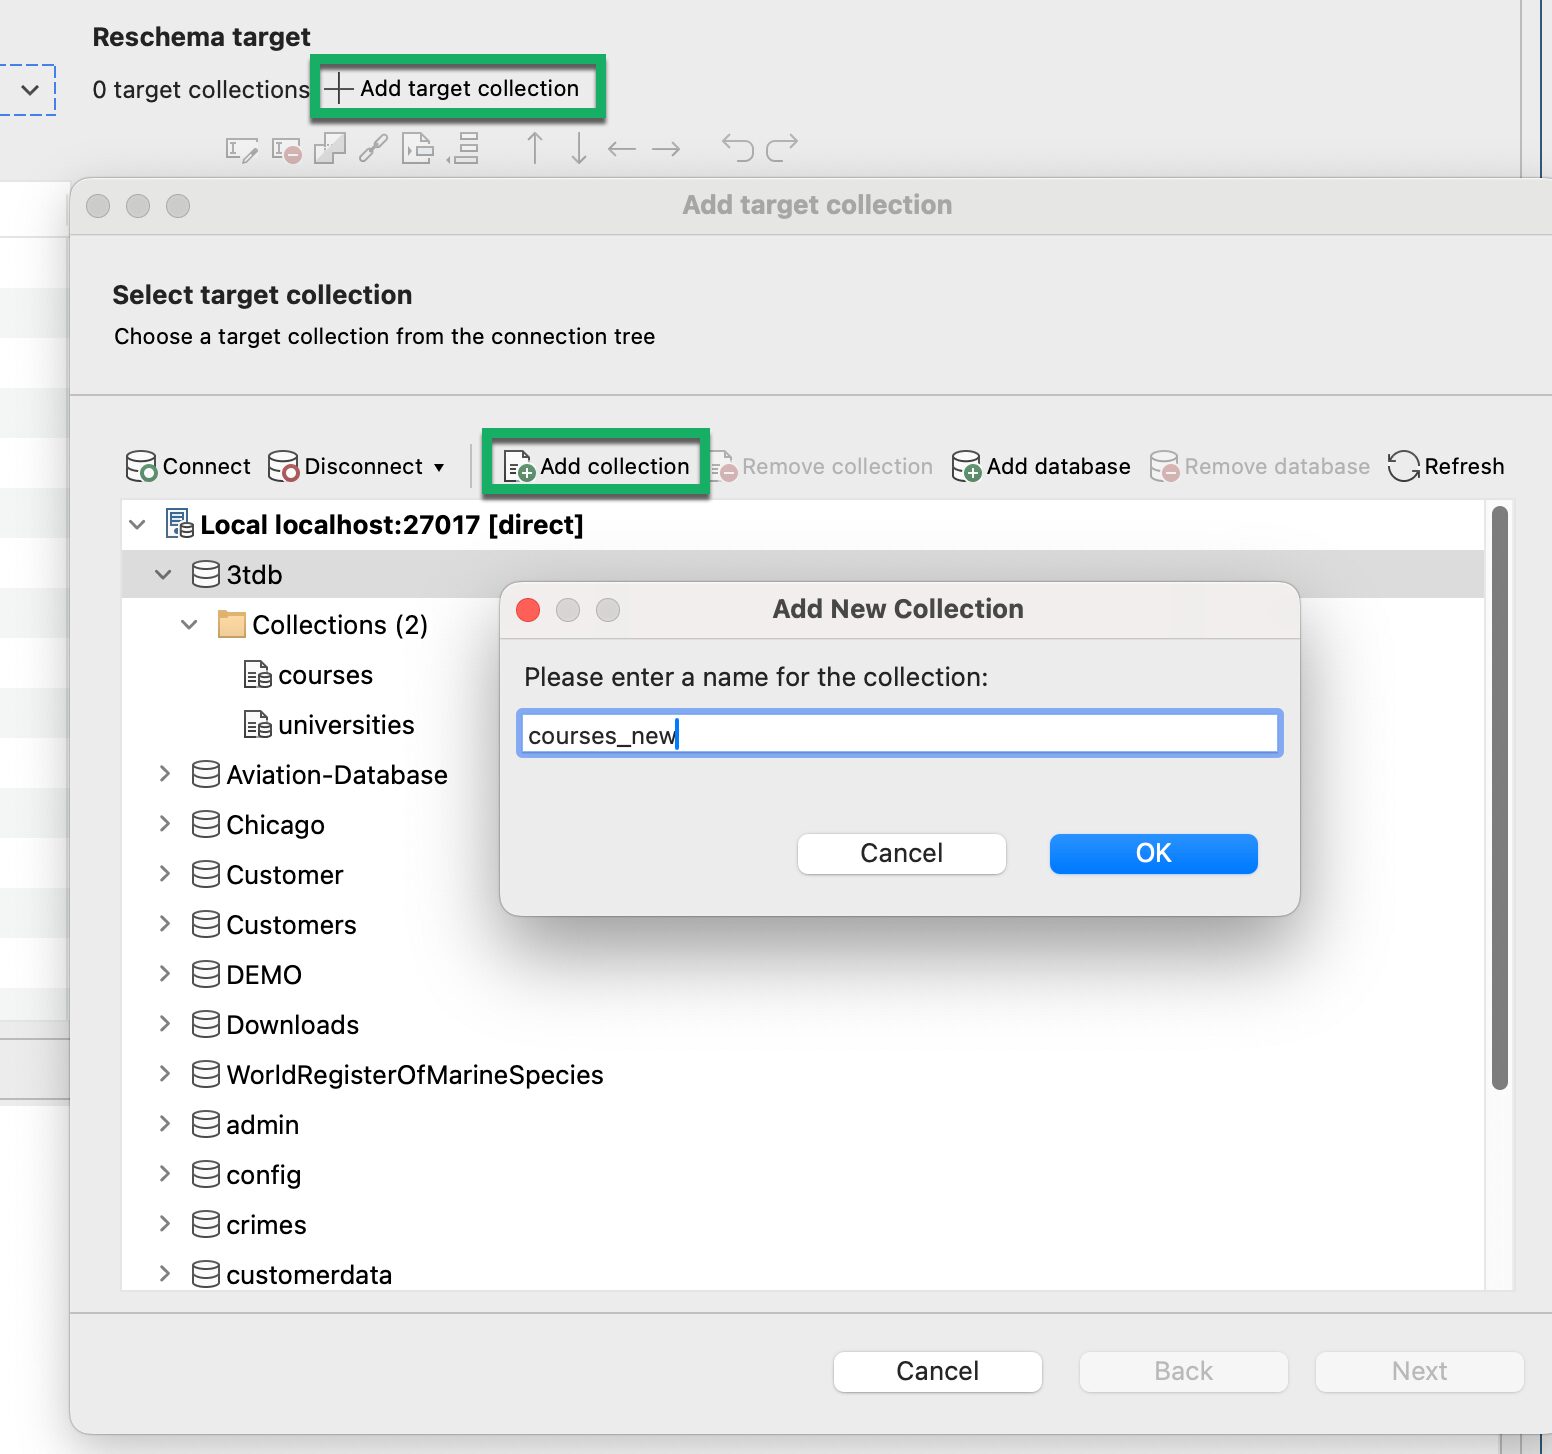
Click on Add new collection. Enter a name for the collection, then click OK.
Click Next. Use the checkboxes to include or exclude the fields in the Reschema target, then click Finish.
Choose an existing target collection
Click on Add target collection.
If the collection is in a different MongoDB instance, click on Connect. Otherwise, select the collection from the tree.
Click Next. Use the checkboxes to include or exclude the fields in the Reschema target, then click Finish.
Choose multiple target collections
If you wish to add additional targets, you can do so by clicking the Add target collection button again.
In this case, the wizard will show one extra page. Here, we can choose to relate the newly added target with one that was previously added.
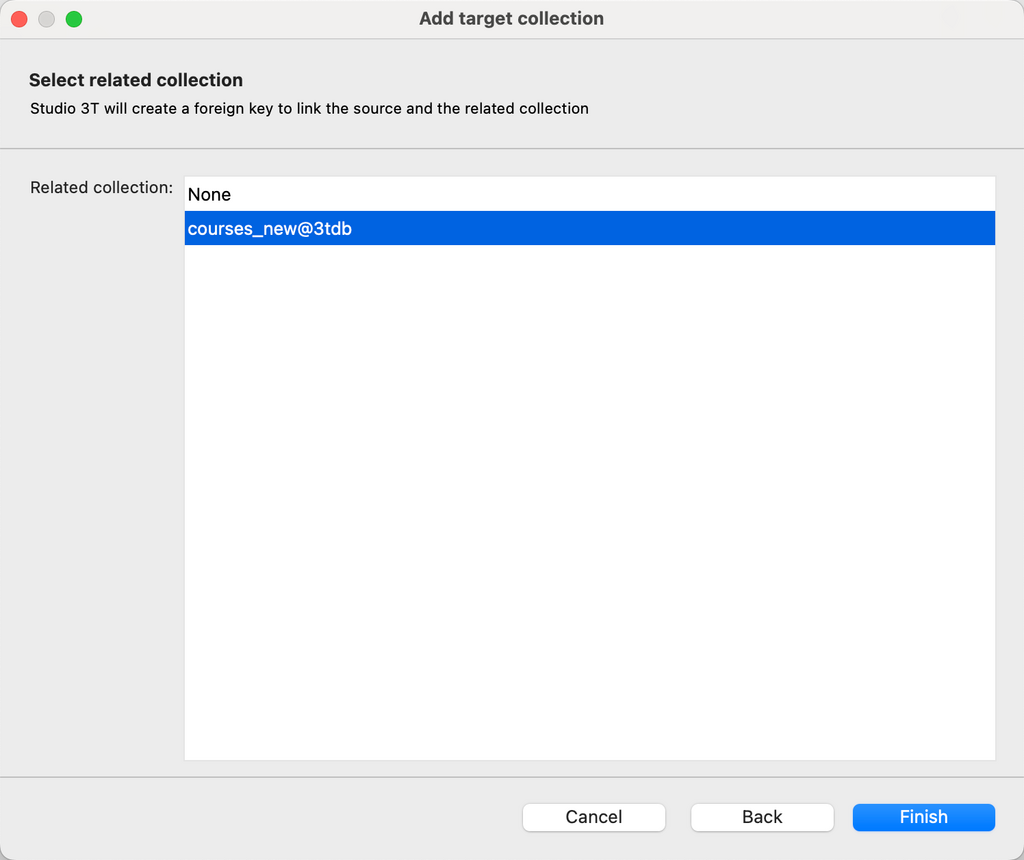
When doing so, Studio 3T will create a <collection name>_foreignkey field in each collection.
This field could then be used to join the collections in an aggregation query, for example.
Note that this is an optional step: it’s absolutely fine to not relate the collections.
After configuring the targets, all collection(s) should now appear on the right-hand Reschema target panel.
A document preview tab should also appear on the bottom panel. It takes five sample documents from the source collection, which will update as you make changes to the target schema.
Configure the new MongoDB schema
At this point, we are ready to transform our MongoDB schema.
The Reschema source will serve as the point of reference as it contains the original schema, while the Reschema target is where the schema transformation will take place.
The options in the toolbar are similar to those found in the right-click context menu. Below we’ll go over each operation in detail.
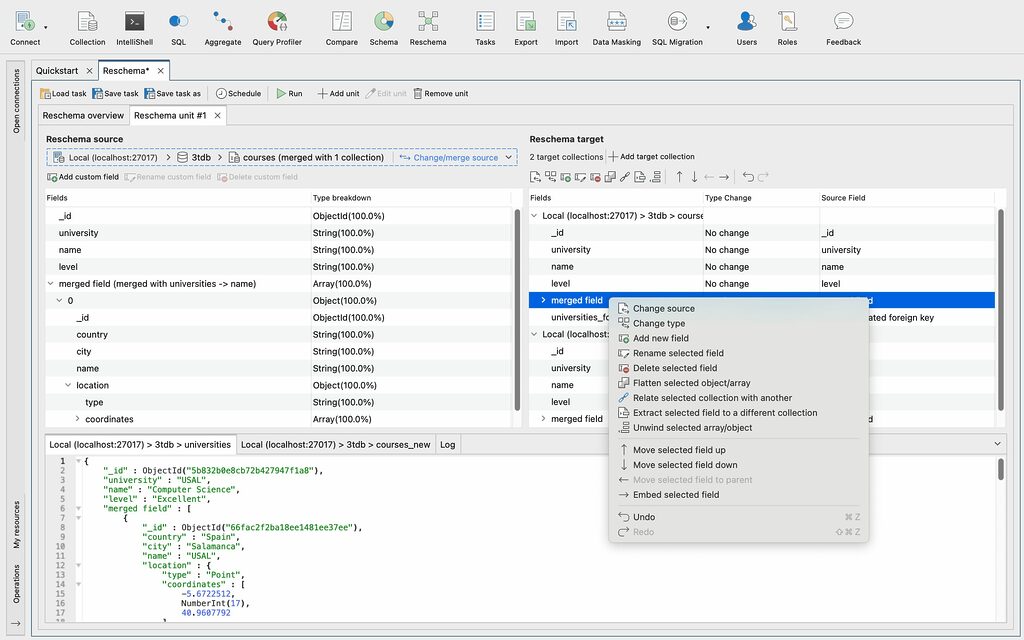
Supported operations
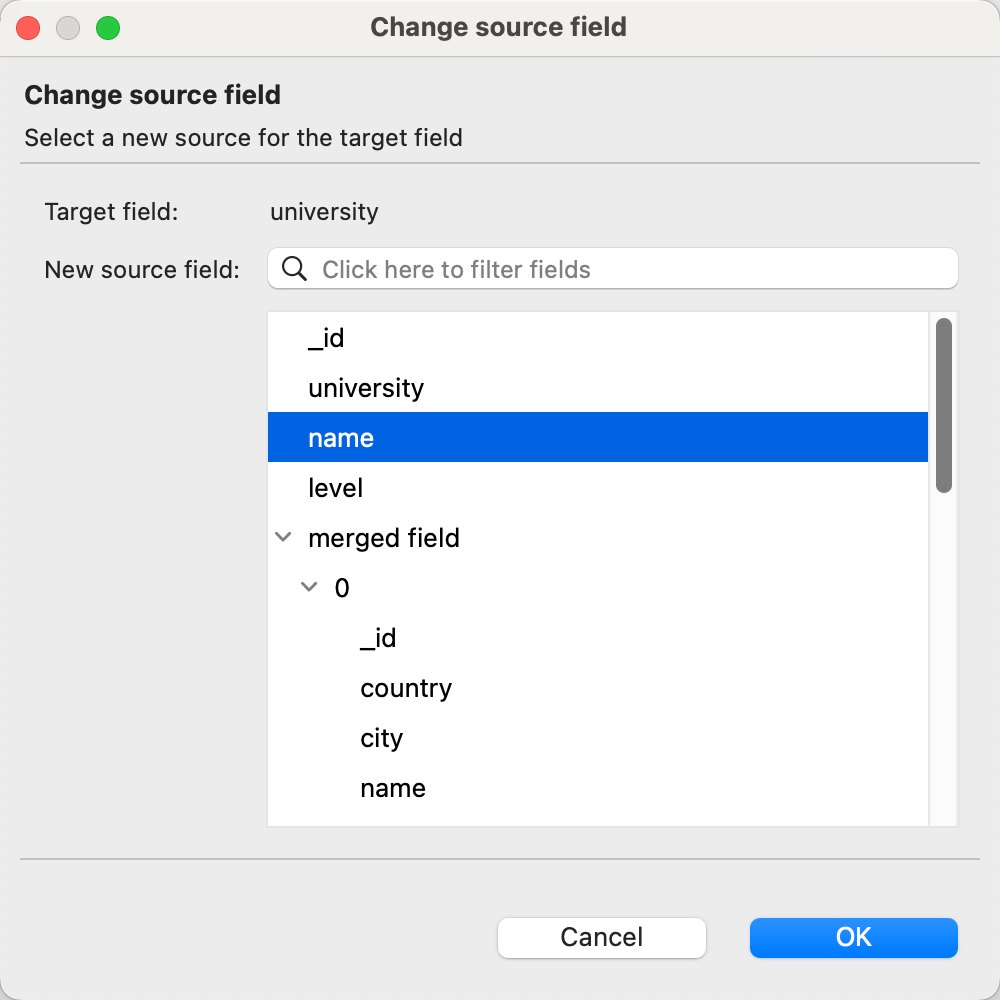
Change source
This operation allows you to change where the selected field will get its value from.
Pressing this button will open the following dialog, where you can choose which field from the source should now provide the value for the selected field.
Change type
This operation changes the type of the field. Changing the type of a field might require converting the value to the new type, which is not always possible.
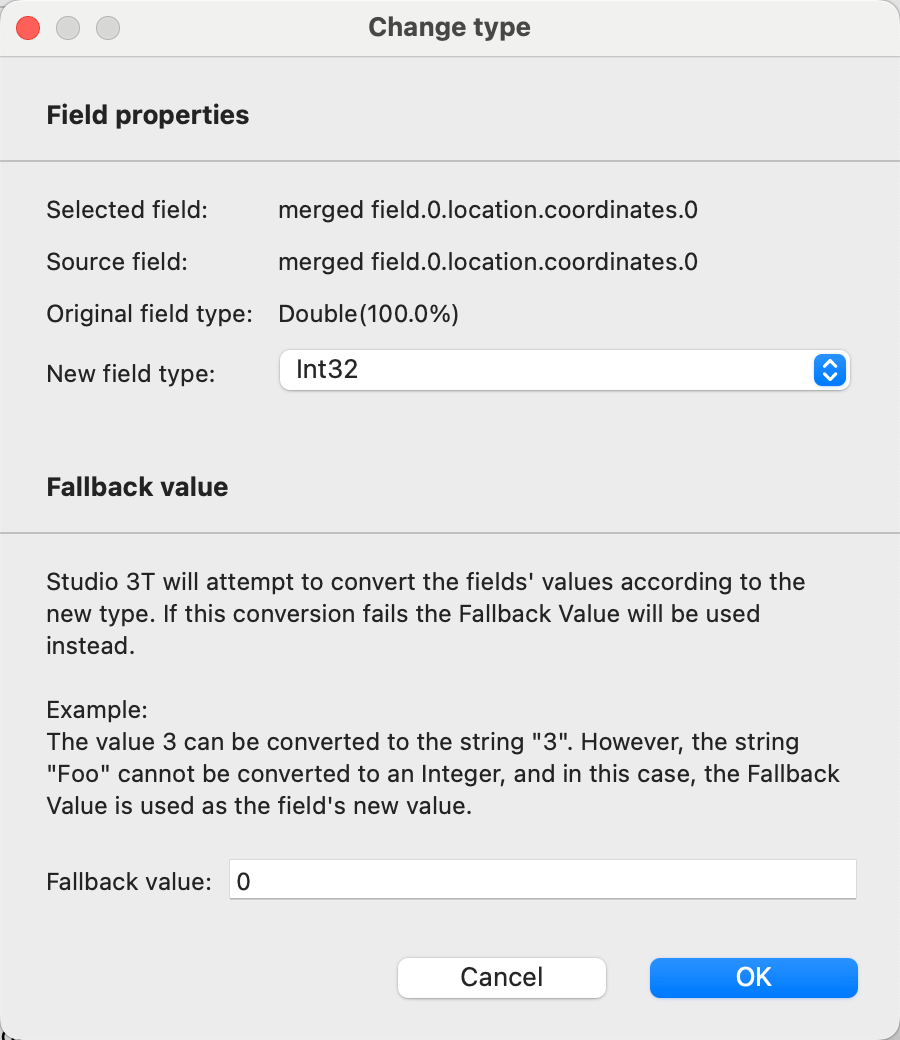
To cover this case, Reschema offers an option to provide a fallback value in case the conversion fails.
Add new field
This operation adds a new field at the level of the selected field.
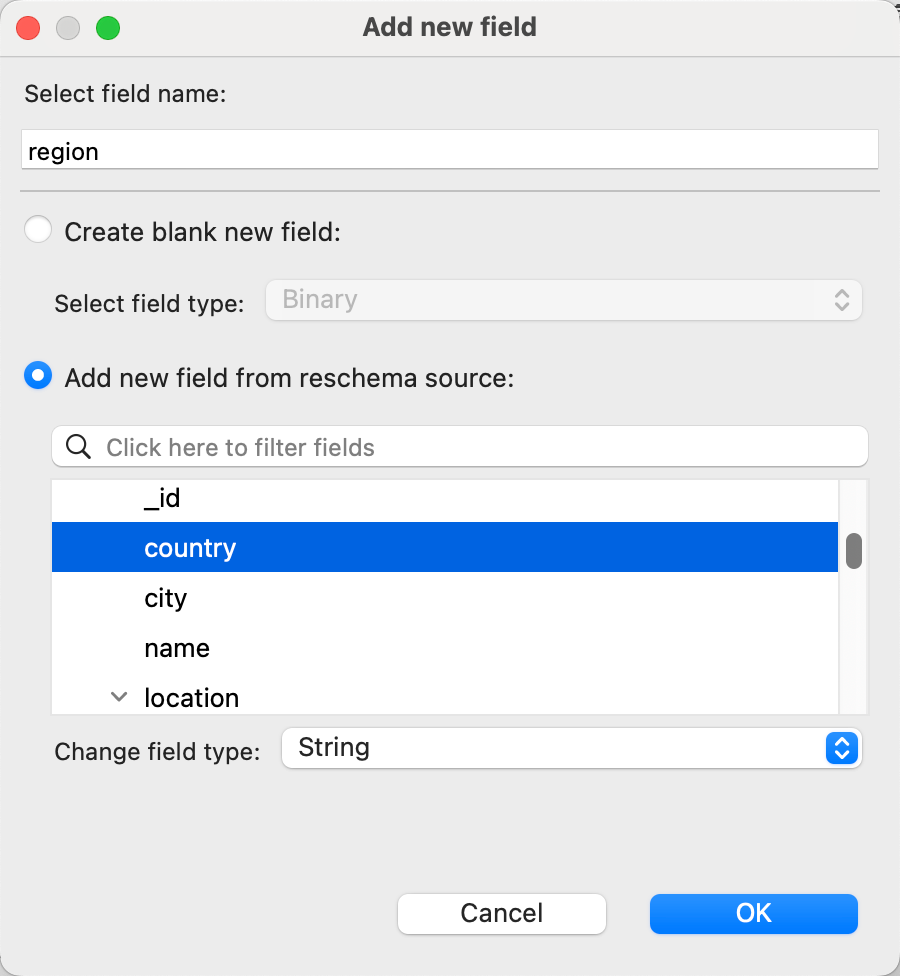
You can choose whether you wish the field to be empty, or whether it should take its value from a field in the source. You can also change its type.
Rename selected field
Renames the selected field.
Delete selected field
Deletes the selected field (and all of its children, if it has any).
Flatten selected object/array
This operation takes the selected object or array, and flattens it, such that the top level field disappears, and its children are now independent fields at the same level.
As an example, flattening the location field will result in said field disappearing, and type and coordinates will now be at the root of the schema.
Relate selected collection to another
This operation relates two collections. Reschema will then create a foreign key to link the two.
Extract selected field to a different collection
This operation takes the selected field and prompts you to select a new target, to which the selected field will be moved. In addition, a relation between both targets will be created.
A field named <field_name>_foreignKey will generated in both targets. These fields refer to each other, maintaining a relation between the collections.
Unwind selected array/object
Unwinds the array or object and saves the elements in a different MongoDB collection that will be linked through a foreign key.
Note that doing so will revert any transformations made to it or its children.
You will be prompted to choose the target collection for these elements in the connection wizard.
Move selected field up
Moves the selected field up.
Move selected field down
Moves the selected field down.
Move selected field to parent
Moves the selected field to the parent, if it’s not already at root level.
Embed selected field
Embeds the selected field in the field immediately above it.
Undo
Undoes the last transformation.
Redo
Redoes the last undone transformation.
After reaching the desired schema for each target, we can now execute Reschema.
Execute the migration to the new schema
We’ve cleaned up our target schema, now we’re ready to create the new collections that conform to our new schema design.
Click on Execute in the toolbar. You can track the progress of the MongoDB migration job in the Operations panel, on the bottom-left.
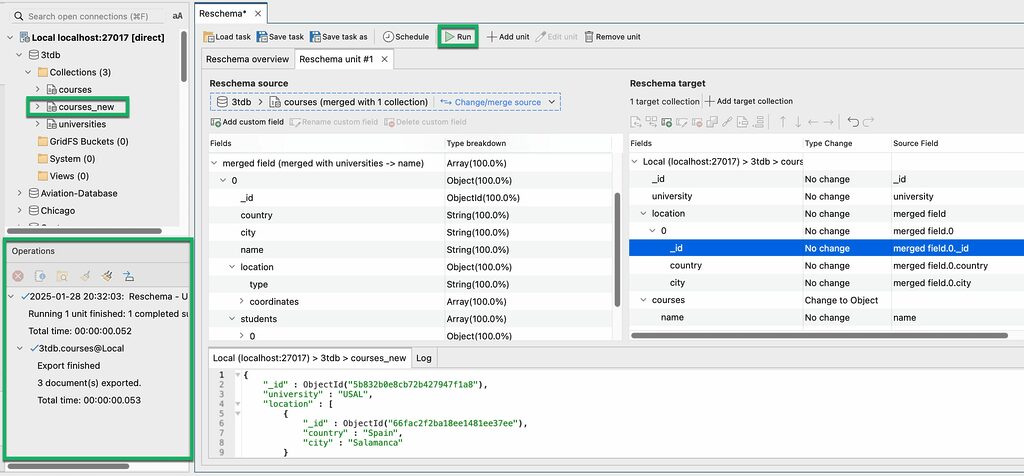
Once the migration has been run, you will also see the new target collection (e.g. courses_new) in the target database.
Update multiple MongoDB collection schemas at once
Add Reschema units
You can add more units by dragging and dropping collections from the Connection Tree to the Overview tab, or by clicking on Add unit from the toolbar.
The new Reschema unit will appear in the Reschema overview tab. Here you can change the insertion mode, if necessary.

Each unit will also open a separate Reschema tab. Here you can repeat the collection-level configuration as needed.
Edit Reschema units
Double-click on a unit in the Reschema overview tab.
You can also right-click on the unit and choose Edit selected units, or select it and click on Edit unit in the toolbar.
Remove Reschema units
With a unit tab open, click on Remove unit in the toolbar.
Alternatively from the Reschema overview tab, select the unit to be removed and either click on Remove unit in the toolbar or right-click and choose Remove selected units.
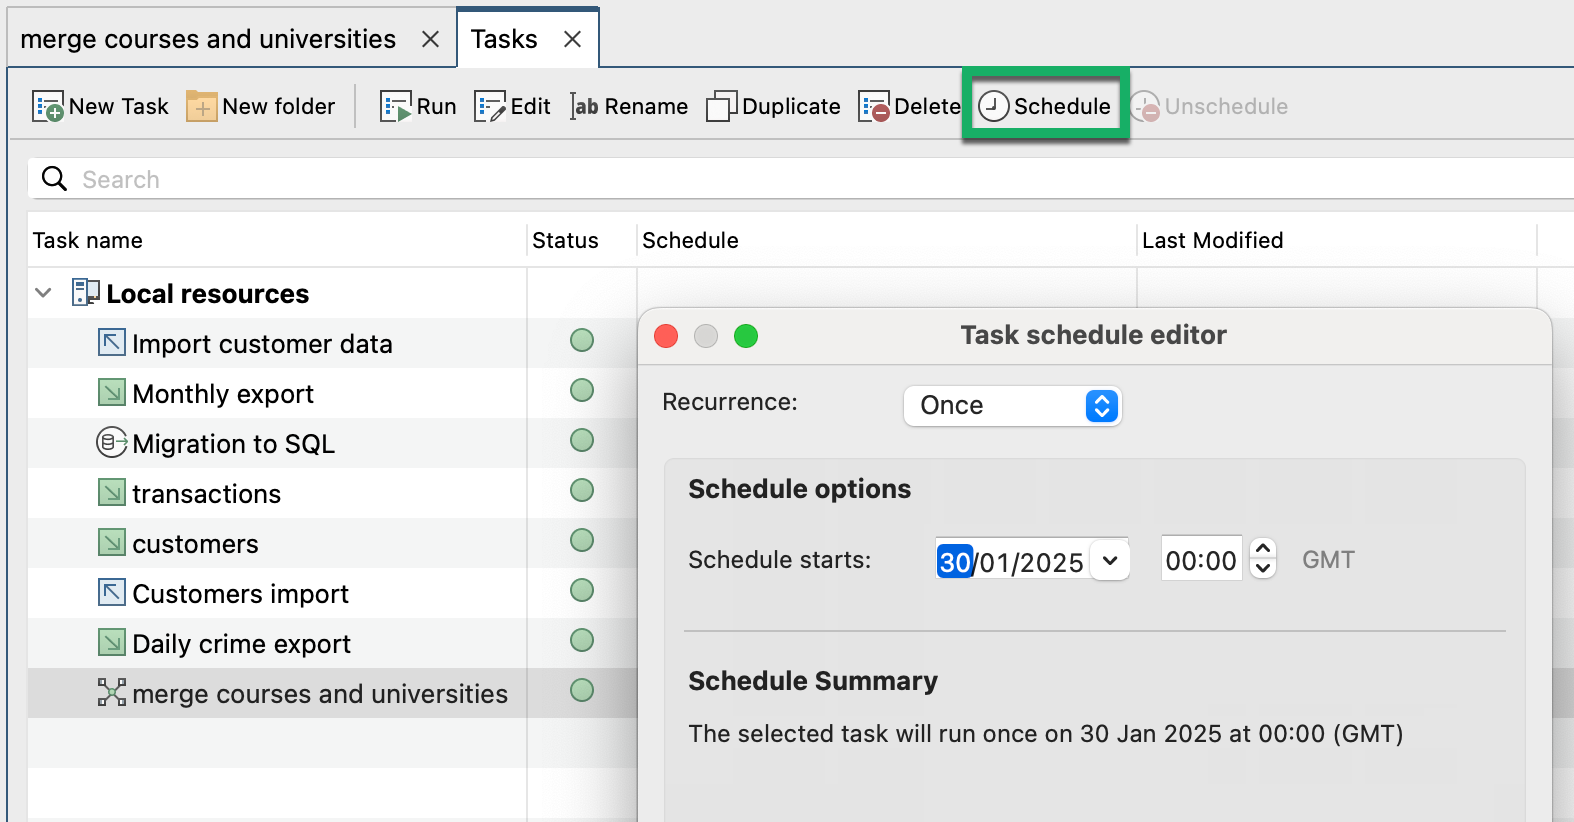
Automate & schedule schema updates
Reschema is parts of the Tasks framework, which allows you to save, automate, and schedule Reschema jobs as tasks.
Other tasks supported include imports, exports, migrations between SQL and MongoDB, data masking jobs, and data comparisons.
To save Reschema as a task, choose a task and click on Save task (as).
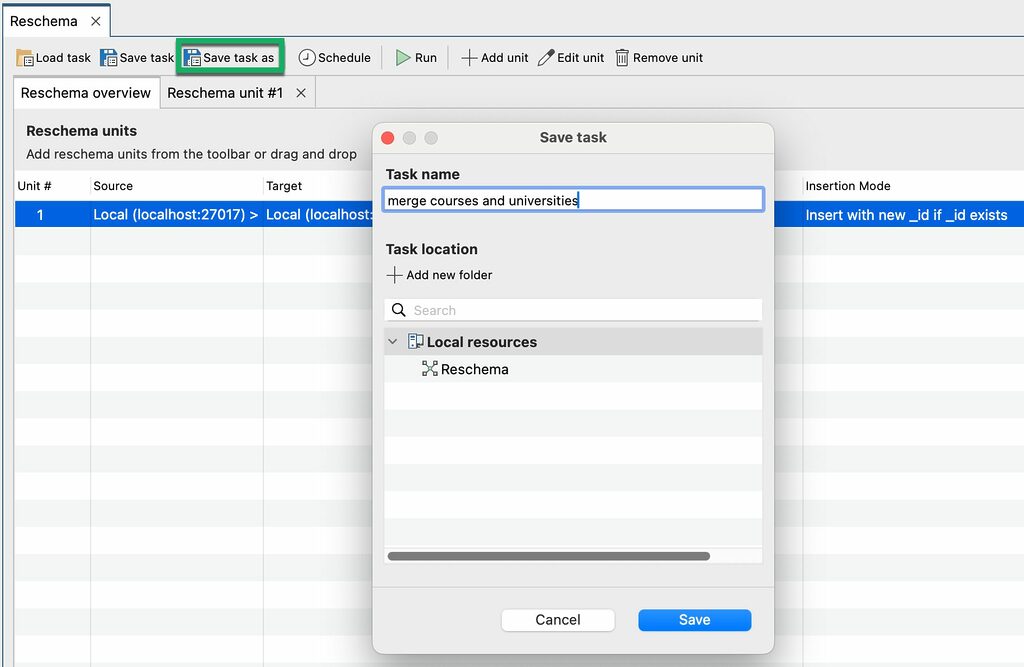
Name the task. Then, click Save.
The task is then added to the Task Viewer, from which you can choose to schedule, unschedule, edit, clone, delete, add, and execute tasks.
This article was originally published by Kathryn Vargas and has since been updated.