In this tutorial, you’ll learn how to query MongoDB arrays through Studio 3T’s drag-and-drop Visual Query Builder.
Prefer the mongo shell or the Aggregation Editor? Try our other tutorial, How to Find & Filter MongoDB Array Elements Using $elemMatch.
What you’ll need:
- Studio 3T (download the latest version here)
- Access to a MongoDB database (create your own MongoDB Atlas cluster for free)
- Download the
customersJSON file here and import it to your database following these steps
An introduction to MongoDB arrays
Documents in a MongoDB database commonly include fields defined with the Array data type.
A field configured with this type can contain zero or more elements that together form a list—or array—of values.
An array is simply a list of values, and an array value can take many forms.
The values might all be the same data type, or they might be different types. For example, an Array field might contain a mix of strings, as in the example below:
{
   cities: [ “London”, “New York”, “San Francisco”]
}
Or an array of embedded documents:
 "cities" : [
        {
            "city" : "London",
            "country" : "United Kingdom"
        },
        {
            "city" : "New York",
            "country" : "United States"
        }
        {
            "city" : "San Francisco",
            "country" : "United States"
        }
    ]
Or an array of any MongoDB-supported BSON data type (e.g. Decimal128, Int32, Date, find the full list of the MongoDB-supported BSON types here):
{
   cities: [ “0.128”, “20”, “1972-07-22T09:39:28.000+0000”]
}
In these examples, we would refer to array values like “London”, “0.128”, and “United States” and array embedded fields like “city”, “country” as array elements.
When the documents in your collection contain arrays, you’ll likely want to build queries that can retrieve specific documents based on the values within those arrays.
To do so, you should understand the fundamentals of working with an array to ensure you can retrieve the documents you need when you need them.
Our customers dataset
We’ll be using the customers collection to learn different concepts.
The documents in this collection contain the interests field, which is an array that includes multiple String values, usually between two and four.
Although the field can contain any number of values and those values can be different types, this particular collection is limited to only a few String values.
The following figure shows a sample of the values in the interests array, as they appear on the Result tab of the customers collection tab.
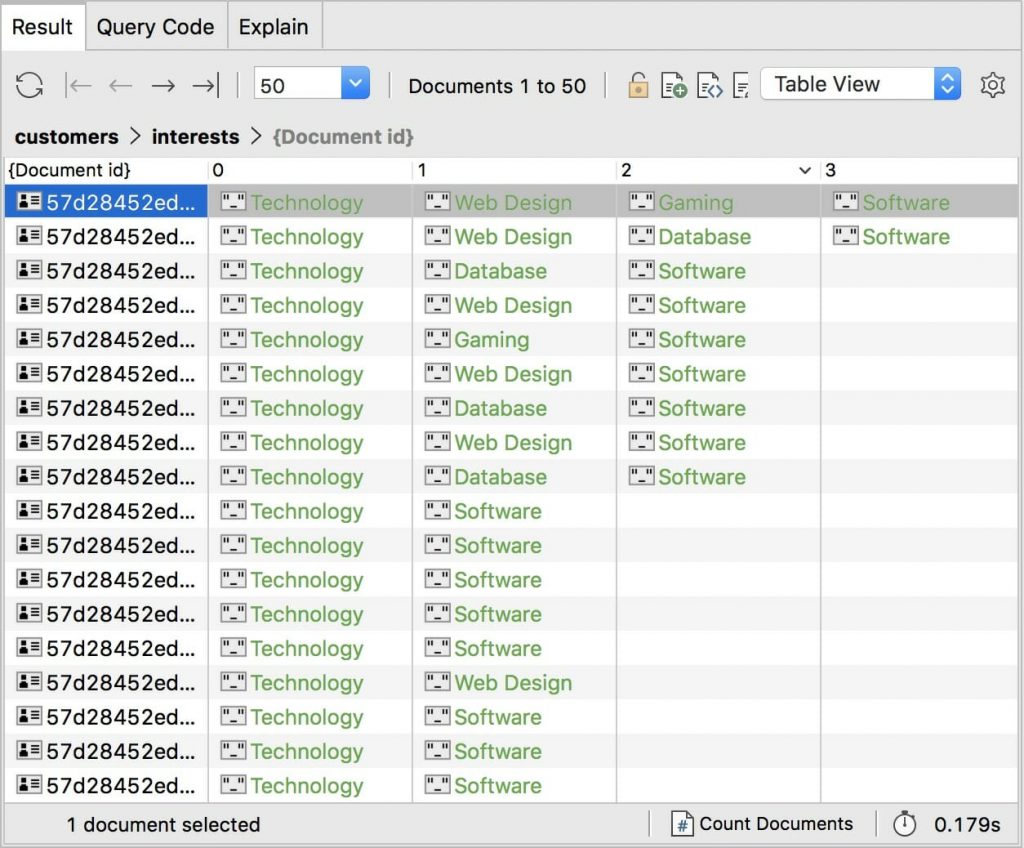
The figure provides a good cross section of the interests array.
Although most documents include the Technology value, not all do, nor do the values appear in the same order.
If you want to retrieve documents based on a single value in the array, you can use the collection’s find method, specifying the name of the array field and the target value, as shown in the following example:
use sales;
db.customers.find(
  { "interests": "Gaming" } );
The statement calls the find method on the customers collection in the sales database.
The method takes one argument, an embedded document that specifies the field name, followed by the value. In this case, the target field is interests and the target value is Gaming.
The query will return only documents that contain the Gaming value in the interests array.
It does not matter where the Gaming value falls within the array or how many values are included in the array. All that matters is that the array contains the specified element.
Using $elemMatch to query arrays
When working with arrays, you might come across the $elemMatch operator. You’ll certainly see it when using Visual Query Builder to create statements based on array values.
The operator can be used with the find method or aggregate method to return documents in which at least one element in the array matches the method’s specified search criteria.
For example, you can recast the previous statement to include the $elemMatch operator, as shown in the following example:
use sales;
db.customers.find(
  { "interests": { $elemMatch: {$eq: "Gaming"} } } );
The statement returns the same results as the preceding one, but with the added complexity that comes with the $elemMatch operator.
The search condition in this case is the embedded document {$eq: "Gaming"}, which means a document must contain the Gaming value in the interests array in order to be returned, just like the previous statement.
As the two examples demonstrate, you don’t need to use the $elemMatch operator when specifying a single search condition.
The operator is mentioned here only because you’ll see it used in the code generated by Visual Query Builder, even when only one search condition is specified.
How to build a MongoDB query based on multiple array string values
In the meantime, let’s consider how to build a query based on multiple array values, a process not quite as straightforward as a query based on a single value.
Suppose you want to return documents in which the interests array contains both the Gaming and Web Design values. In an attempt to build such a query, you might try the following statement:
use sales;
db.customers.find(
  { "interests": ["Gaming", "Web Design"] } );
Unfortunately, the query returns no documents from the customers collection because it’s looking for those that are an exact match.
In other words, the interests array must contain both the Gaming and Web Design values in the specified order and include no other array elements.
Returning all documents containing two array values
To return all documents that contain both values, you can instead use the $and operator to define two search conditions, one for Gaming and one for Web Design, as shown in the following example:
use sales;
db.customers.find(
  {
    "$and": [
      { "interests": "Gaming" },
      { "interests": "Web Design" } ]
  } );
The statement returns only those documents in which the interests array contains both of the target elements.
It does not matter what order they appear or whether the array contains other elements, as long the document includes both Gaming and Web Design.
Returning documents that include either of two array values
If you want to return documents that include either value, you can instead use the $or operator:
use sales;
db.customers.find(
  {
    "$or": [
      { "interests": "Gaming" },
      { "interests": "Web Design" } ]
  } );
Now only one of the two conditions needs to be true for a document to be returned, although a document can include both values.
Exercise 1: Using Visual Query Builder to query a single array value
In this exercise, you’ll use Visual Query Builder to build and run a query that retrieves documents from the customers collection. The query will be based on a single value (Database) in the interests array.
To build the query in Visual Query Builder:
1. In the Studio 3T Connection Tree, expand the database where you imported the customers collection and, if necessary, expand the Collections node.
2. Double-click the customers collection node to open the customers collection tab.
3. On the customers collection tab, click the Visual Query Builder link to launch Visual Query Builder.
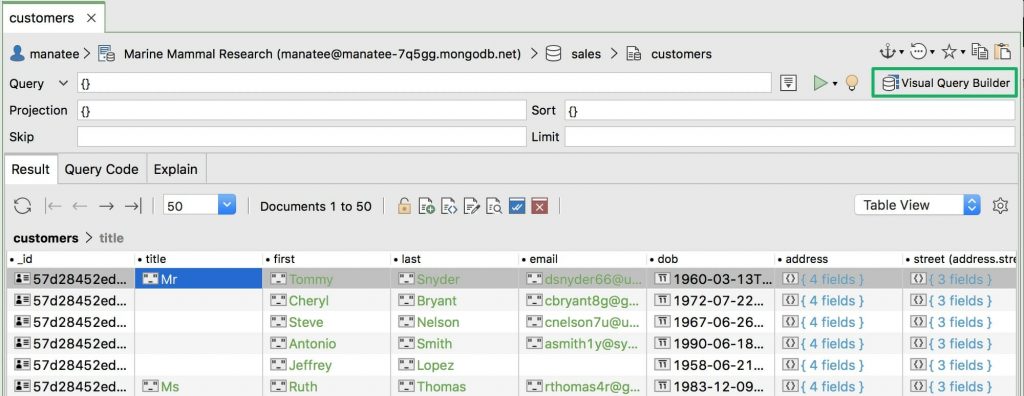
4. In the Query section of the query form, select the Has array element(s) matching option from the drop-down list in the upper left corner.
Studio 3T adds the Array drop-down list to the top of the Query section, as shown in the following figure.
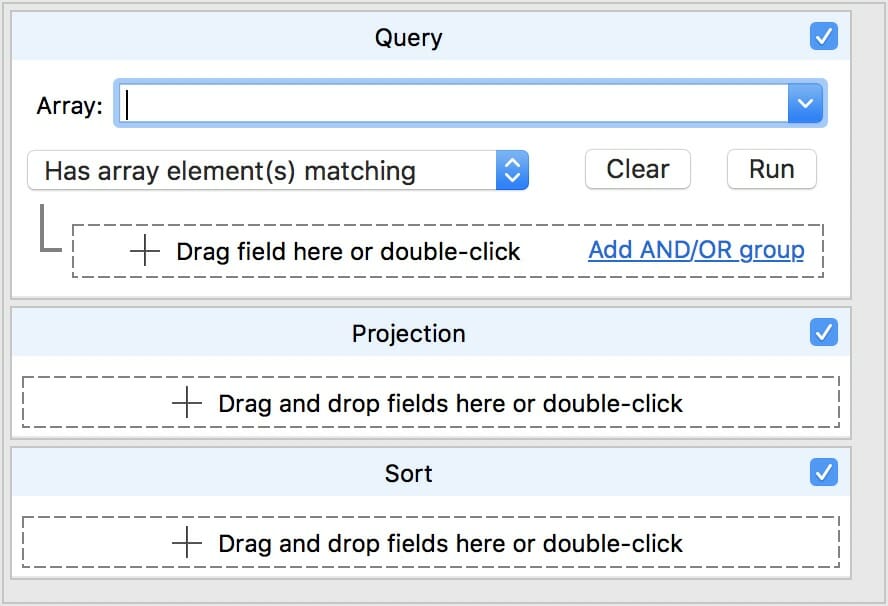
5. From the Array drop-down list, select the interests field, which is configured with the Array data type.
6. Click the Add button (white-on-green plus sign) in the box at the bottom of the Query section. The form will expand to include options for defining a search condition, as shown in the following figure.
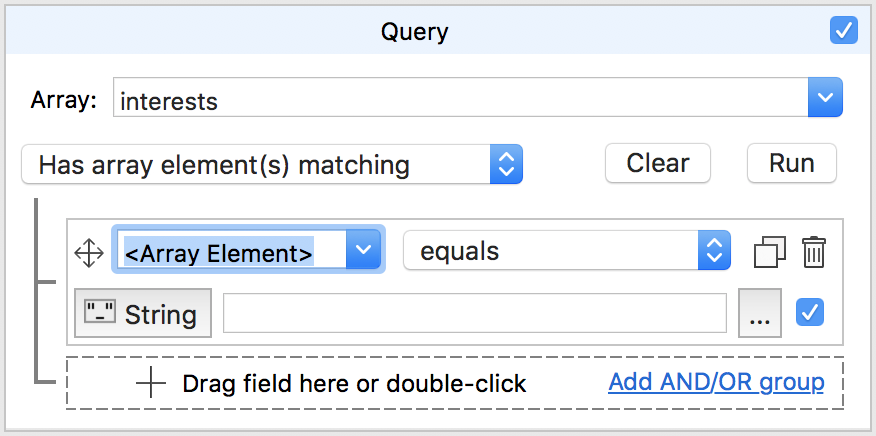
7. In the first drop-down list in the new search condition section, ensure that <Array Element> is selected, and in the second drop-down list (the one to the right of the first list), ensure that equals is selected. These options are typically selected by default, as indicated in the previous figure, but you should verify them anyway.
8. In the text box beneath the two drop-down lists, type Database.
9. In the main window on the customers collection tab, display the collection in Tree View and, if necessary, expand the first record.
10. Drag the last field to the box at the bottom of the Projection section of the query form.
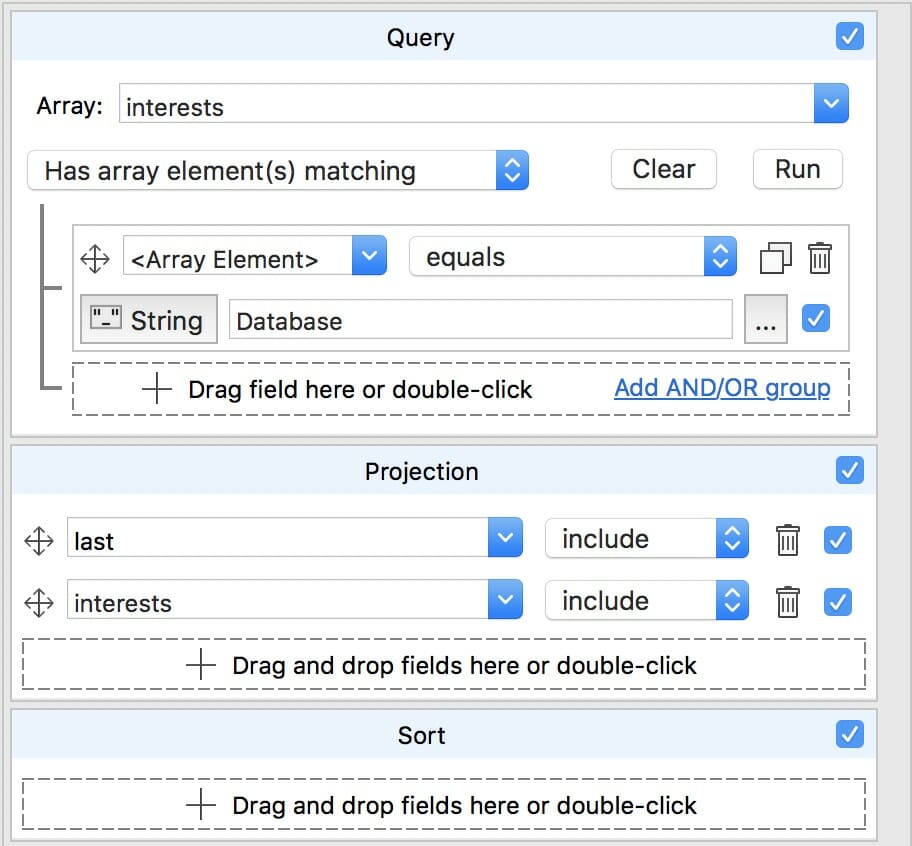
11. Drag the interests field to the same box in the Projection section. Your query form should now look like the following figure.
12. On the query form, click the Run button in the upper right corner.
13. In the main window of the customers collection tab, display the collection in Table View.
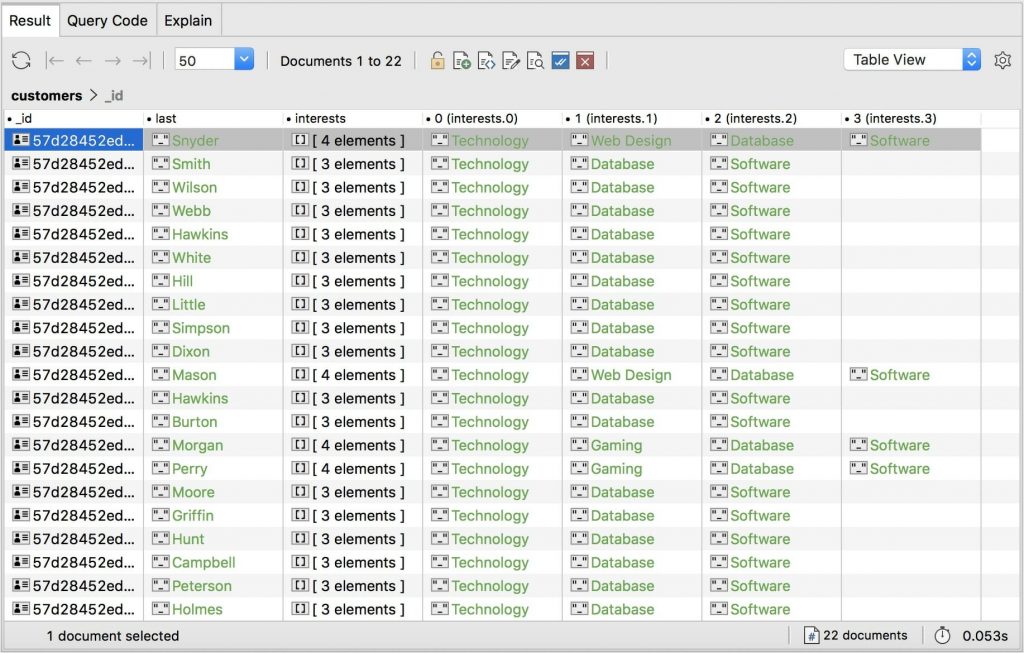
14. If the values in the interests array are not displayed, right-click a value in the interests column and then click Show Embedded Fields. The query should have returned 22 documents, as shown in the following figure.
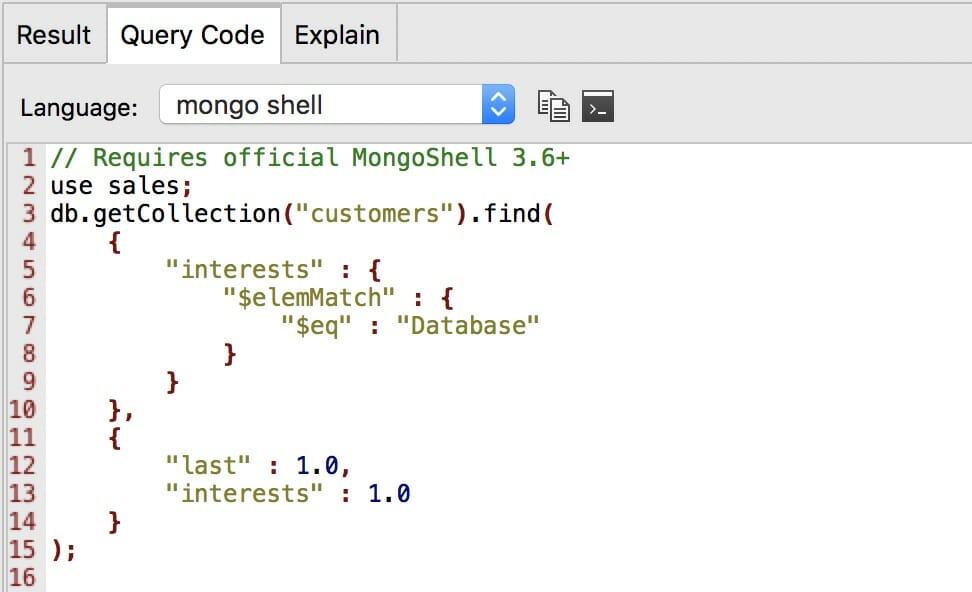
15. Go to the Query Code tab and view the mongo shell code. It should look similar to the first find statement you created in the previous exercise, as shown in the following figure.
16. Leave the customers collection tab and Visual Query Builder form in place for the next exercise.
Exercise 2: Using Visual Query Builder to query multiple array values
In this exercise, you’ll use Visual Query Builder to build and run a query that retrieves documents from the customers collection. The query will be based on two values (Database and Web Design) in the interests array.
To build the query in Visual Query Builder:
1. Return to the Visual Query Builder form on the customers collection tab. The query you built in the previous exercise should still populate the query form.
2. In the Query section, click the Delete button (trash can icon).
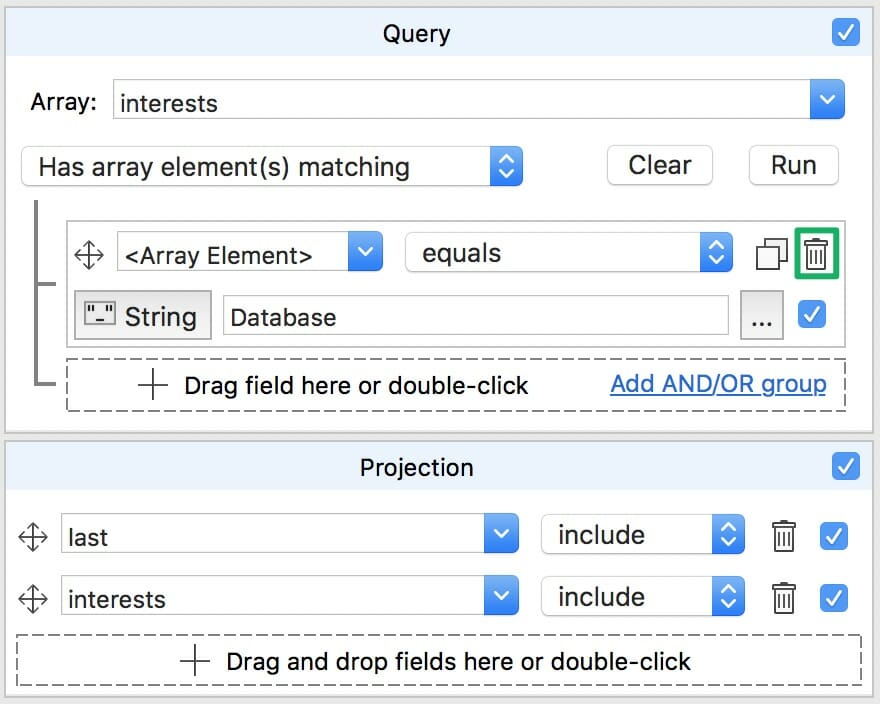
When you click the Delete button, Studio 3T removes the search condition, but leaves the Projection section untouched.
3. In the Query section, select the Match all of ($and) option from the drop-down list beneath the Array drop-down list. When you select this option, Studio 3T removes the Array drop-down list.
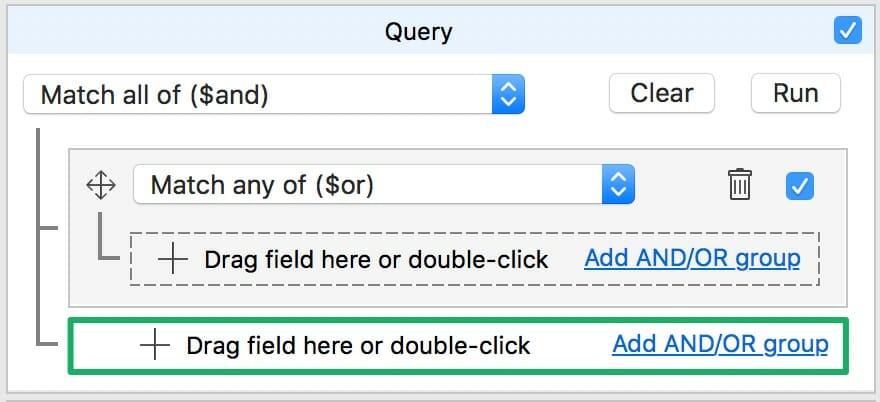
4. Click the Add AND/OR group link near the bottom right corner of the Query section.

Studio 3T adds a subsection for defining the $and operator’s first search condition. The subsection has a light gray background, as shown in the following figure.
5. In the new subsection, select Has array element(s) matching from the drop-down list. Studio 3T adds the Array drop-down list to the top of the subsection, similar to what you saw in the previous exercise.
6. From the newly added Array drop-down list, select the interests field.
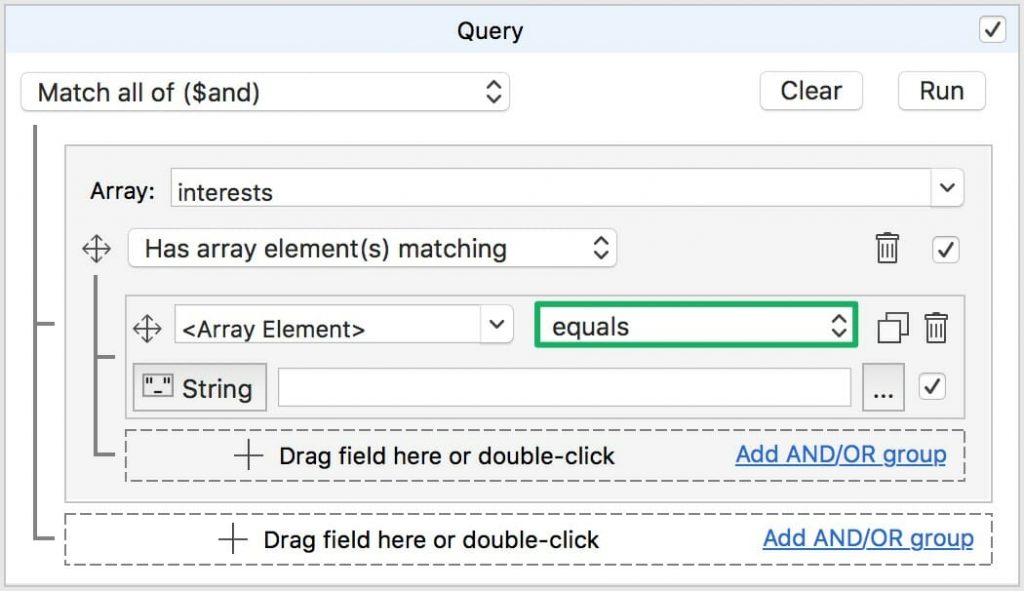
7. Click the Add button (plus sign) in the box at the bottom of the subsection. The form will expand to include options for defining the search condition.
8. In the first drop-down list in the expanded area, ensure that <Array Element> is selected, and in the second drop-down list (to the right of the first one), ensure that equals is selected.
9. In the text box beneath the two drop-down lists, type Database. The Query section should now look like the following figure.
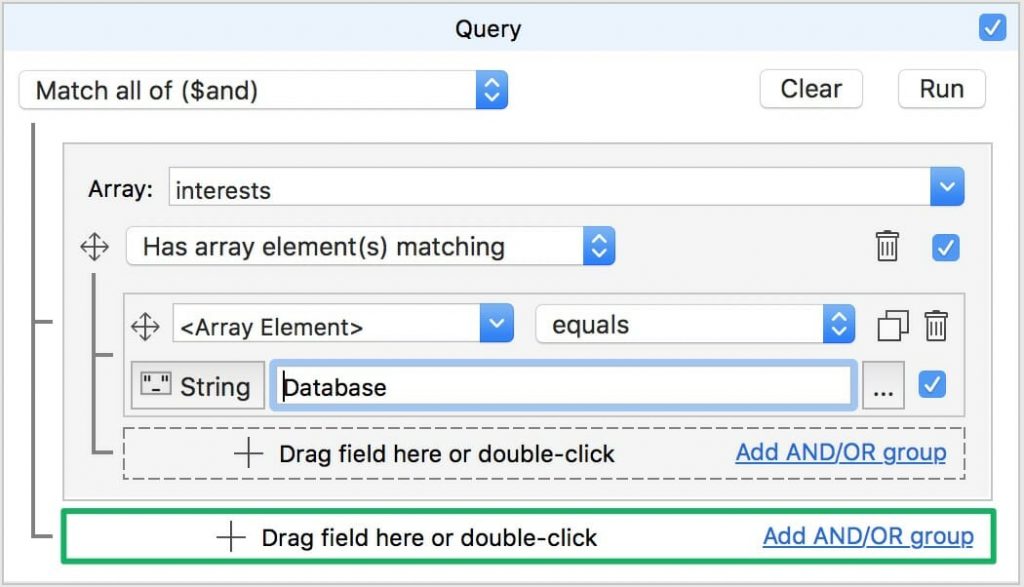
The box beneath the subsection you just configured is outlined in red to show where you define the $and operator’s second search condition.
10. In the box for the second search condition, click the Add AND/OR group link. (Be sure not to click the Add AND/OR group link directly above it.) This adds a second subsection, as shown in the following figure.
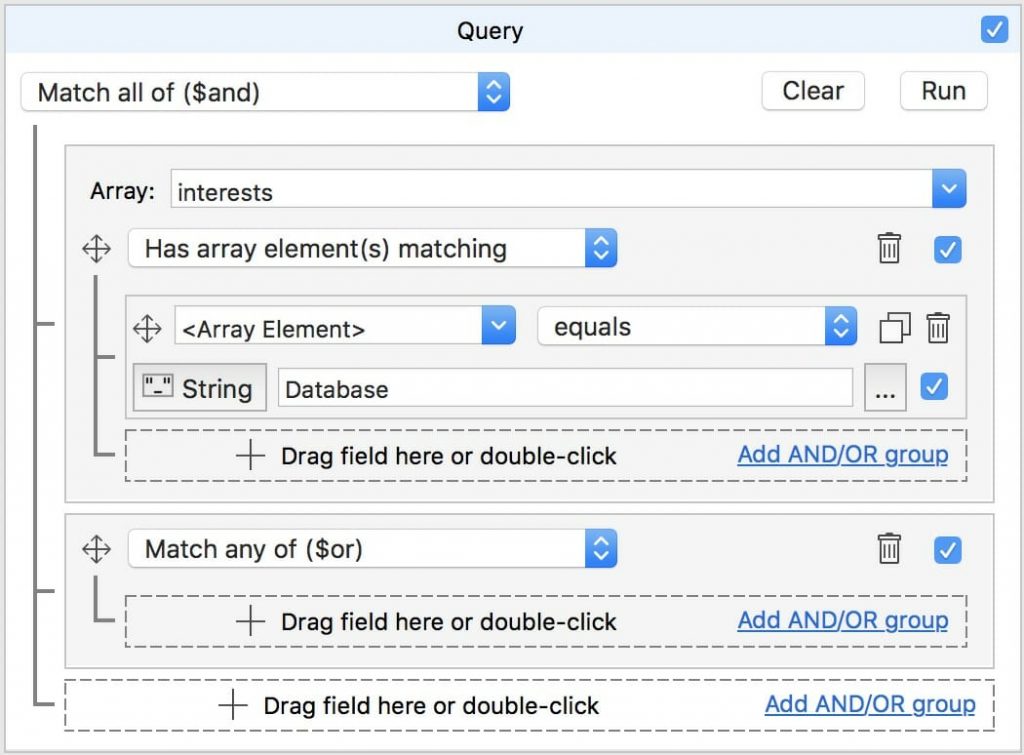
11. In the new subsection, select Has array element(s) matching from the drop-down list.
12. From the Array drop-down list, select the interests field.
13. In the same subsection, click the Add button. The subsection will expand to include options for defining the second search condition.
14. In the first drop-down list in the expanded section, ensure that <Array Element> is selected, and in the second drop-down list, ensure that equals is selected.
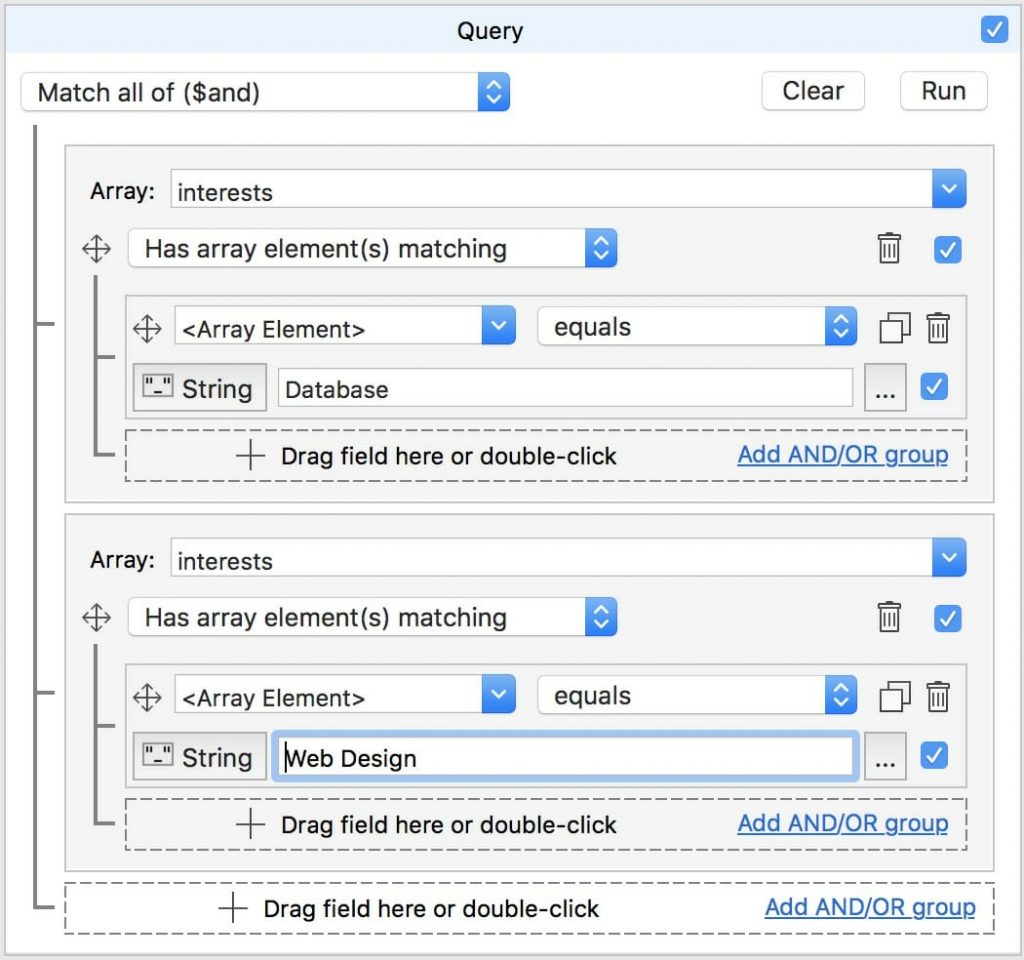
15. In the text box beneath the two drop-down lists, type Web Design. The Query section should now look like the following figure.
16. Ensure that the Projection section still specifies that last and interests fields, just like you left it at the end of the previous exercise.
17. On the query form, click the Run button in the upper right corner.
18. In the main window of the customers collection tab, ensure that the Result tab is selected. The query should return only two rows, as shown in the following figure.

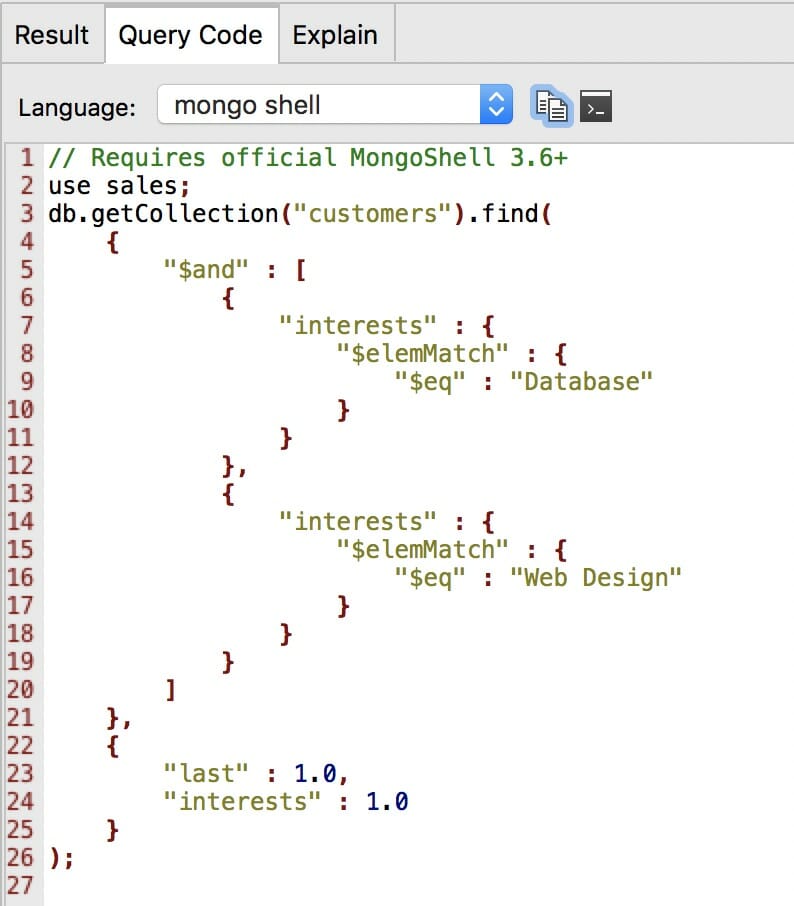
19. Go to the Query Code tab and view the mongo shell code. It should look similar to the one of the find statements you created in the first exercise, as shown in the following figure.
20. Close Studio 3T.
