The ability to rename a MongoDB database is a feature that the MongoDB team is still working on.
In the meantime, there’s an easy workaround that only requires a few clicks when using the MongoDB GUI, Studio 3T:
- Copy the original database by copying all the collections, views, and buckets in it.
- Create a new database.
- Name the new database as desired.
- Paste the copied collections, views, and buckets into the new database.
- Drop the original database.
Let’s rename the database users to customers as an example.
Step 1: Copy the original MongoDB database
Once you’ve connected to a MongoDB instance, you’ll see the list of databases in the Connection Tree on the left-hand side:
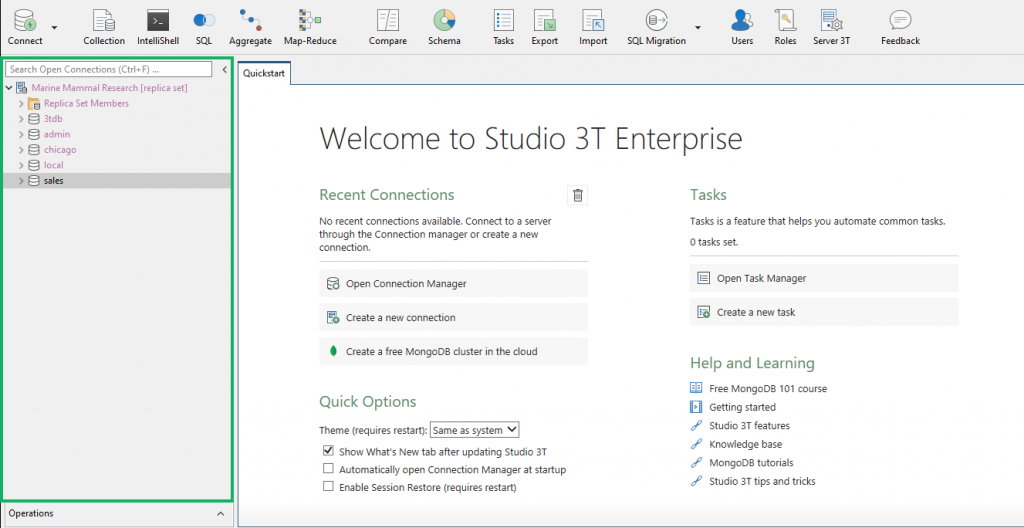
Studio 3T’s rich context menus conveniently replace needing to run basic MongoDB CRUD commands in the shell.
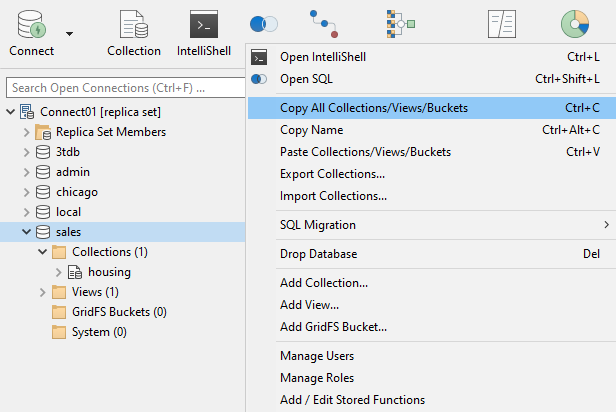
In this case, all we need to do copy the contents of the users database is:
- Right-click on the
usersdatabase. - Click on Copy All Collections/Views/Buckets.
Step 2: Create a new MongoDB database
Next, we’ll create a new database where we can paste the copied content.
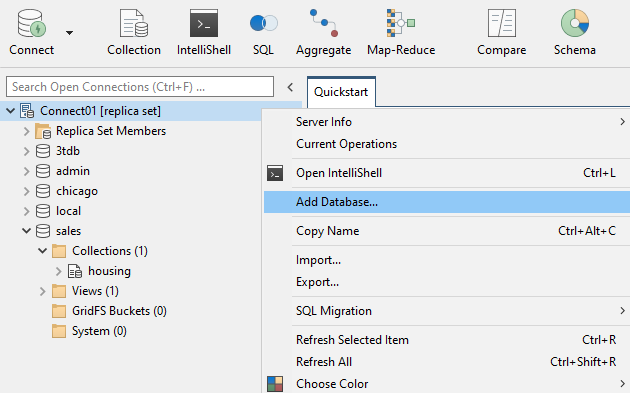
To add a database:
- Right-click on the target server (which is Studio 3T Replica Set in our example).
- Choose Add Database…
Step 3: Name the new database
The Add Database dialog will pop up.
Here, we can name the newly-created database customers and click OK.
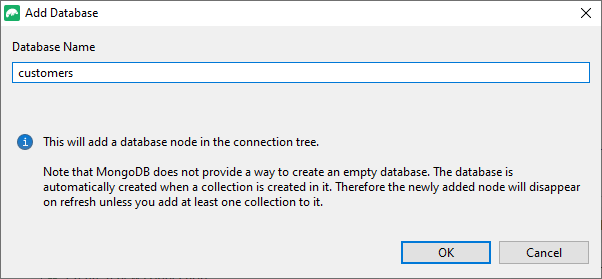
The database called customers should then appear in the Connection Tree.
Step 4: Paste the contents of the original database
Now that we’ve created the new database, we’ll then paste the contents of the original database users into customers.
- Right-click on the
customersdatabase. - Choose Paste Collections/Views/Buckets.
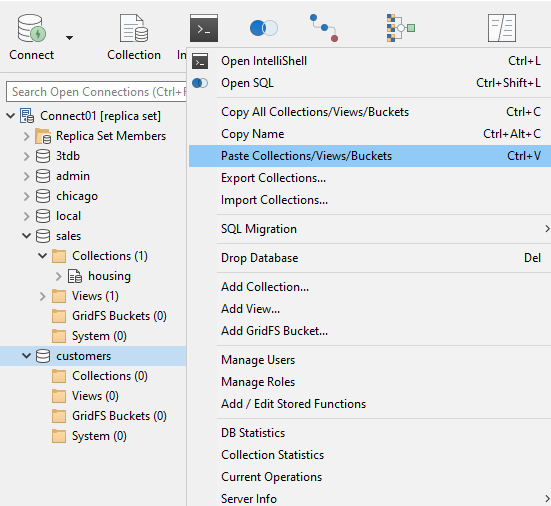
How long this process takes will depend on how large your original database is. You can always track the progress in the Operations window, below the Connection Tree on the bottom-left hand side.
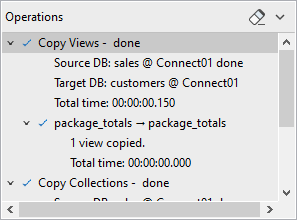
Step 5: Drop the original MongoDB database
After making sure that everything has been correctly copied into the new database, we can drop the original database, users.
- Right-click on the original database.
- Choose Drop database.
- Click Drop database.
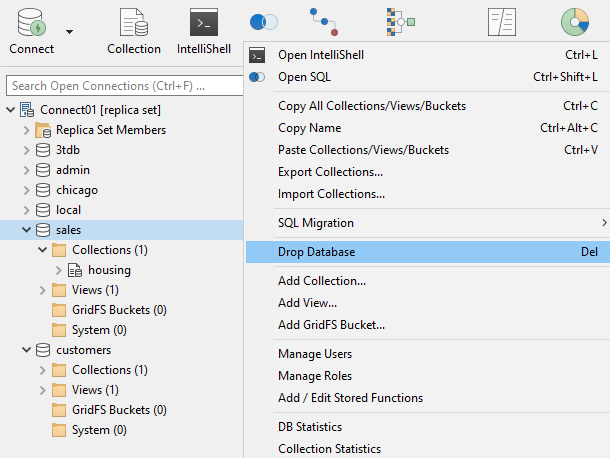
The original database should then disappear from the Connection Tree.
