Amazon DocumentDB is a fully managed document database service with MongoDB compatibility. If you are looking for a more powerful GUI tool for database management tasks, Studio 3T is a highly recommended option that works with DocumentDB.
A popular GUI and IDE for MongoDB, Studio 3T enables rapid team development by offering Tree, Table, and JSON views of your data, easy import/export in CSV, JSON, SQL, and BSON/mongodump, along with flexible querying options perfect for growing professional teams: a visual drag-and-drop UI, a built-in mongo shell with auto-completion, an aggregation pipeline editor, and SQL query support – all in one tool.
Data management features such as in-place editing, unlimited database connections, and the ability to color-code databases, connections, and field types are matched with time-saving features like driver code generation in JavaScript, Java, C#, Python, PHP, and Ruby, task automation and scheduling, quick schema analysis, among many others.
In this post you will learn how to:
- create an Amazon DocumentDB cluster inside your VPC (Virtual Private Cloud*)
- set up an EC2 Linux VM in the same VPC and then use an SSH tunnel between your EC2 VM and your DocumentDB cluster
- connect to your cluster from Studio 3T
- import a collection
- learn more about working with Studio 3T
What is Amazon VPC?
*Amazon VPC is a networking layer for Amazon EC2. It enables you to launch AWS resources into a virtual network that closely resembles a traditional network that you’d operate in your own data center.
What is Amazon EC2?
Amazon Elastic Compute Cloud (Amazon EC2) provides scalable computing capacity in the Amazon Web Services (AWS) cloud. With this you can launch your virtual servers, configure security and networking, and manage storage.
The following diagram shows the final architecture of this walkthrough.

Creating an Amazon DocumentDB cluster
You can create an Amazon DocumentDB cluster using the AWS Command Line Interface (AWS CLI) or the AWS Management Console. If you have an existing cluster, you can skip this step.
Creating your cluster with AWS CLI
To create a cluster using the AWS CLI with smart defaults, use the following code for Linux, macOS, or Unix:
aws docdb create-db-cluster \

--db-cluster-identifier sample-cluster \

--engine docdb \

--deletion-protection \

--master-username master-user \

--master-user-password password
For Windows, use the same code, but replace the backslashes with carets:
aws docdb create-db-cluster ^
--db-cluster-identifier sample-cluster ^
--engine docdb ^
--deletion-protection ^
--master-username master-user ^
--master-user-password password
Creating your cluster on the console
To create your cluster on the console with the smart defaults, complete the following steps:
- On the Amazon DocumentDB console, under Clusters, choose Create.

2. On the Create Amazon DocumentDB cluster page, for Number of instances, choose 1 to minimize costs.
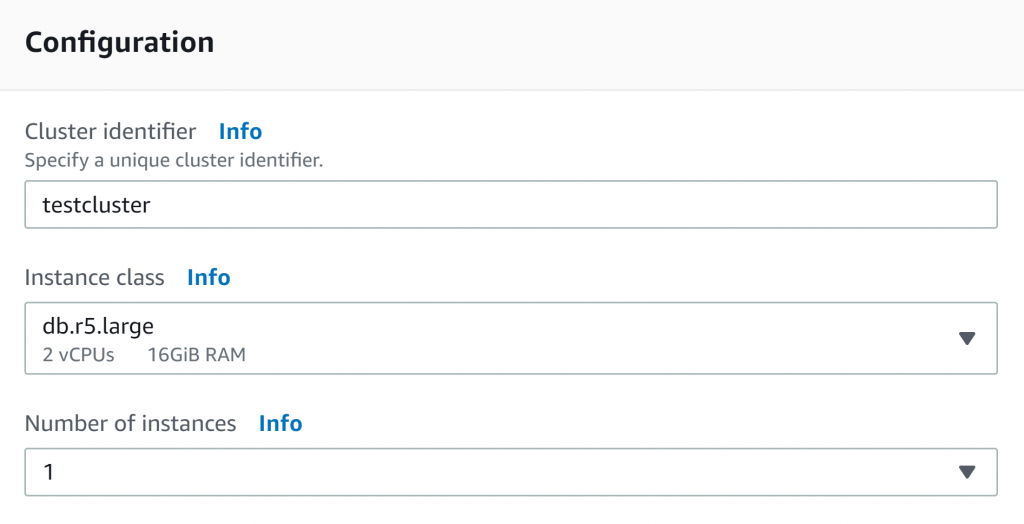
3. Leave other settings at their default.
4. In the Authentication section, enter a username and password.
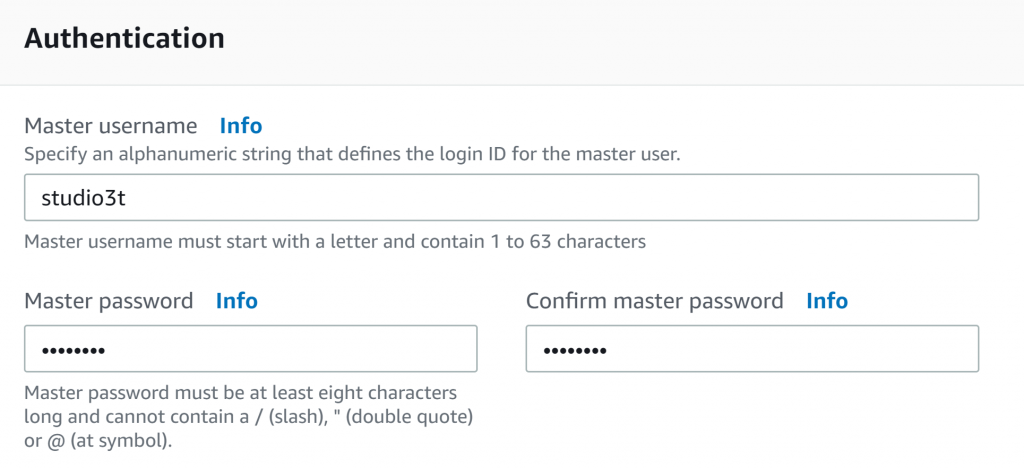
5. Choose Create cluster.
6. Enable inbound connection for your cluster’s security group.
- Sign in to the AWS Management Console and open the Amazon EC2 console at https://console.aws.amazon.com/ec2/.
- In the Resources section of the main window, choose Security Groups.
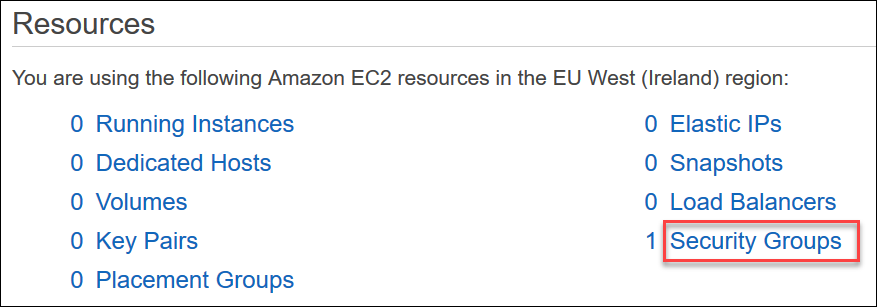
- From the list of security groups locate the security group you used when creating your cluster (it is most likely the default security group) and check the box to the left of the security group’s name.

- From the Actions menu, choose Edit inbound rules then choose or enter the rule constraints.
- Type—From the list, choose the protocol to open to network traffic.
- Protocol—From the list, choose the type of protocol.
- Port Range—For a custom rule, enter a port number or port range. Be sure that the port number or range includes the port you specified when you created your cluster (default: 27017).
- Source—Specifies the traffic that can reach your instance. From the list, choose the traffic source. If you choose Custom, specify a single IP address or an IP address range in CIDR notation (e.g., 203.0.113.5/32).
- Description—Enter a description for this rule.
- When finished creating the rule, choose Save.
Launch an EC2 Instance
Amazon DocumentDB clusters are deployed within an Amazon Virtual Private Cloud (Amazon VPC). They can be accessed directly by Amazon Elastic Compute Cloud (Amazon EC2) instances or other AWS services that are deployed in the same Amazon VPC.
To connect to your cluster using Studio 3T from your laptop, you need to access your cluster from outside the cluster’s VPC. For this, we need a Linux EC2 instance in the same VPC and security group as your DocumentDB cluster.
Later in the walkthrough, we will create an SSH tunnel from your laptop to your cluster via your EC2 instance. You can either use an existing EC2 instance in the same VPC and security group as your cluster or create a free Linux EC2 instance in the same VCP and security group as your cluster. For more information, see Getting Started with Amazon EC2 Linux Instances.
Connect to a DocumentDB cluster using Studio 3T
If you haven’t yet, go ahead and download Studio 3T and install it. As of this writing, the latest Studio 3T version is 2020.5. You can skip this step if you already have Studio 3T.
- Inside Studio 3T, click on Connect in the top left corner of the toolbar.

2. Inside the Connection Manager that opens up, click on New Connection in the top left corner of the toolbar.

3. Copy the cluster endpoint from the cluster.

4. Paste your Amazon DocumentDB Cluster endpoint information on the Connection tab. Inside the new connection window that opens, give your connection a name.

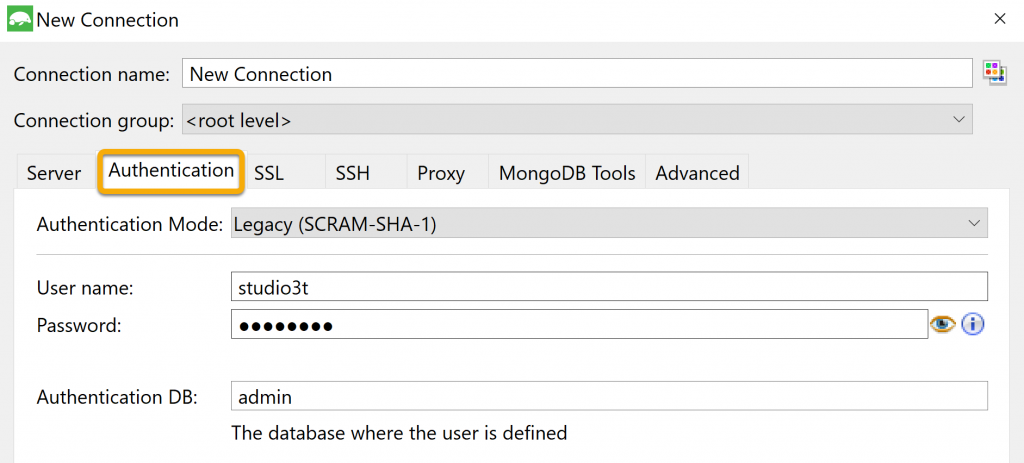
5. On the Authentication tab, enter the authentication information for your cluster.
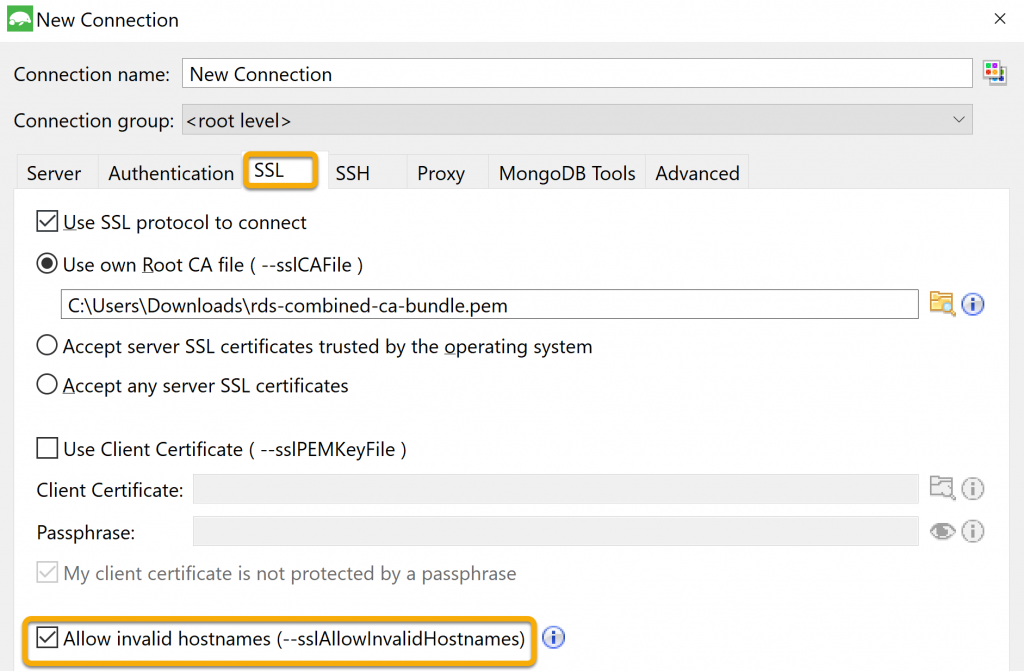
6. On the SSL tab, tick the “Use SSL protocol to connect””and choose “Use own Root CA file”.You can download it by clicking here or with the following command:wget https://s3.amazonaws.com/rds-downloads/rds-combined-ca-bundle.pem
Also select the checkbox to allow invalid hostnames.
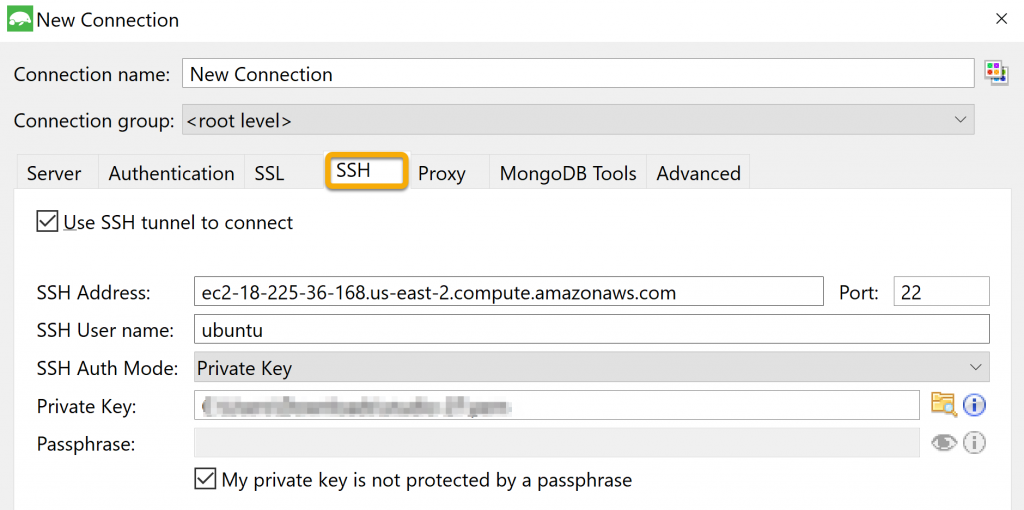
7. On the SSH tab, check the box for ‘Use SSH tunnel’, and add the
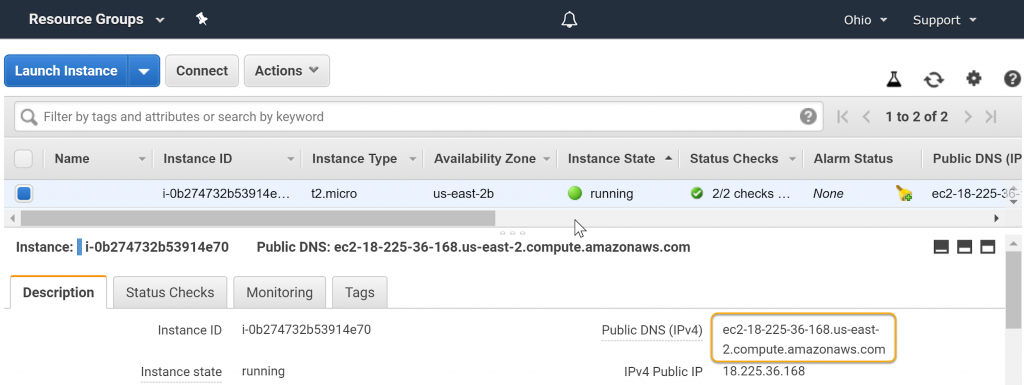
- SSH address – This is your instance Public DNS (IPV4). You can get this URL from your Amazon EC2 console at https://console.aws.amazon.com/ec2/.
- Username – This depends on the Amazon Machine Image (AMI) chosen by you.
| Server | Username |
| Ubuntu | ubuntu |
| Linux | ec2-user |
- Private key of your EC2 instance – This is the .pem file (key pair) that you saved while creating your instance in EC2 Console.Your SSH tab would look like this once you have all the details filled in:
8. Test the connection by choosing Test. A Diagnostic window opens with the test results.
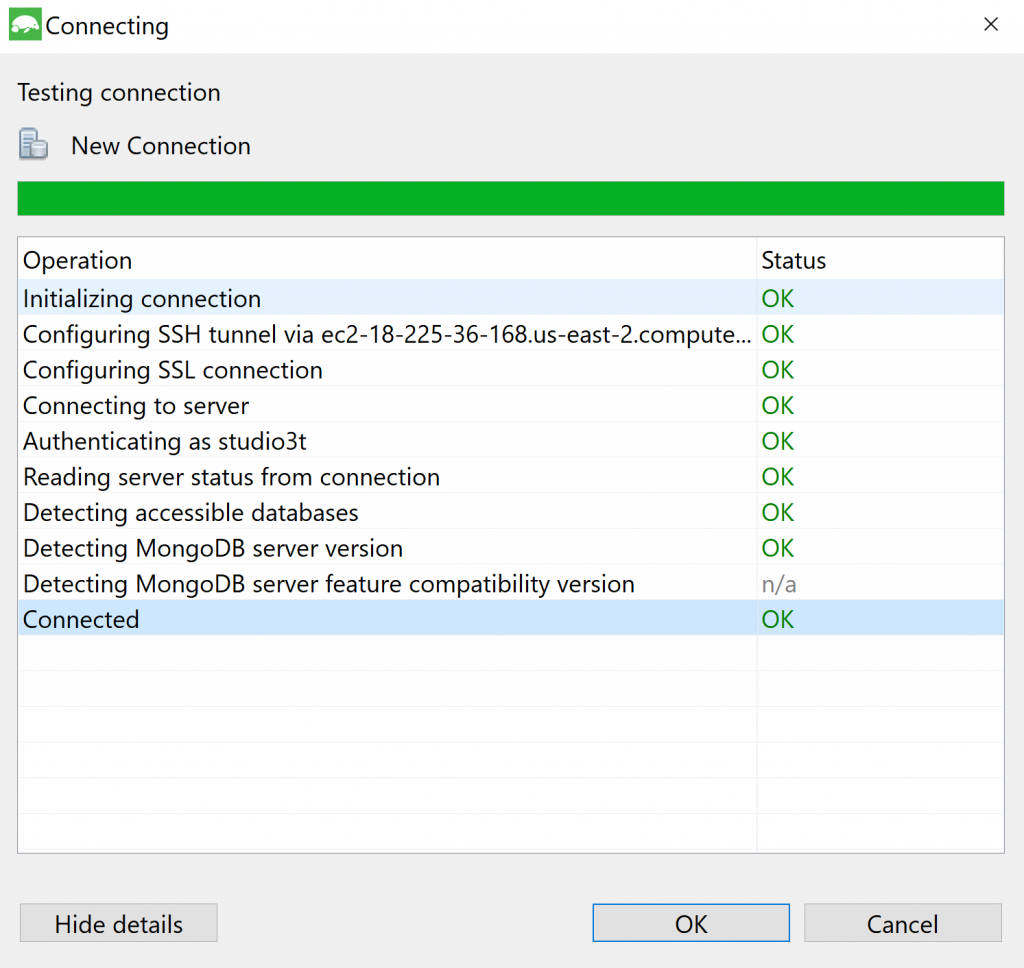
9. Choose Ok and Save.
10. Select your cluster and click Connect.
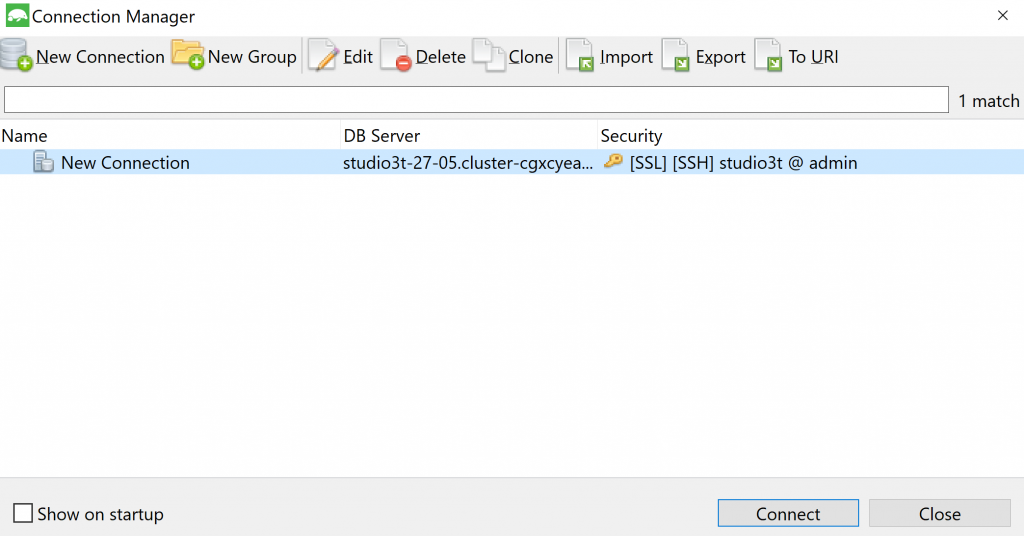
Exploring Studio 3T
Now that you are all set up, you can import your own data in CSV, JSON, SQL, and BSON/mongodump. or we could import this customers dataset as an example.
- Copy the dataset into your clipboard or save it as a file.
- Inside Studio 3T, select your database and click on Import. Import the JSON dataset either from your clipboard or by selecting the file you saved. If you copied the data from your clipboard, be sure to add customers as the name of your collection. Click on Execute to start the import.

3. You now have a sample dataset and you’ll find your new collection located on the left hand side within the Connection pane. Double-click your new collection and you’ll see the Collection Tab open up with all your collection’s documents.
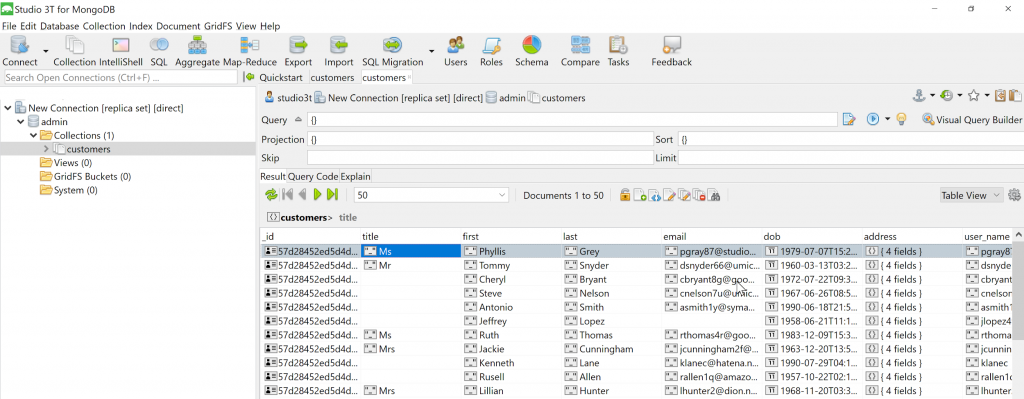
From here you can use the UI to view your data in Tree, Table, or JSON View, edit documents in-place, add and delete documents and fields, and much more.You also have access to the Visual Query Builder from here.
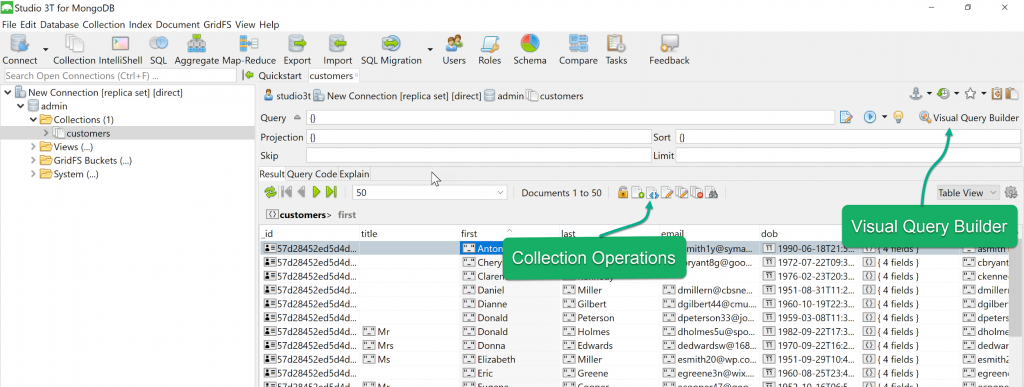
4. You can now execute a sample query. To better specify the query, drag as many fields as necessary. You can further filter queries and define the desired operators and values in the Query, Projection, and Sort sections.
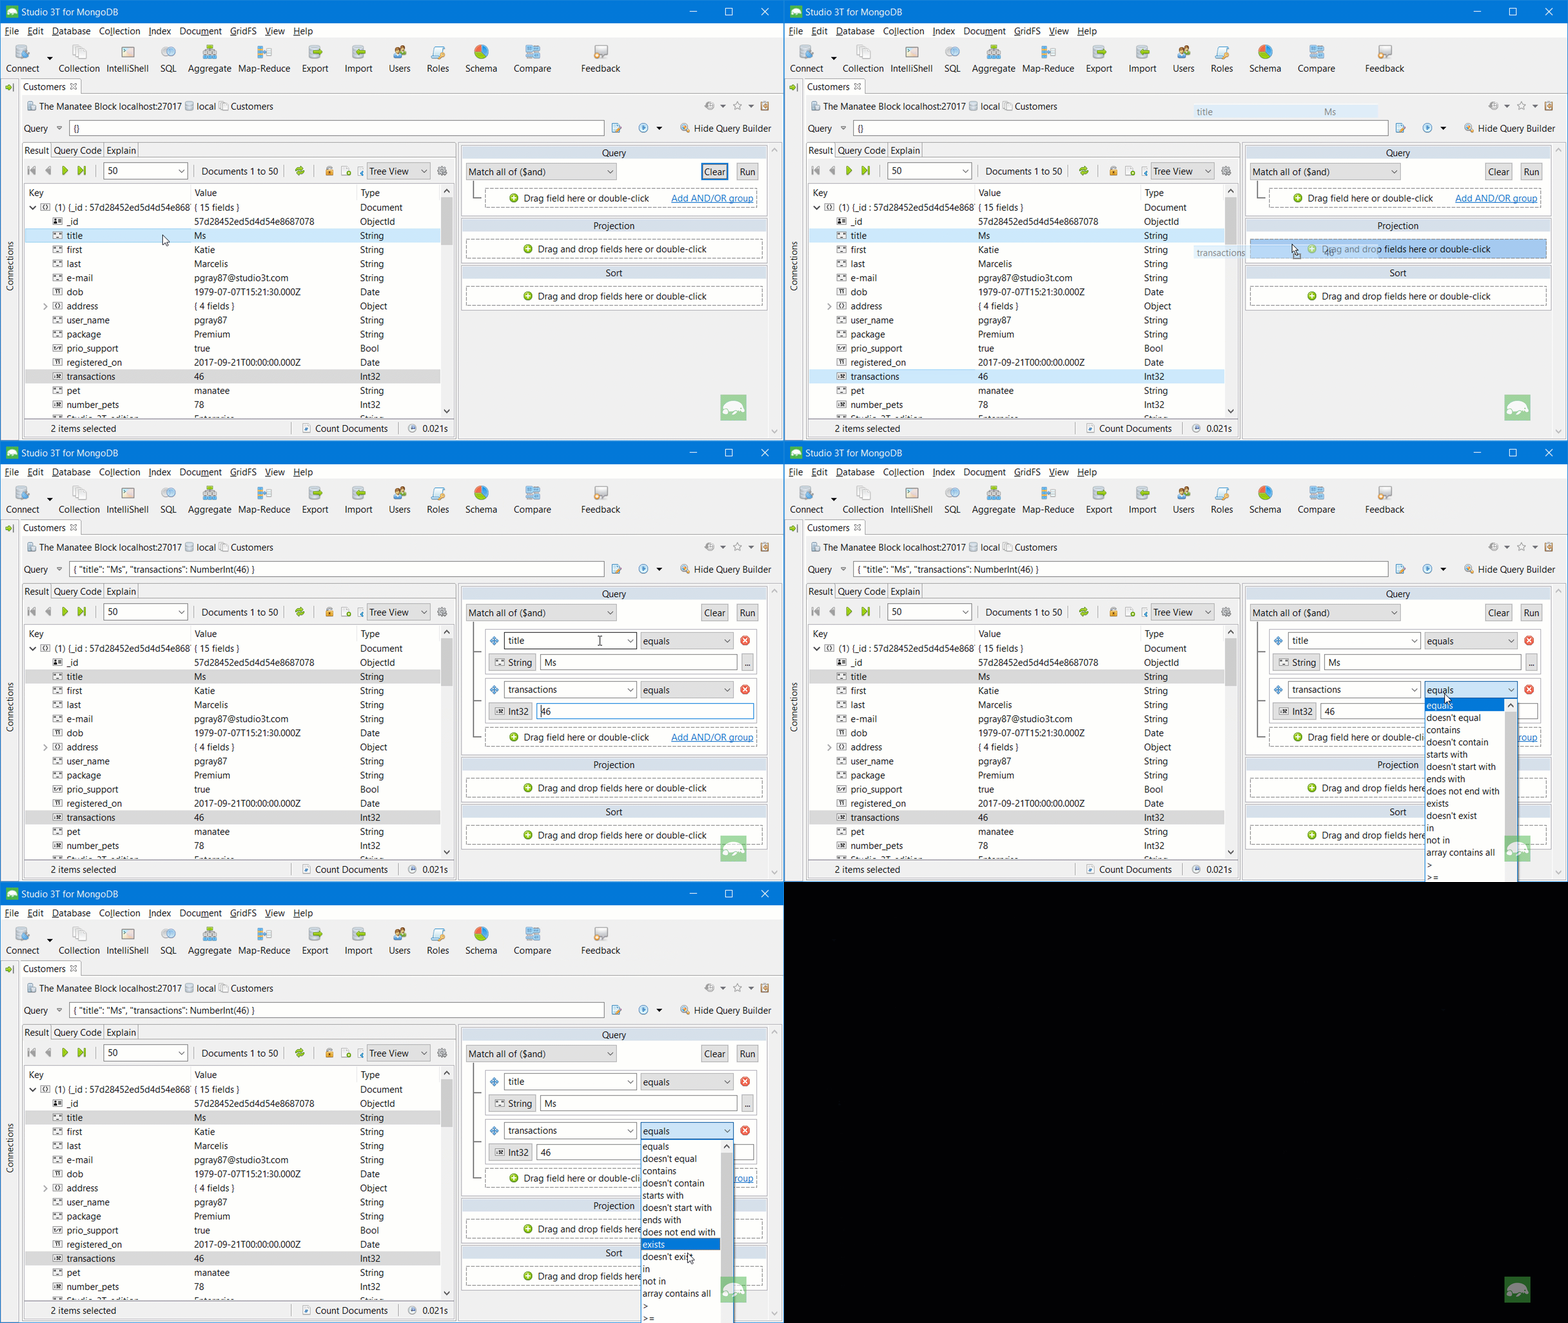
With Studio 3T, you can build a query with the MongoDB query language, SQL, or by using the Visual Query Builder (as shown above). Learn more about the different ways to build a query.
5. To further explore Studio 3T’s querying functionalities have a look at IntelliShell, the built-in mongo shell with auto-completion; the SQL Query tool, which lets you query MongoDB with SQL; and the Aggregation Editor, which lets you build aggregation queries in stages.
Cleaning up
When you complete the walkthrough, you can either stop your Amazon DocumentDB cluster to reduce costs or delete the cluster.
Summary
This post showed you how to connect to Amazon DocumentDB using Studio 3T. By establishing a connection to your Amazon DocumentDB cluster from Studio 3T, you can now create a database, collection, and indexes, insert documents, and query them from a single tool. You can also find some useful Studio 3T tips and tricks by visiting the Studio 3T Knowledge Base.
