In this tutorial, we’ll show you how to connect to your Compose-hosted MongoDB database with Studio 3T.
Prerequisites:
- Sign up for a Compose account through their free 30-day trial.
- Download our MongoDB GUI on your Windows, Mac, or Linux machine.
Connect to Compose
- Log into your Compose account.
- You’ll land on an overview of your Compose-hosted deployments (e.g. MongoDB, Redis, Elasticsearch). Choose your MongoDB deployment.

3. You’ll then see your Deployment Overview. Scroll down to Connection Info – this is where you’ll find the connection string to enter in Studio 3T.
4. Copy the connection string. Note that you’ll need to edit certain placeholder texts (e.g. admin, password) but this can be done later.

Connect to Studio 3T
Use your MongoDB connection string
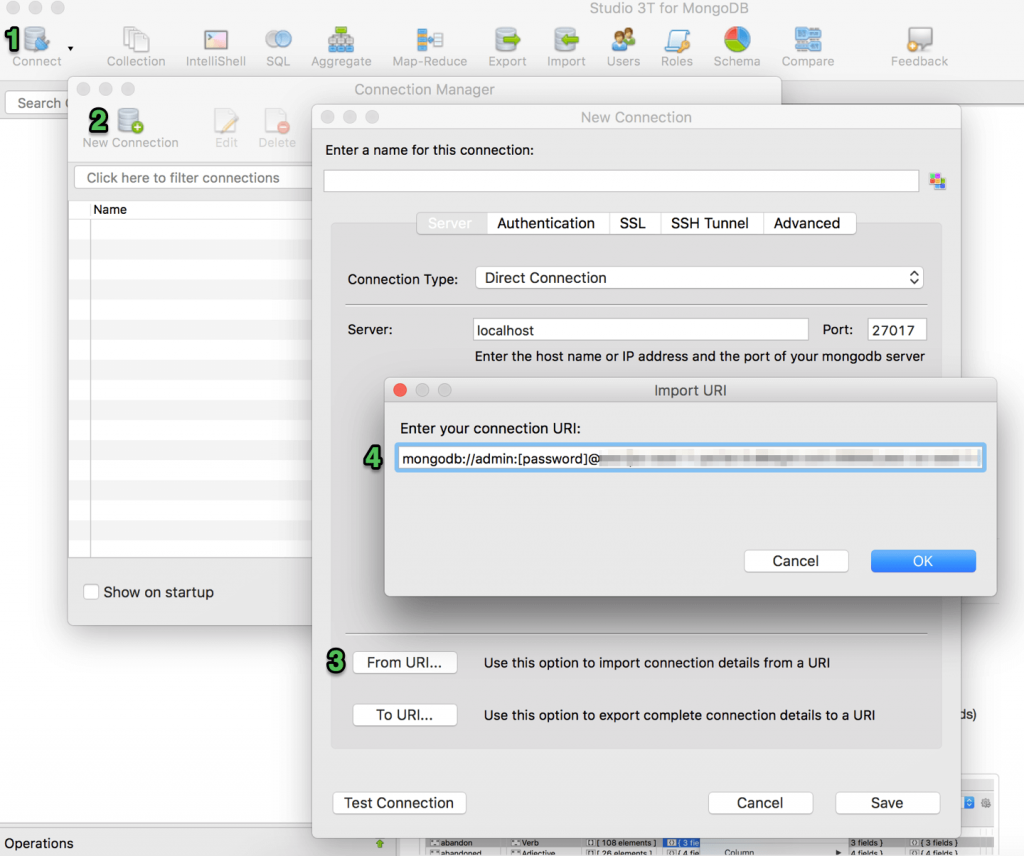
- Open Studio 3T and click on Connect.
- Choose New Connection.
- Click on From URI – this will open up the Import URI window.
- Paste the connection string from Compose and click OK.
Configure connection details
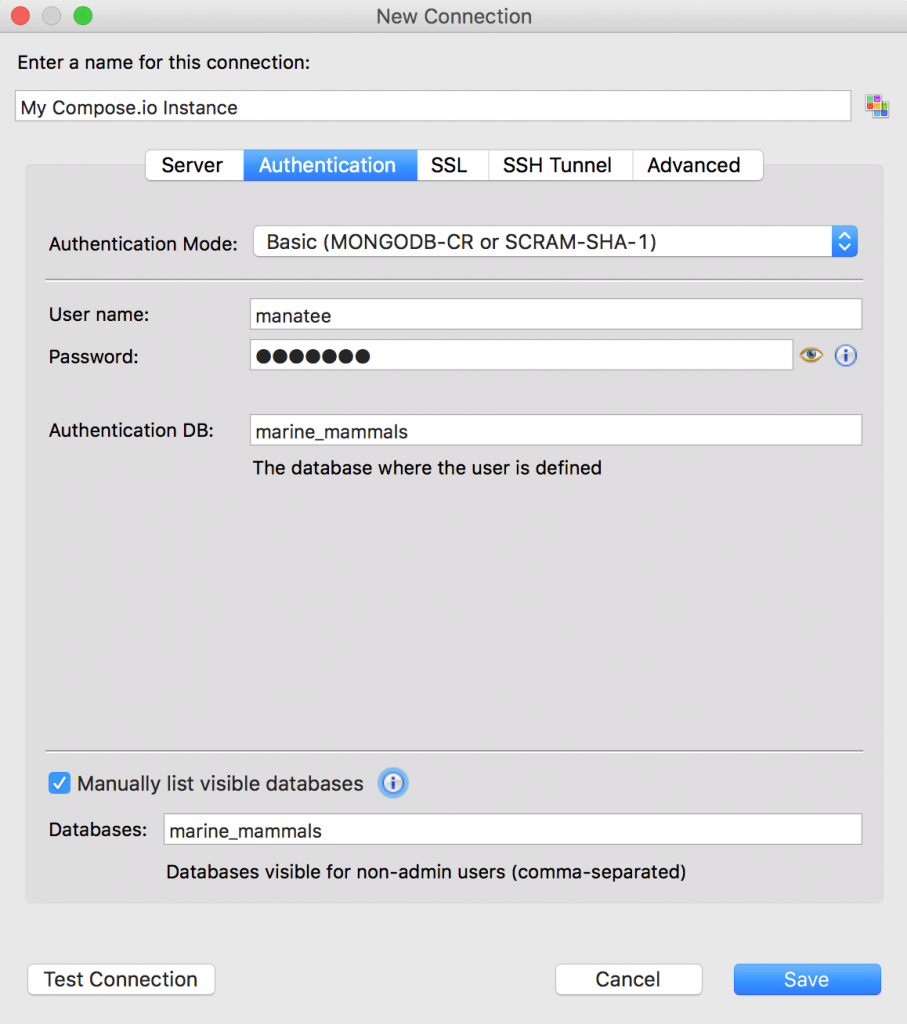
Now it’s time to modify the placeholder texts.
- Click on the Authentication tab to modify your username and password.
- Enter a name for the connection.
- Click Save – this will store your connection details in the Connection Manager.
4. Click Connect.
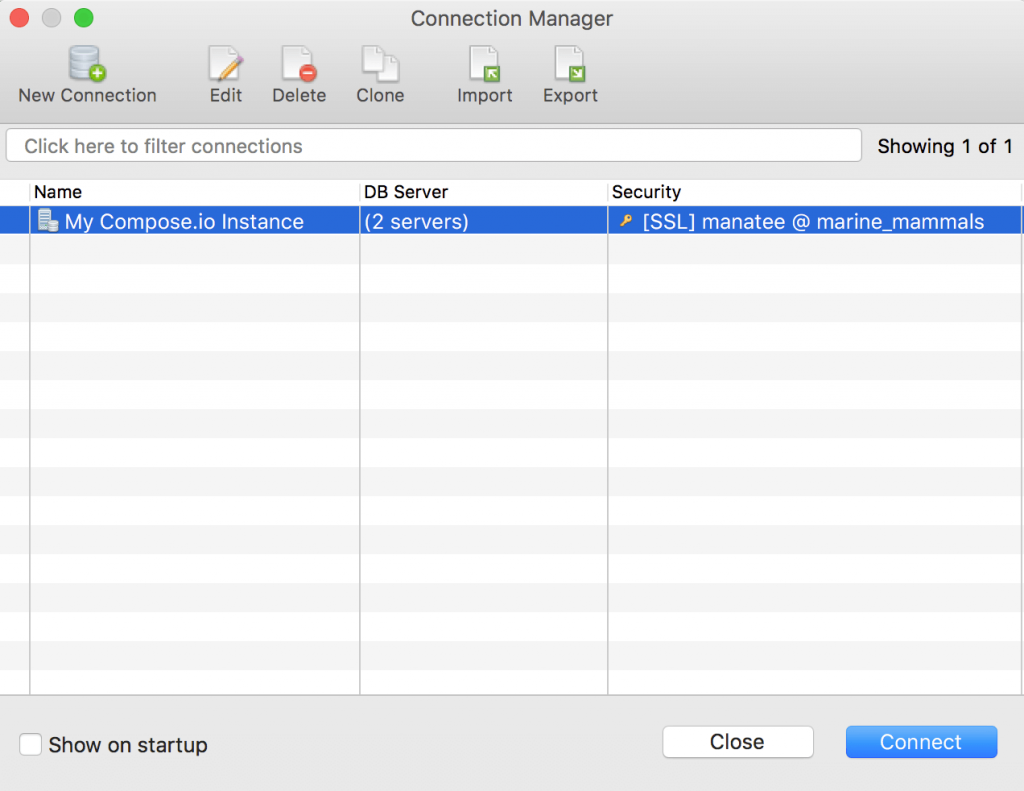
Add a MongoDB user
If you’re logged into Studio 3T as a user with admin rights, then you can add users directly in our MongoDB GUI without having to do it through Compose’s web interface.
- Click on the Users tab, or right-click on your target database and click Manage Users.
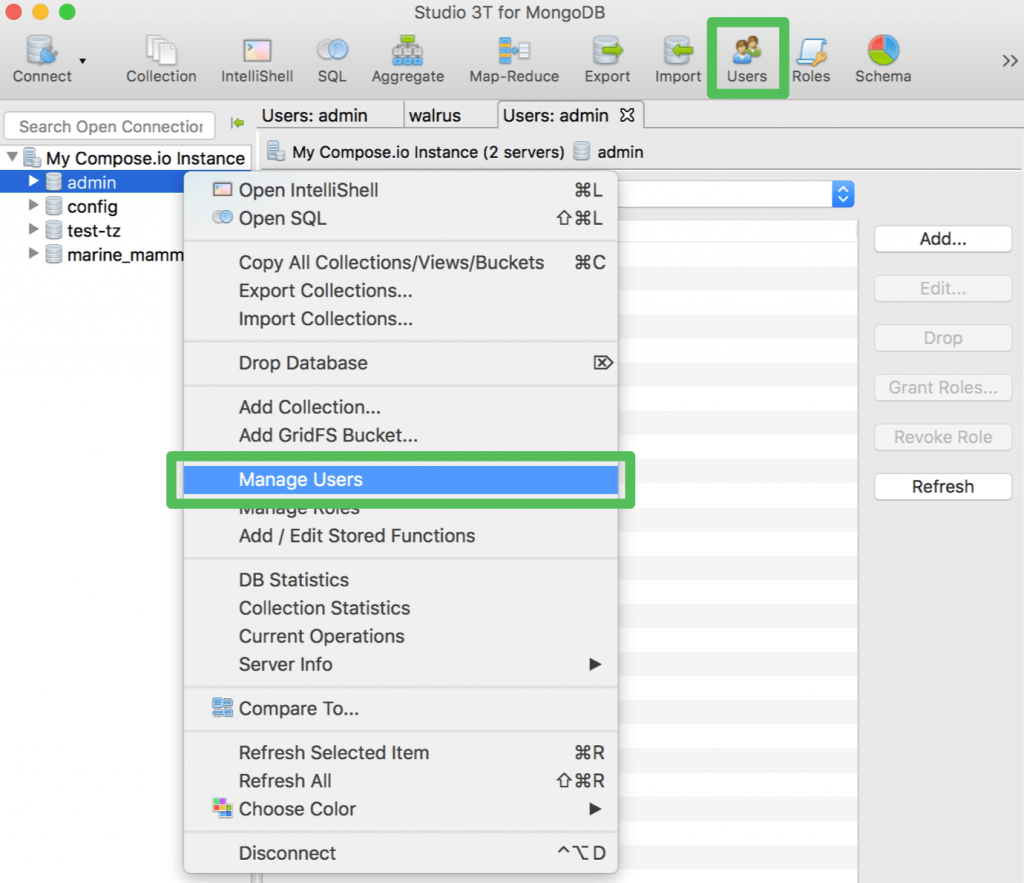
2. Follow steps 2-4 on how to add a new user and grant roles.
Add a MongoDB database
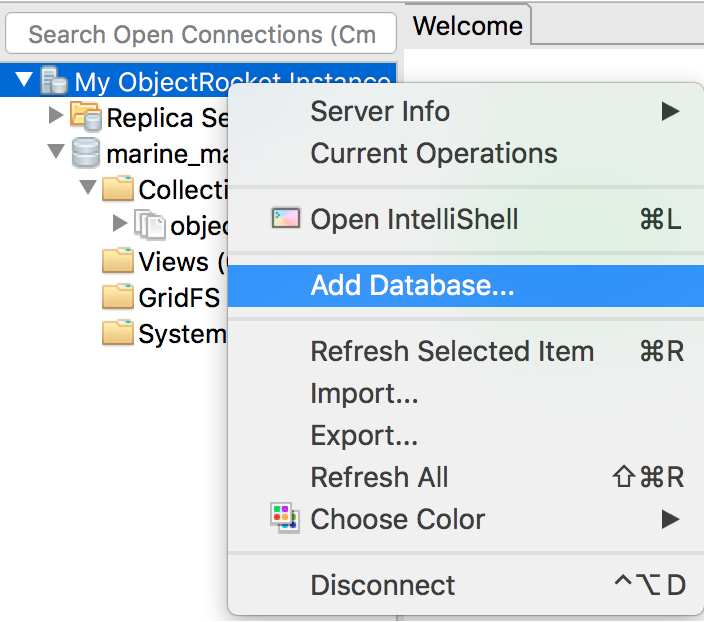
Similar to creating a user, you can also add a database directly to your Compose-hosted MongoDB deployment within Studio 3T. Right-click on a server, click Add Database, give it a name, and done.
