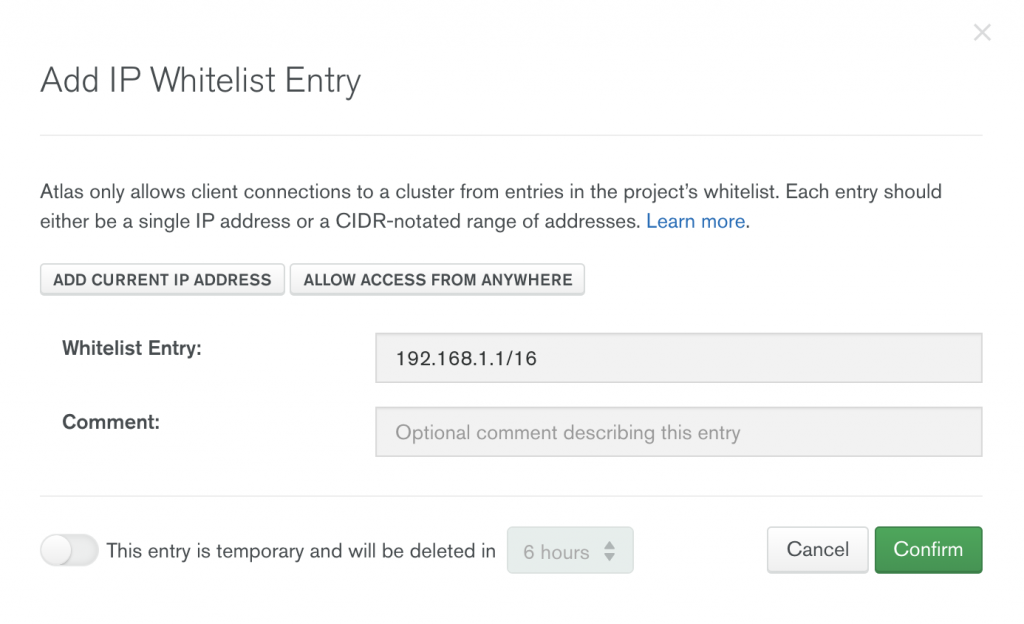
When you create a MongoDB Atlas account, you are asked to “whitelist your current IP address”.
Whitelisting is a sensible precaution to make it difficult for an attacker to get to the point of having the opportunity to guess your credentials.
This security feature, however, has also caused many a headache when connecting to MongoDB Atlas.
In this article, we present solutions to the most common MongoDB Atlas login issues that relate to IP whitelisting.
Why IP whitelisting matters
In Studio 3T, users see the error Prematurely reached end of stream when their current IP address isn’t whitelisted on MongoDB Atlas.
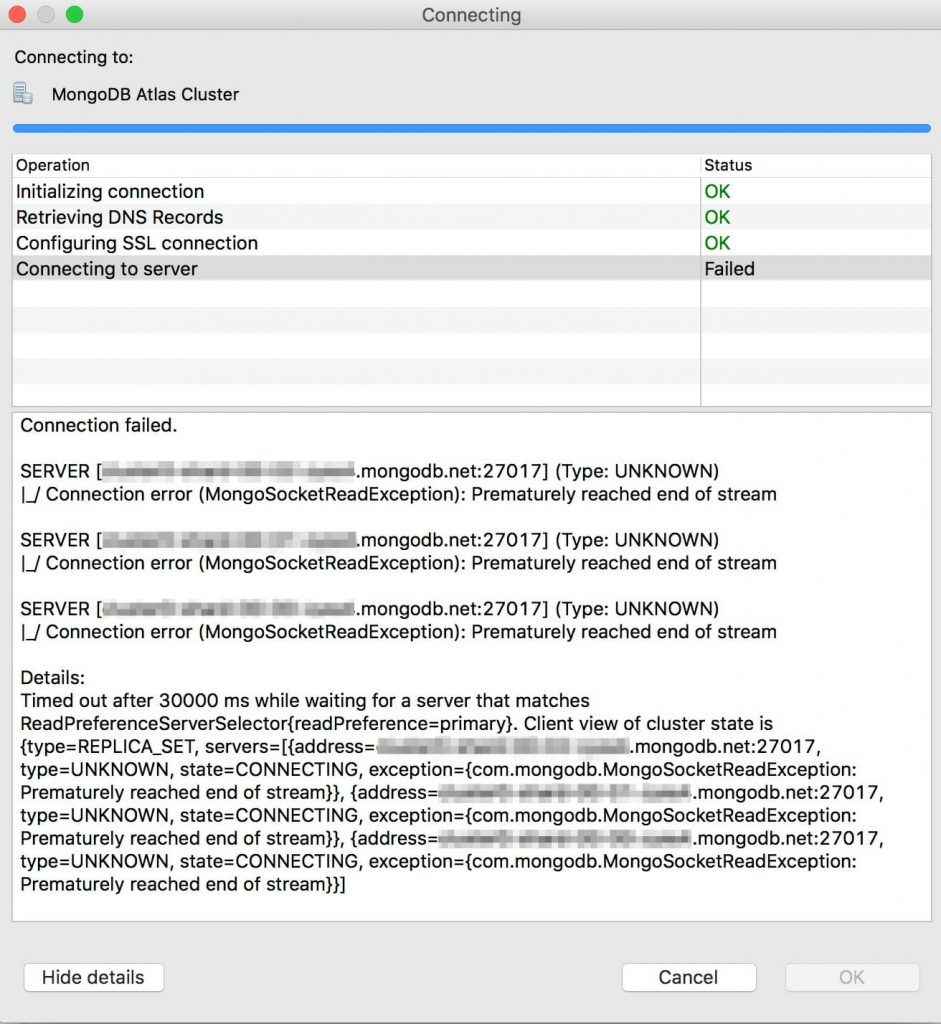
The problem is that most IP addresses are dynamic, instead of static. They change over time as your network assigns them to devices connecting to the internet. As one user reported, even a quick power shortage was enough for his router to change its IP address.
MongoDB Atlas only allows client connections to your cluster from IP addresses that are matched by entries in your project’s IP whitelist.
You may need to access your cluster from several locations, and these locations can involve the IP address being allocated to you just for that connection. This is why you need to whitelist both your home and work IP address, for example.
Even your own permanent location can have an dynamic IP address allocated within a range. If you are allowing cloud-based processes such as websites to access your Atlas cluster, you will need to add the IP addresses of your services to your Atlas project’s IP whitelist to grant those services access to the cluster.
A well-managed whitelist is a valuable first-line defense that will deter a high proportion of opportunistic attackers. Each whitelist entry can either be a single IP address or a range of addresses – and you can enter up to 200 whitelist entries.
Changes to old IP addresses
Because most IP addresses change over time, the IP address you whitelisted in MongoDB Atlas might have changed since your initial setup. This is perhaps the most common MongoDB Atlas login issue.
Follow these steps to add your current IP address to the IP whitelist tab, or add a range of IP addresses as listed by your provider.
Wrong current IP address detected
On the note of detecting current IP addresses, sometimes MongoDB Atlas doesn’t (automatically) get it right.
If you’ve already whitelisted your current IP address and you’re still getting a connection error after your MongoDB Atlas login, try a quick “whats my ip” Google search or use a tool like whatsmyip.org.
Double-check that the IP addresses are the same, and if not, try whitelisting the other IP addresses instead.
If the other IP addresses also don’t work, continue reading this troubleshooting guide to see if other factors are at play: maybe you need to whitelist your VPN or check your router settings.
Connecting from a different physical location
If you’ve set up your MongoDB Atlas connection, say in the office, and are now trying to connect from home, that means you need to add your home IP address to the IP Whitelist tab, too.
Add the new IP address by following these steps.
Connecting to MongoDB Atlas through a VPN
If you’re using a VPN and are getting a connection error, chances are you’ve whitelisted your current IP address but MongoDB Atlas is still blocking your VPN’s IP address.
Confirm that you have your VPN IP address and add it to your IP whitelist tab.
Router settings
Some users have reported that their router sometimes didn’t allow them to connect to the default MongoDB ports.
A good way to check is to connect to a different network (e.g. tethering to your phone for internet) to see if connecting to MongoDB Atlas works then. If it does, then it could very well be a router setting issue.
How to whitelist IP addresses on MongoDB Atlas
Whitelist your current IP address
With your MongoDB Atlas login credentials, open your account and find the cluster that is triggering the error message.
Next, click on Network Access under the Security tab on the left-hand sidebar. This will take you to the IP Whitelist tab.
Click on Add IP Address in the top-right corner. This will open the Add IP Whitelist Entry dialog.
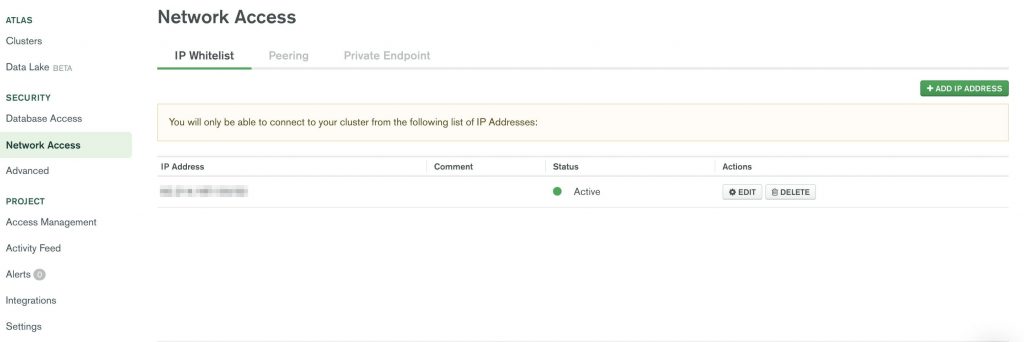
Click on Add current IP address. MongoDB will automatically detect your current address, then click Confirm.
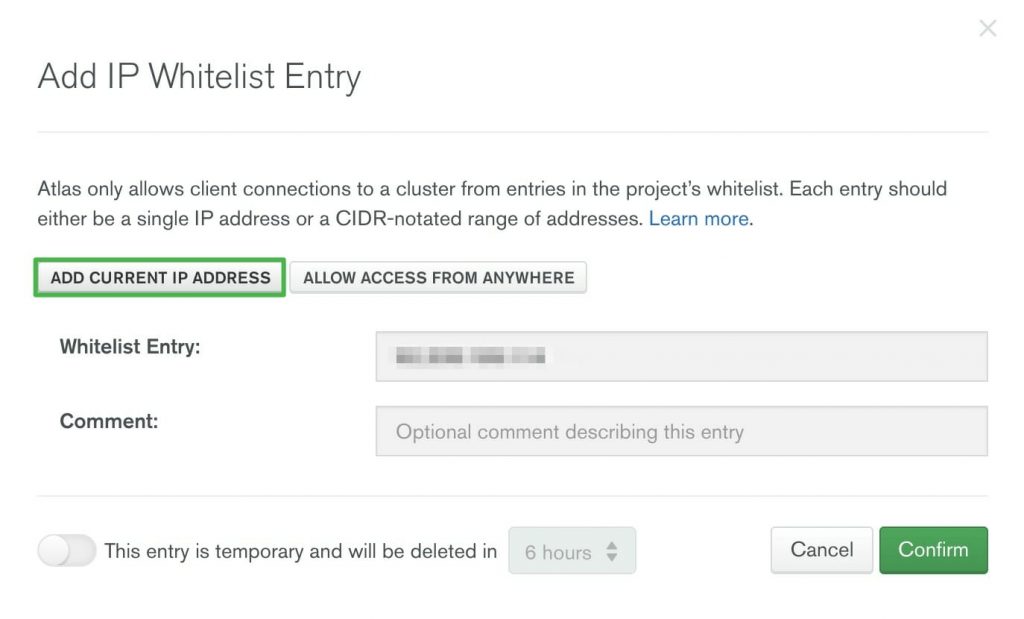
MongoDB Atlas will take a few minutes to deploy the changes, after which you should be good to go.
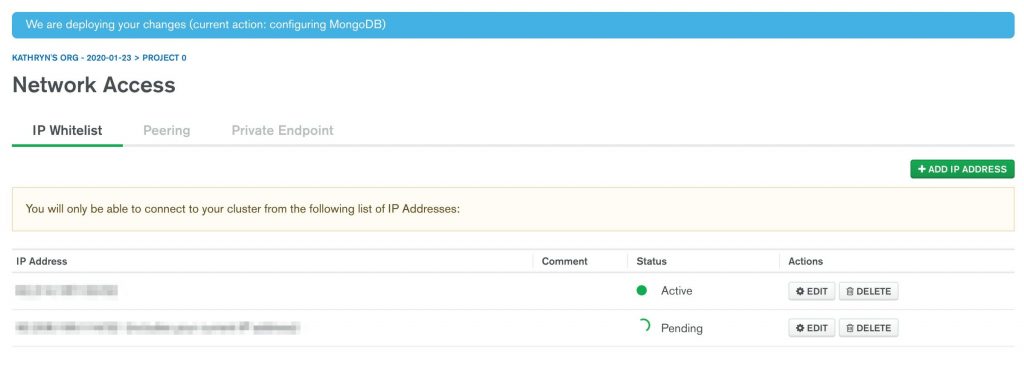
This IP address should be the same that appears when you search for it manually, using tools like whatsmyip.org.
Whitelist multiple or additional IP addresses
To whitelist multiple IP addresses, go to your target cluster on MongoDB Atlas.
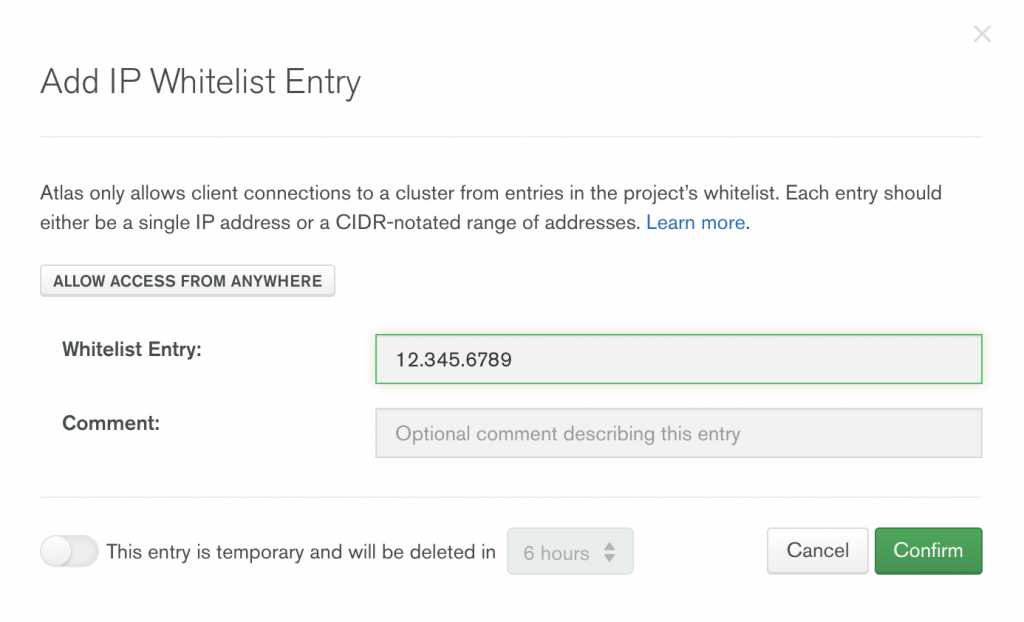
Next, go to Network Access under the Security tab. On the IP Whitelist tab, click on Add IP address.

Type your IP address manually under Whitelist Entry, then click Confirm.
Whitelist a range of IP addresses
To whitelist a block of IP addresses, you may need to look up the IP ranges that your provider has allocated to you. With luck, these will already be in Classless Inter-Domain Routing (CIDR) form.
In MongoDB, you can enter this range by going to Network Access under the Security tab. On the IP Whitelist tab, click on Add IP address.
Enter the range under Whitelist Entry, then click Confirm.
