Skip to content
Studio 3T - The professional GUI, IDE and client for MongoDB
  • Tools
    • Aggregation Editor
    • IntelliShell
    • Visual Query Builder
    • Export Wizard
    • Import Wizard
    • Query Code
    • SQL Query
    • Connect
    • Schema Explorer
    • Compare
    • SQL ⇔ MongoDB Migration
    • Data Masking
    • Task Scheduler
    • Reschema
    • More Tools and Features
  • Solutions
  • Resources
    • Knowledge Base
    • MongoDB Tutorials & Courses
    • Tool/Feature Documentation
    • Blog
    • Community
    • Testimonials
    • Whitepapers
    • Reports
  • Contact us
    • Contact
    • Sales Support
    • Feedback and Support
    • Careers
    • About Us
  • Store
    • Buy Now
    • Preferred Resellers
    • Team Pricing
  • Download
  • My 3T
search

Studio 3T Knowledge Base

  • Documentation
  • Tutorials
  • Workshops
Take the fastest route to learning MongoDB. Cover the basics in two hours with MongoDB 101, no registration required.
Start the free course

MongoDB Atlas Tutorial: Set Up a Free Tier Cluster & Import Your First Collection

Posted on: 22/07/2020 (last updated: 09/03/2022) by Robert Sheldon

In this MongoDB Atlas tutorial, you’ll learn how to set up a cluster using the M0 free tier, connect to your cluster through Studio 3T, and import your first collection from a JSON file.

What is MongoDB Atlas?

MongoDB Atlas is MongoDB’s fully-managed cloud database service that comes with a free tier. The service is built to handle enterprise workloads, with support for global clusters.

You can store your data with Amazon Web Services (AWS), Google Cloud Platform, or Microsoft Azure. However, you don’t need to set up an account with any of these platforms. MongoDB Atlas takes care of all this behind the scenes.

MongoDB Atlas also automatically handles backend administrative processes such as provisioning resources, setting up clusters, or scaling services. Most of the tasks you perform are simple point-and-click operations that you carry out through the service’s centralized web interface.


Set up a free MongoDB Atlas cluster

1. Go to the MongoDB Atlas landing page.

2. Fill in the required information (email address, first name, last name, and password).

3. Click the terms of service and privacy policy links, which should open on a new tab.
If you want to continue with the registration, select the I agree to the terms of service and privacy policy check box.

5. Click the Get started free at the bottom of the form.

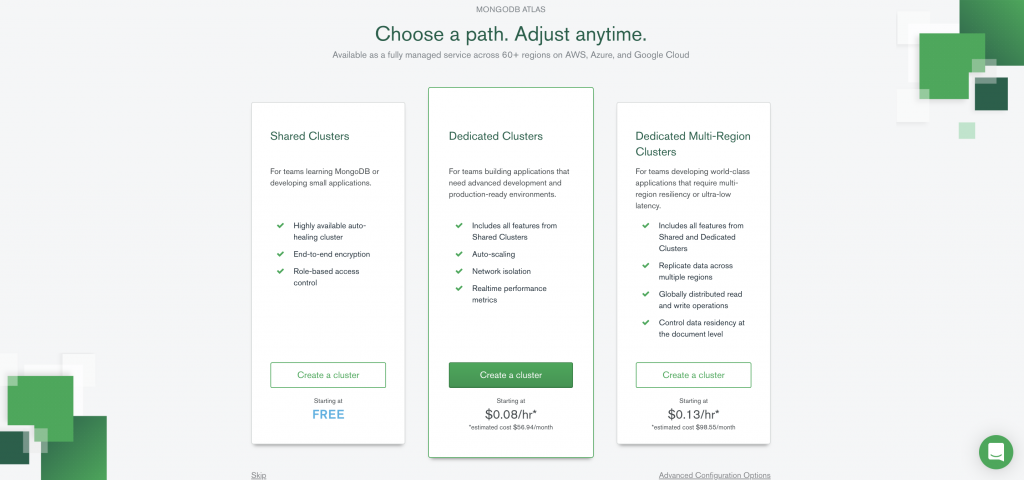
6. The website will ask to choose a cluster. Choose Starter Clusters and click on Create a cluster.

Choose a MongoDB Atlas path

You should also receive a welcome email, which confirms that you’re registered with MongoDB Atlas and includes a link for logging onto the service.

7. In the Cloud Provider & Region section, the aws option should be selected as the default provider, but you can select any provider. All three platforms support the free tier.

8. Beneath the list of providers, select a region.

9. Expand the Cluster Tier section and ensure that M0 Sandbox is selected. This is the free M0 service level.

10. Expand the Cluster Name section and type Cluster1 in the text box.

Choose the MongoDB Atlas cluster

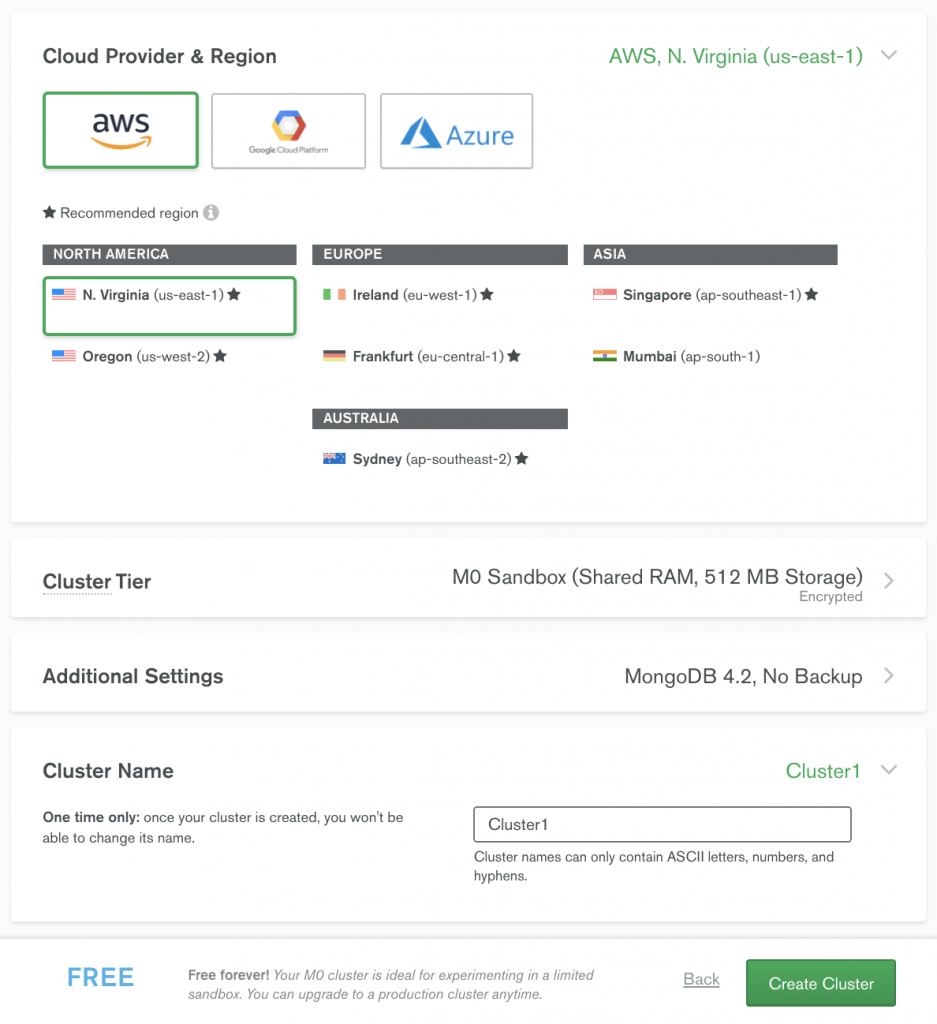
11. Click the Create Cluster button at the bottom of the web page.

12. You should then receive a message stating that your cluster is being created.
When the process is complete, you’ll be taken to the Clusters page, which includes a listing for your new cluster, as shown in the following figure.

MongoDB Atlas clusters overview

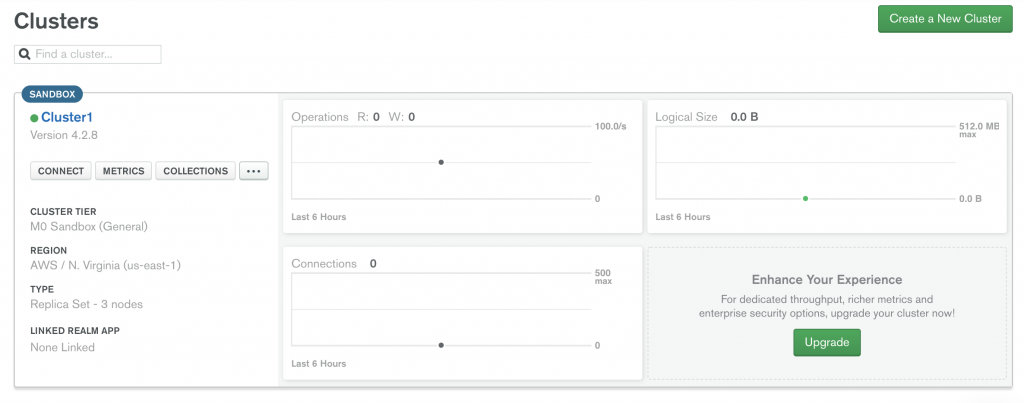
The cluster information includes the service level, cloud provider, and region, along with details about operations, connections and logical size, all of which currently show zero amounts.

Configure IP address and connection string

Next, you’ll configure MongoDB Atlas to connect to the cluster you created.

For this, you will need the IP address of the device that will connect to the service.

If you plan to connect to MongoDB Atlas on the same device where you’re setting up the service, MongoDB Atlas can find the local IP address automatically.

As part of this exercise, you’ll also set up an administrator account for accessing the cluster.

You’ll then generate a connection string or Uniform Resource Identifier (URI) based on this account. You’ll be able to use the connection string in Studio 3T, which we’ll use to access MongoDB Atlas.

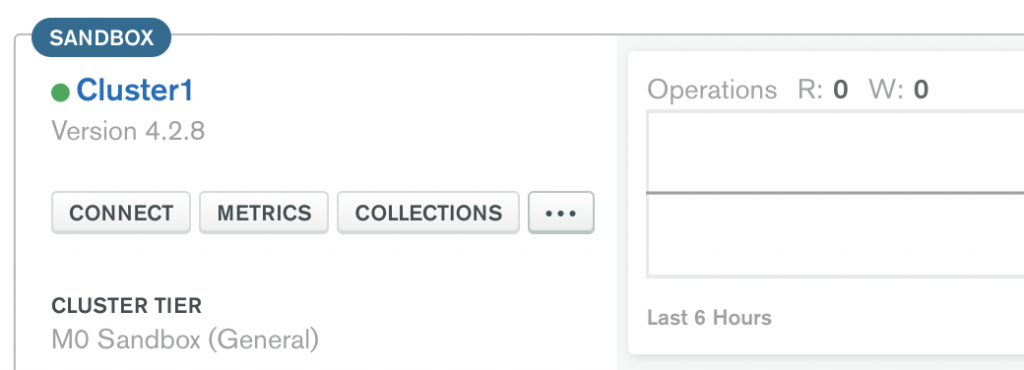
1. In the Cluster1 section of the Clusters page, click the CONNECT button in the left pane.

Click on Connect

The Connect to Cluster1 dialog box appears, showing the two steps you must take to configure your connection.

Connect to Cluster1 dialog

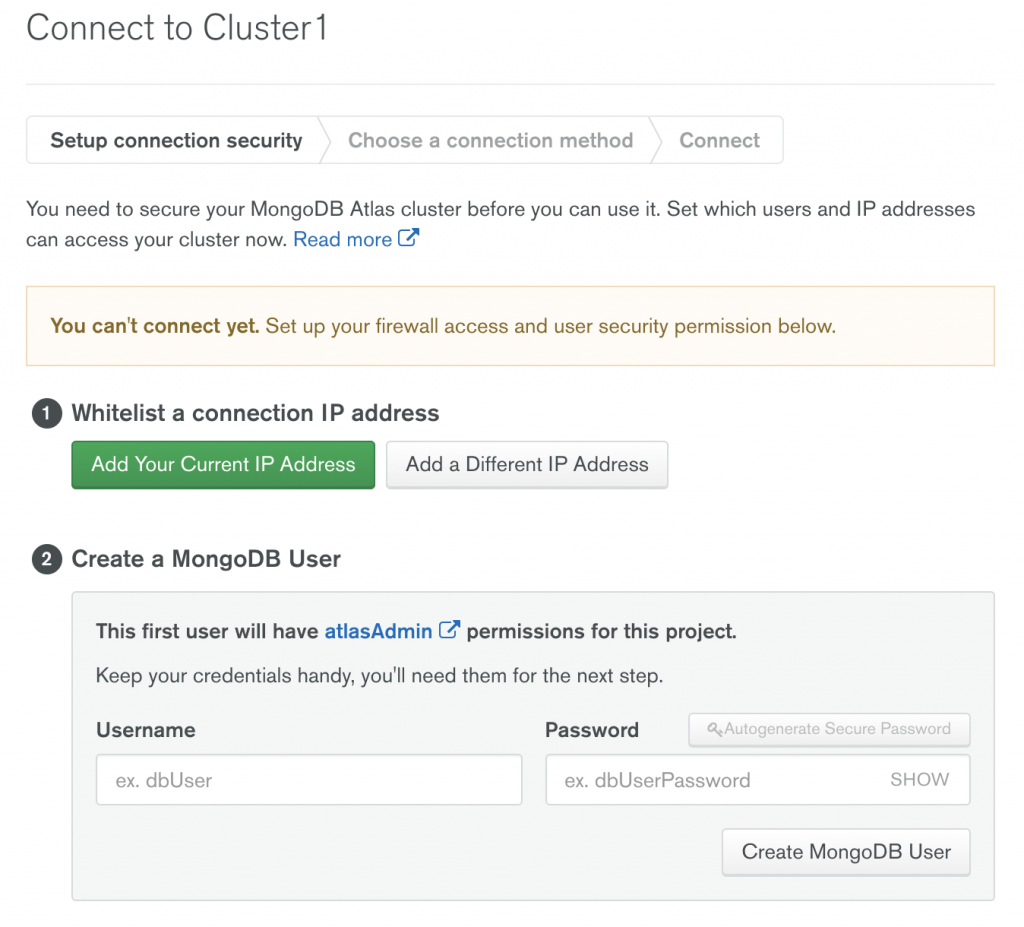
2. For security reasons, MongoDB Atlas blocks all outside connections by default. In order to connect, you must first whitelist your IP address. In the Step 1 section, do one of the following:

Add current IP address
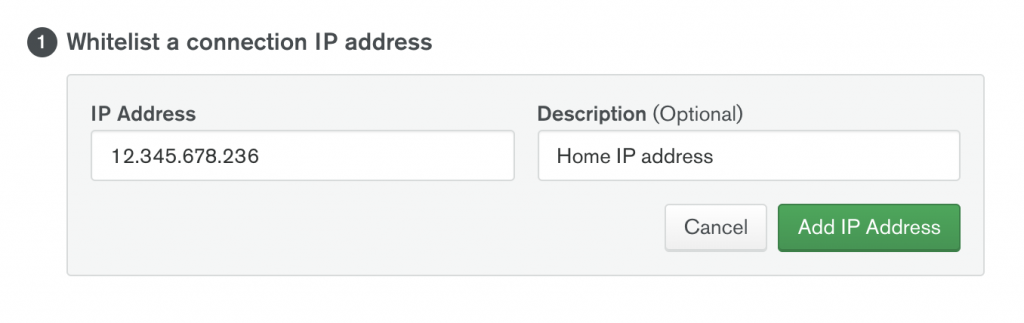
  • If you plan to connect from the computer you’re currently using, click Add Your Current IP Address and then click Add IP Address.
  • If you plan to connect from a different computer, click Add a Different IP Address, type the IP address, and then click Add IP Address. You can edit the IP address, add IP addresses, or delete them at any time in case you change devices.

3. In the Step 2 section, type admin in the Username text box (or whatever name you want to use), and then type a password in the Password text box.

To make it easier to connect to MongoDB Atlas from Studio 3T, your password should include only alphanumeric characters, that is, letters and numbers only with no special characters.

If you use special characters, you will need to encode them when creating a connection string for accessing the MongoDB service.

To generate a password automatically, click the Autogenerate Secure Password button. A password will be generated that includes only alphanumeric characters. Be sure to save the password somewhere secure.

4. Click the Create MongoDB User button.

5. The next task is to generate the connection string or Uniform Resource Identifier (URI).

To start this process, click the Choose a connection method button. The Connect to Cluster1 dialog box reappears, providing a different set of options.

6. Click Connect Your Application. You’ll again be presented with two steps.

7. In the Step 1 section, select Java from the DRIVER drop-down list, and select 3.6 or later from the VERSION drop-down list.

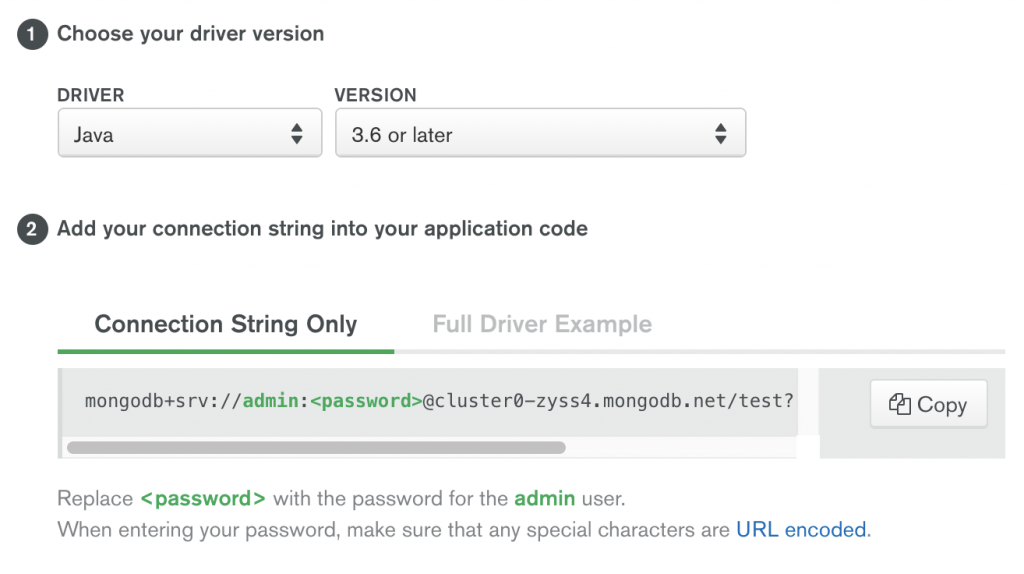
These are the settings that Studio 3T requires to connect to MongoDB Atlas.

When you select the driver and version, the service automatically updates the connection string in the Step 2 section.

8. In the Step 2 section, click Copy to copy the connection string to your clipboard, and then paste the connection string to a safe location.

When you use the connection string or URI, you must replace the placeholder with the password you created for the administrator account. Don’t forget to remove the <> as well.

9. Click Close to close the Connect to Cluster1 dialog box, and then sign out of the MongoDB Atlas service.

Connect and import data

Prerequisite: Download and install Studio 3T, available for Windows, macOS, and Linux. 

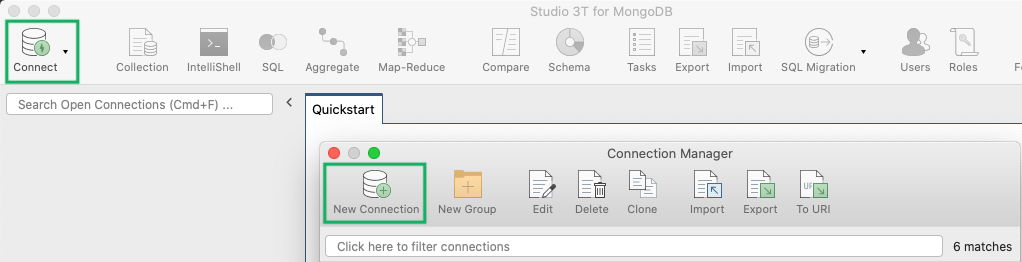
1. Open Studio 3T and click on Connect in the top-left corner of the toolbar. This will open the Connection Manager.

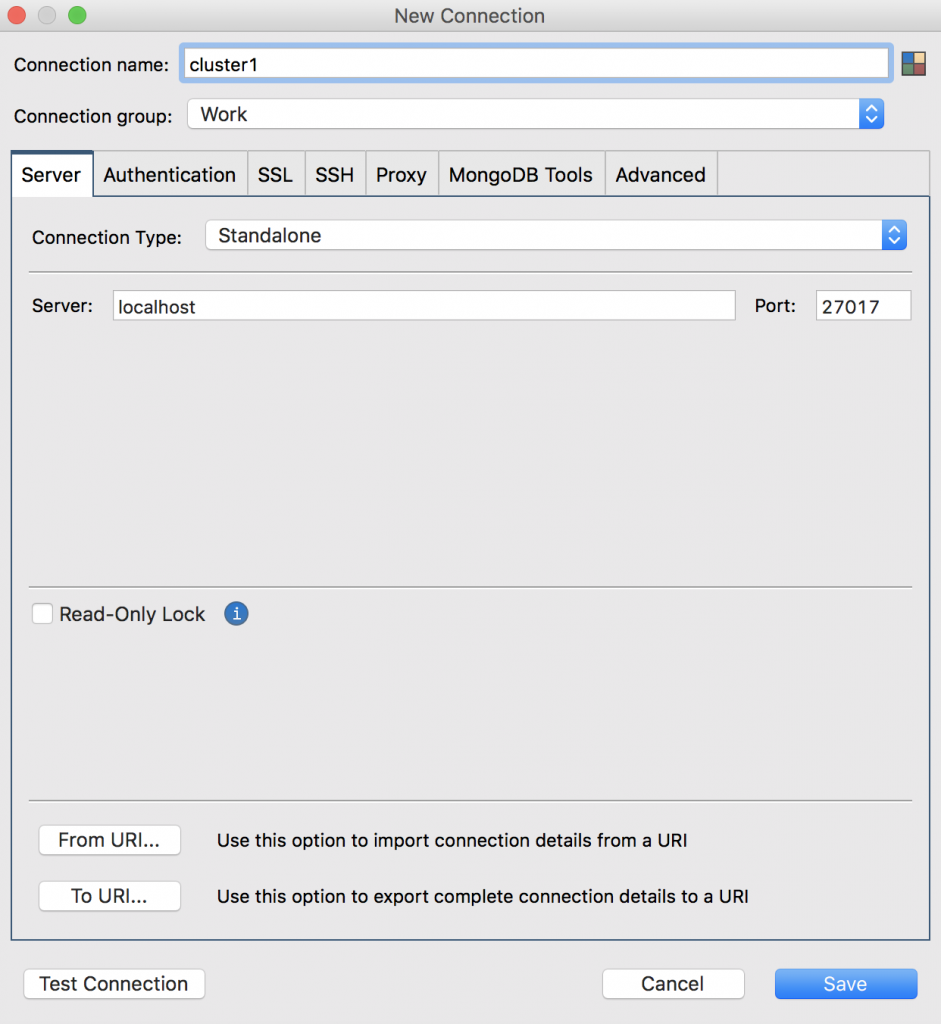
2. Click on New Connection in the top-left corner, which will open a new connection window.

3. Name the connection and click on the From URI button.

Connect to your MongoDB cluster1 via Studio 3T

4. Paste the connection string you copied from MongoDB Atlas.

Paste the MongoDB connection string

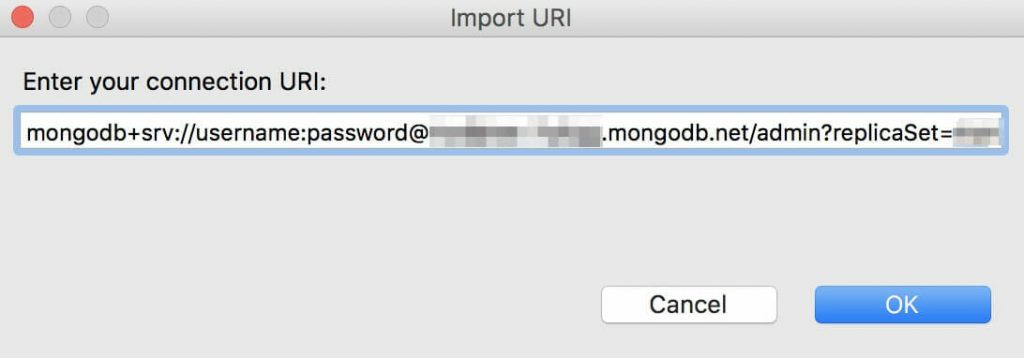
5. Replace the placeholder “<password>” with your actual password and “<dbname>” with the name of the database that connections will use by default. Make sure to replace the brackets too, and click OK.

Studio 3T will automatically extract the information and pre-populate the fields in the Server, Authentication, SSL, SSH Tunnel, and Advanced tabs. It will also save the connection for later use.

6. Click through the Server, Authentication, SSL, and SSH Tunnel tabs and verify that the information is correct.

7. Click Save. Then click Connect. You should see cluster1 in the Connection Tree.

cluster 1 in the Connection Tree

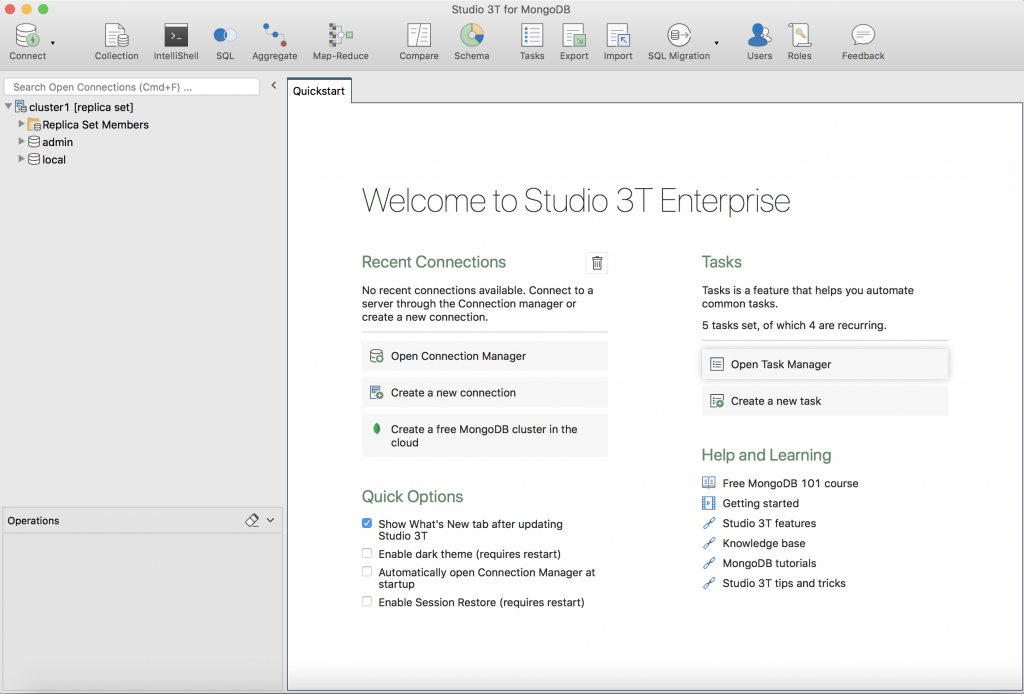
8. In the Connection Tree, right-click the connection (top-level node) and click Add Database.

3. In the Add Database dialog box, read the information about creating an empty database.

When you create a database in Studio 3T, you’re basically adding a temporary node to the Connection Tree. MongoDB does not create the actual database or its files until you add your first collection.

4. Type pubs in the Database Name text box, and then click OK.

Add pubs as a database to your MongoDB Atlas cluster

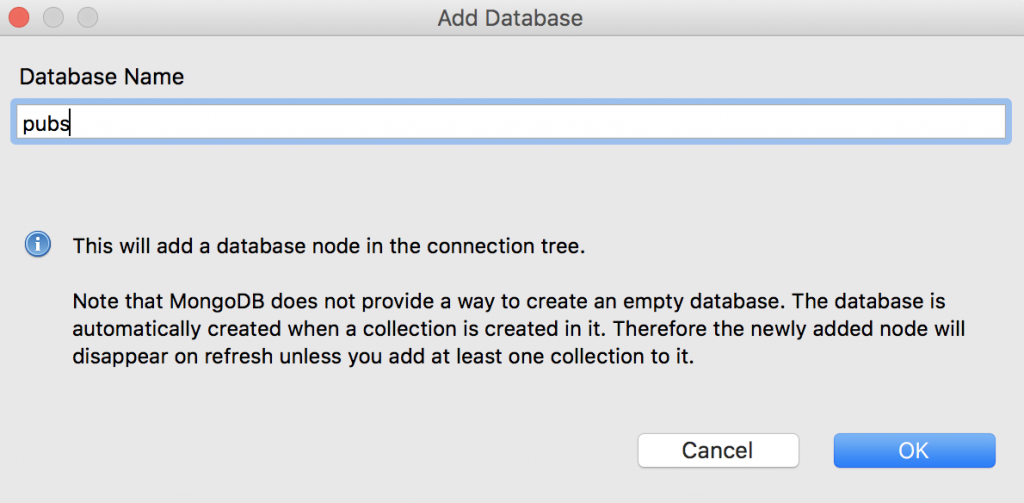
Studio 3T adds the pubs database node to the Connection Tree.

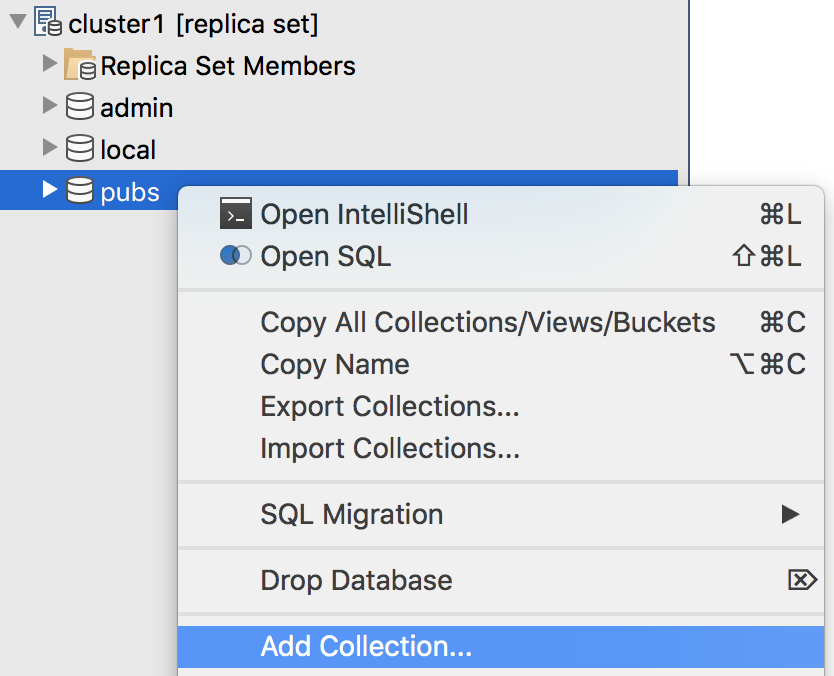
5. Right-click the pubs database node and click Add Collection.

Right-click to add collection

6. In the Add New Collection dialog box, type welsh_pubs in the Collection Name text box, and then click Create.

Add the welsh_pubs collection

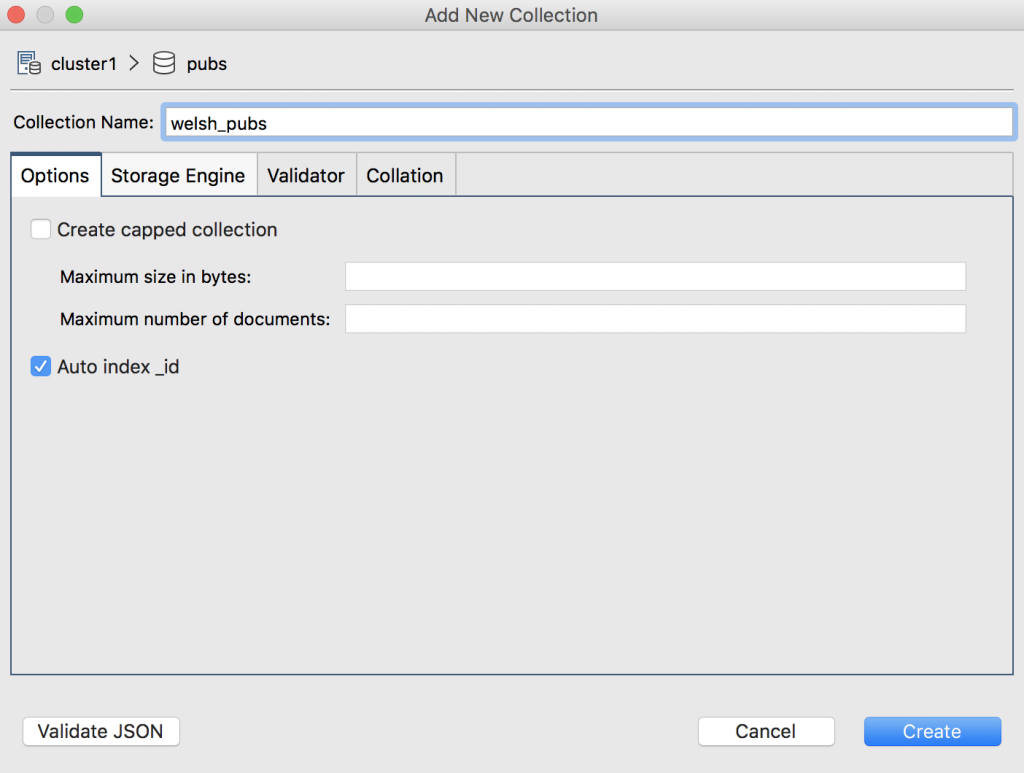
Do not worry about the other collection settings at this time. Studio 3T opens the welsh_pubs collection tab, which has many parts that you can read more about here.

You can already choose to view your data either in Table, Tree, or JSON View.

7. Download this welsh_pubs.json file and open it in a text editor such as Notepad (Windows) or TextEdit (macOS).

8. In the text editor, copy the entire contents of the file to the clipboard.

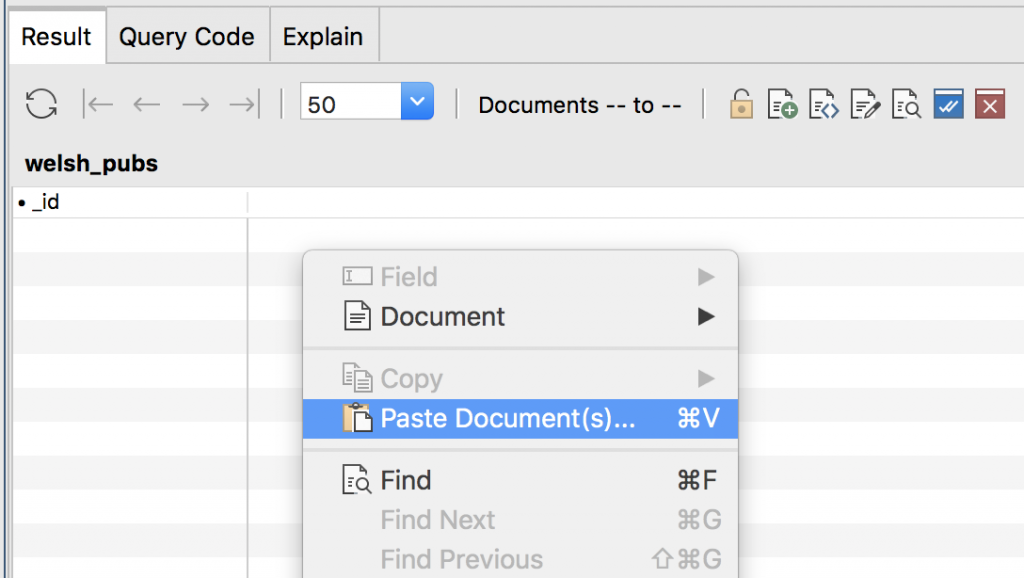
9. In Studio 3T, go to the welsh_pubs collection tab, right-click the main document region of the Result tab, and click Paste Document(s).

Paste documents from clipboard

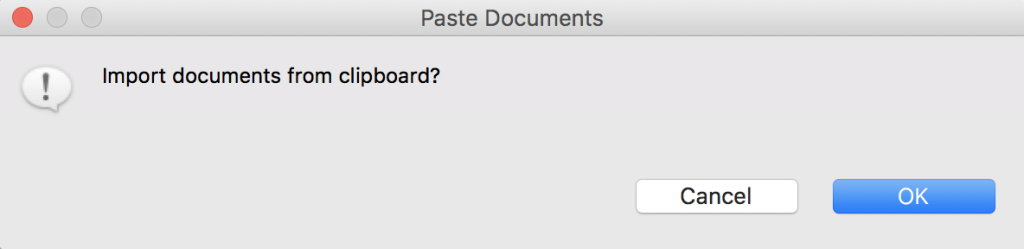
10. In the Paste Documents dialog box, click OK.

11. When the import process is complete, you should receive a confirmation message stating that 3,122 documents have been imported. Click OK to continue.

Click OK to paste the documents

12. On the Result tab toolbar, click the Refresh button. The tab should now display the first 50 documents in the result set.

Refresh to view pasted documents

13. At the bottom of the Result tab, click the Count Documents link.

The count should show 3,122 documents. This is a handy tool to know about for verifying the number of documents returned by the current query.

In addition to copying and pasting documents, you can also import CSV, JSON, mongodump/BSON and SQL to MongoDB with Studio 3T’s Import Wizard:

  • Import JSON to MongoDB
  • Import CSV to MongoDB
  • Import BSON/mongodump to MongoDB
  • Import SQL to MongoDB

Congratulations! You’ve just set up your free MongoDB Atlas cluster, connected to it via Studio 3T, and created your first collection.


What’s next?

MongoDB 101 by Academy 3T

This MongoDB Atlas tutorial is an excerpt from MongoDB 101, the free MongoDB course on Academy 3T. Continue learning the basics of querying, aggregation, working with the mongo shell, and more. Sign up for free here.


How helpful was this article?
This article was hideous
This article was bad
This article was ok
This article was good
This article was great
Thank you for your feedback!

About The Author

Robert Sheldon

Robert is a freelance technology writer based in the Pacific Northwest. He’s written hundreds of articles about technology for both print and online publications, with topics ranging from predictive analytics to 5D storage to the dark web. He’s also contributed to over a dozen books on technology, developed courseware for Microsoft’s training program, and served as a developmental editor on Microsoft certification exams. When not writing about technology, he’s working on a novel or venturing out into the spectacular Northwest woods.

Article navigation

Related articles

  • Test your skills: Creating a Collection
  • MongoDB Tutorial: Learn MongoDB in 2 Hours
  • MongoDB Monitoring, Auditing & Authentication: 3 Steps to Secure Your Database
  • MongoDB DevOps Checklist: 3 Steps to Secure Your Database
  • Test your skills: Importing and Exporting MongoDB Data

Studio 3T

MongoDB Enterprise Certified Technology PartnerSince 2014, 3T has been helping thousands of MongoDB developers and administrators with their everyday jobs by providing the finest MongoDB tools on the market. We guarantee the best compatibility with current and legacy releases of MongoDB, continue to deliver new features with every new software release, and provide high quality support.

Find us on FacebookFind us on TwitterFind us on YouTubeFind us on LinkedIn

Education

  • Free MongoDB Tutorials
  • Connect to MongoDB
  • Connect to MongoDB Atlas
  • Import Data to MongoDB
  • Export MongoDB Data
  • Build Aggregation Queries
  • Query MongoDB with SQL
  • Migrate from SQL to MongoDB

Resources

  • Feedback and Support
  • Sales Support
  • Knowledge Base
  • FAQ
  • Reports
  • White Papers
  • Testimonials
  • Discounts

Company

  • About Us
  • Blog
  • Careers
  • Legal
  • Press
  • Privacy Policy
  • EULA

© 2023 3T Software Labs Ltd. All rights reserved.

  • Privacy Policy
  • Cookie settings
  • Impressum

We value your privacy

With your consent, we and third-party providers use cookies and similar technologies on our website to analyse your use of our site for market research or advertising purposes ("analytics and marketing") and to provide you with additional functions (“functional”). This may result in the creation of pseudonymous usage profiles and the transfer of personal data to third countries, including the USA, which may have no adequate level of protection for the processing of personal data.

By clicking “Accept all”, you consent to the storage of cookies and the processing of personal data for these purposes, including any transfers to third countries. By clicking on “Decline all”, you do not give your consent and we will only store cookies that are necessary for our website. You can customize the cookies we store on your device or change your selection at any time - thus also revoking your consent with effect for the future - under “Manage Cookies”, or “Cookie Settings” at the bottom of the page. You can find further information in our Privacy Policy.
Accept all
Decline all
Manage cookies
✕

Privacy Preference Center

With your consent, we and third-party providers use cookies and similar technologies on our website to analyse your use of our site for market research or advertising purposes ("analytics and marketing") and to provide you with additional functions (“functional”). This may result in the creation of pseudonymous usage profiles and the transfer of personal data to third countries, including the USA, which may have no adequate level of protection for the processing of personal data. Please choose for which purposes you wish to give us your consent and store your preferences by clicking on “Accept selected”. You can find further information in our Privacy Policy.

Accept all cookies

Manage consent preferences

Essential cookies are strictly necessary to provide an online service such as our website or a service on our website which you have requested. The website or service will not work without them.

Performance cookies allow us to collect information such as number of visits and sources of traffic. This information is used in aggregate form to help us understand how our websites are being used, allowing us to improve both our website’s performance and your experience.

Google Analytics

Google Ads

Bing Ads

Facebook

LinkedIn

Quora

Hotjar

Functional cookies collect information about your preferences and choices and make using the website a lot easier and more relevant. Without these cookies, some of the site functionality may not work as intended.

HubSpot

Social media cookies are cookies used to share user behaviour information with a third-party social media platform. They may consequently effect how social media sites present you with information in the future.

Accept selected