Data masking protects sensitive information in your MongoDB data by obfuscating collections at field-level, ensuring data privacy and compliance with regulations such as GDPR and CCPA. This helps safeguard personally identifiable information in health and financial data, balancing security with operational needs and reduces the risk of breaches and unauthorized access.
In Studio 3T, you can apply data masking to any field in a collection and overwrite the source collection or export the masked documents to a new collection.

Open Data Masking
1. Launch Studio 3T.
2. Connect to the MongoDB instance that contains the collection you want to mask.
3. Choose the collection from the Connection Tree.
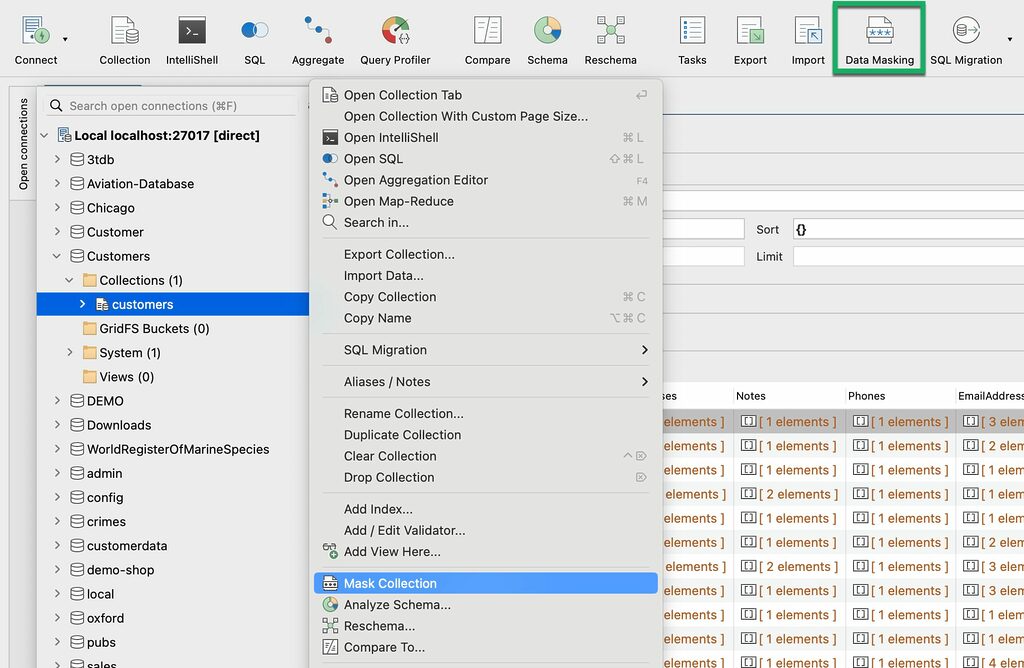
4. With the collection selected, open Data Masking by clicking on the icon in the global toolbar, or by right-clicking on the collection and choosing Mask Collection.
A new Data Masking tab opens with an Overview tab. Studio 3T automatically creates a data masking unit for the collection.
Each data masking unit corresponds to a collection to be obfuscated.
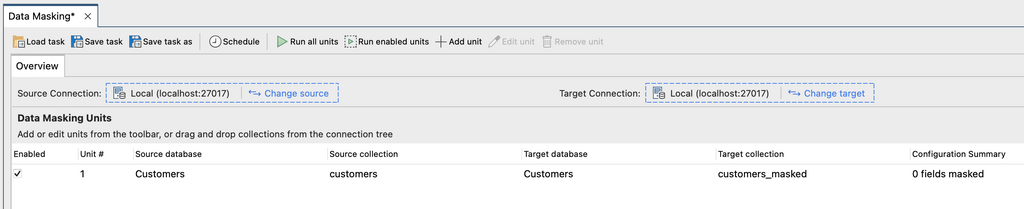
6. (Optional). Choose the source and/or target connection. Selecting Change source or Change target will open the Connection Manager. The default configurations are the current working connection.
7. Double-click on the unit. This opens a separate Data Masking Unit tab where the field-level data masking configuration takes place.
Set the source collection
The source collection is the collection you’ve chosen – or dragged – from the Connection Tree.
Click on Change Source to switch to a different collection within your connection. You have the option to retain the current data masking unit configuration or to create a new default configuration.
Set the target collection
The target collection will be automatically set to <<source_collection_name>>_masked, in the same database where the source collection is located.
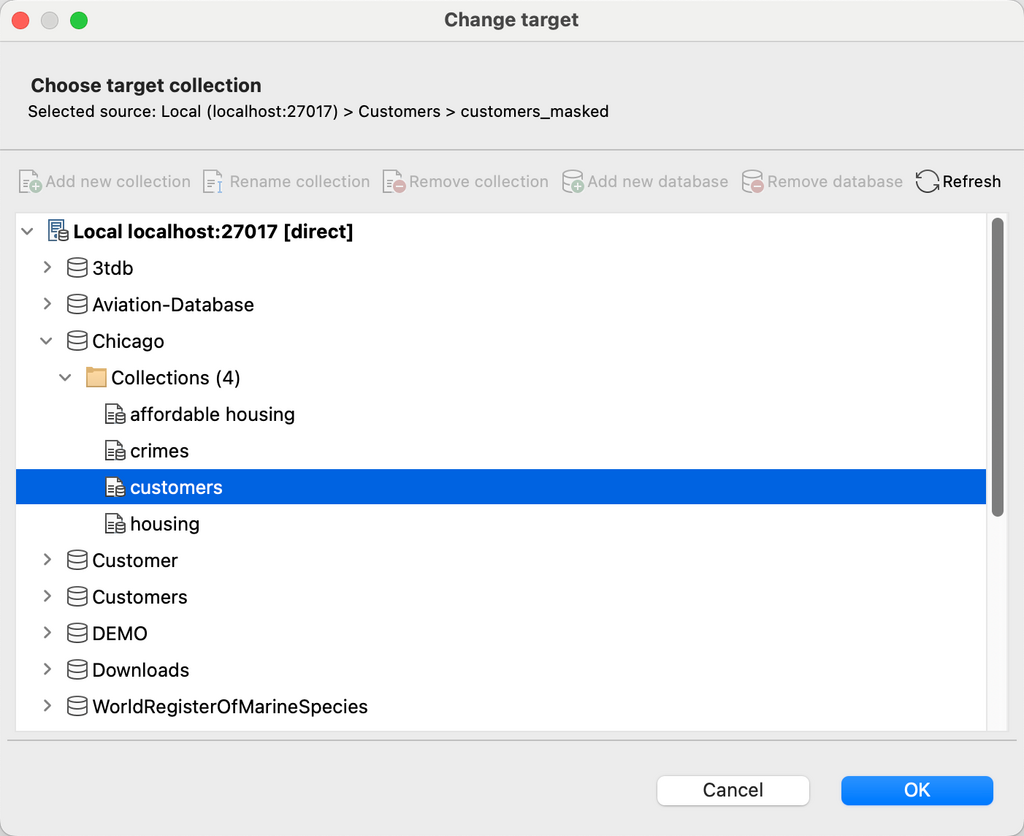
To change the target collection at any time, click on Change Target.
Use an existing collection as a target collection
Choose an existing collection from the list of databases in your connection, then click OK.
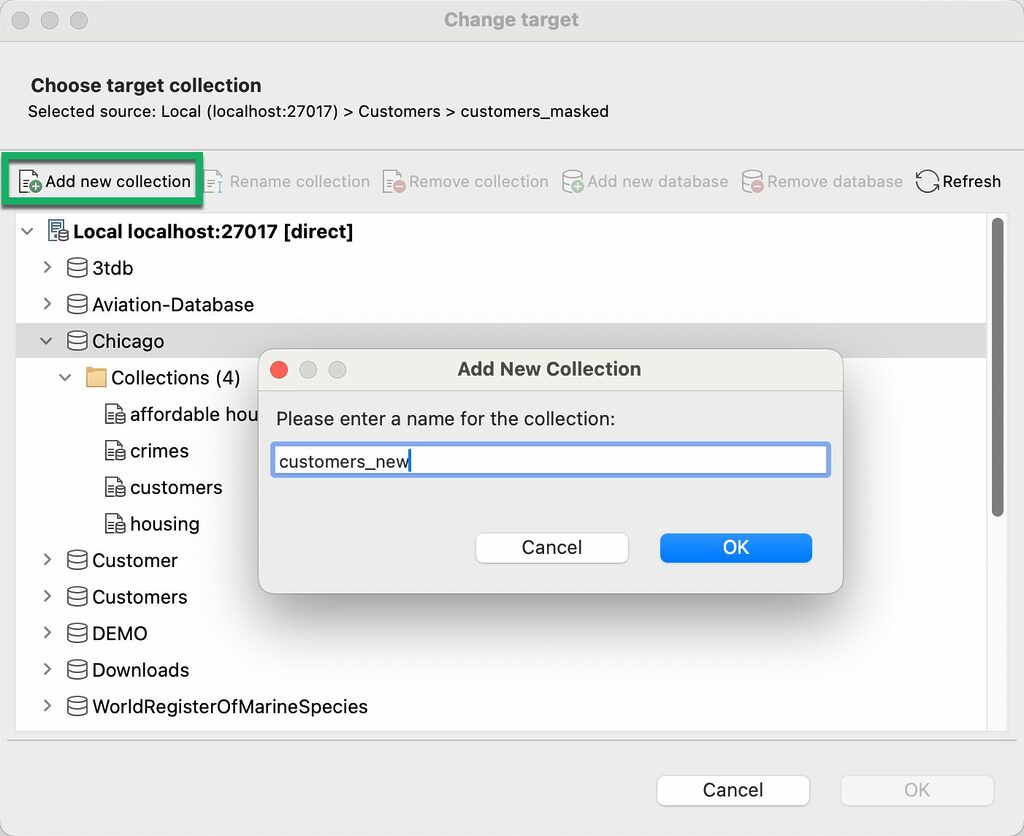
Add a new collection as a target collection
Click on the target database from the tree, click on the Add new collection button, type the new collection name, and click OK.
Overwrite the source collection
It is also possible to overwrite the source collection instead of choosing a target collection.
Click on Click here to overwrite source. Note that overwriting the source will overwrite the original documents in place and masking the _id field will also be disabled.
Apply data masking techniques to fields
You will find all the fields in your source collection in the Mapping Tree section.
Choose a field from the Mapping Tree and click on the Edit mask button. Alternatively, right-click on a field and choose Edit.
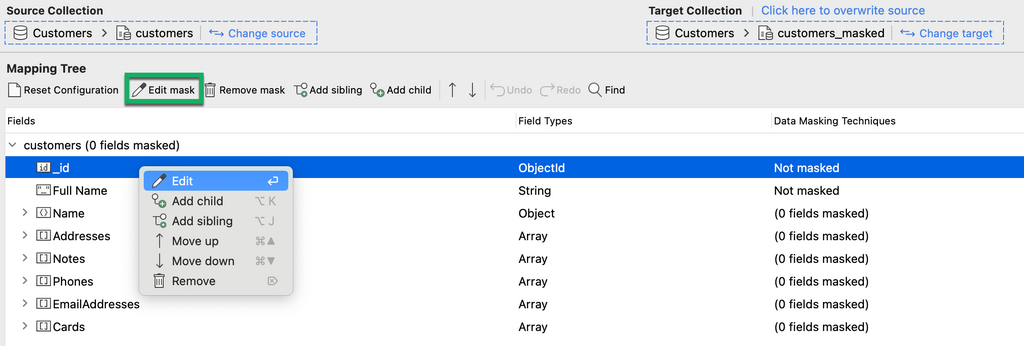
A field masking options dialog opens for you to choose the data masking technique to apply to any given field, depending on its type.
Supported data masking techniques
All field types
- Not masked*
- Null out field*
- Exclude field*
- Shuffle
*These three data masking techniques are the only options for Binary, Regex, Reference, Code, Min key, Max key, Mixed, Symbol, Timestamp, Undefined, and Unknown types.
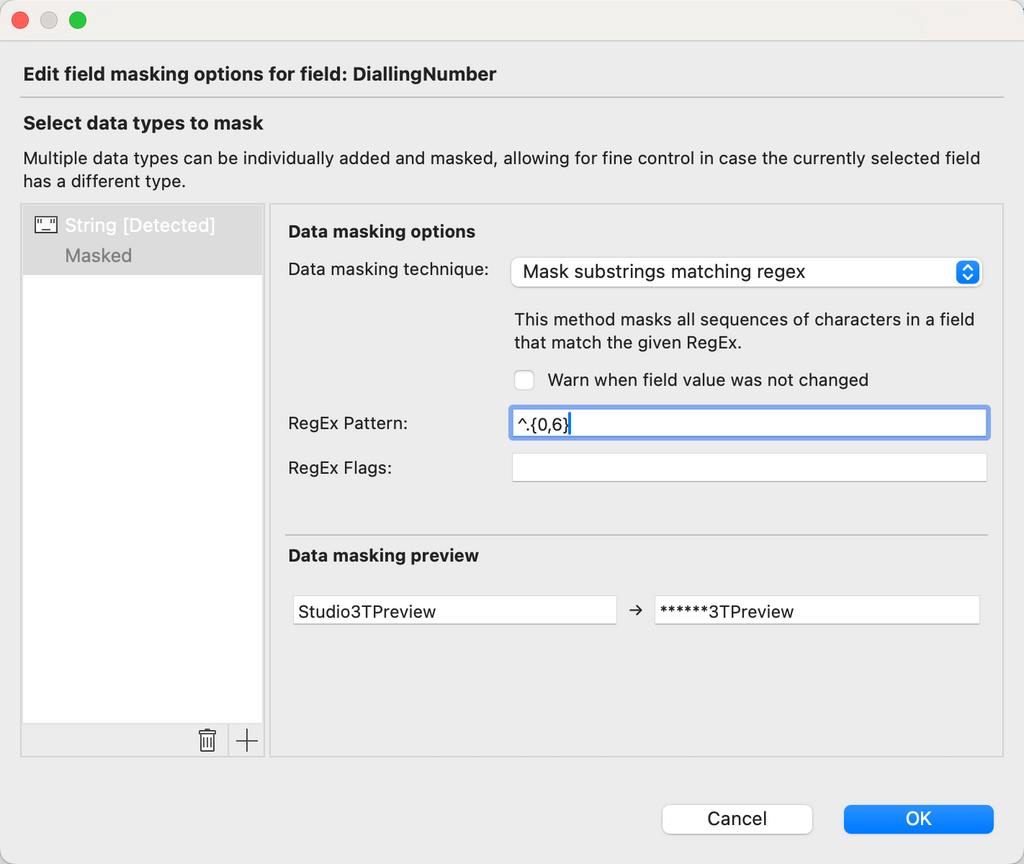
String
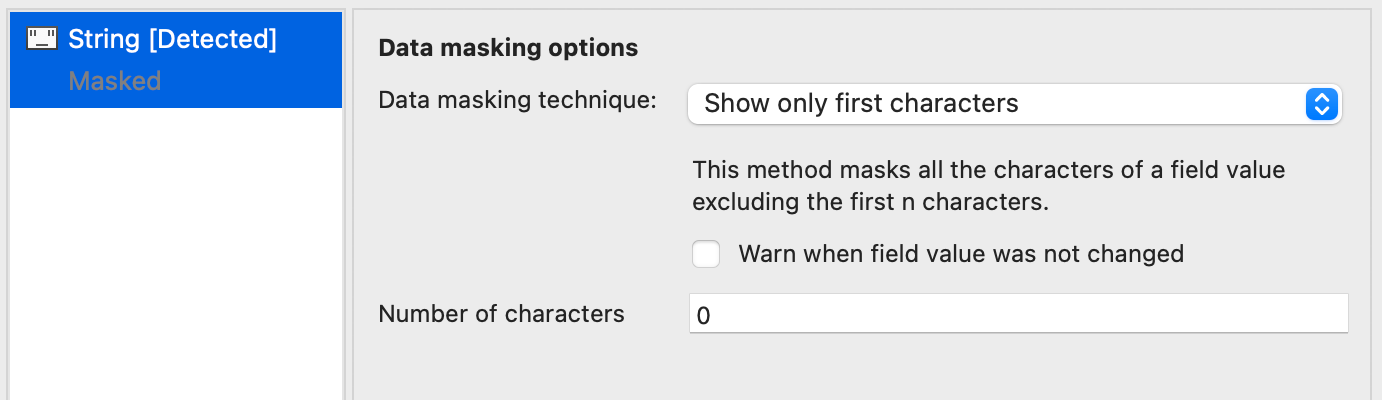
- Show only first or last characters
- Mask entire string
- Mask substrings matching regex
- Scramble characters
- Replace entire field with a fixed string
Replace entire field with a random string
Numeric
Includes Double, Int32, Int64, and Decimal128 types.
- Substitute value with fixed number
- Add percentage to number
- Subtract percentage from number
Date
- Substitute with random date and time
- Substitute with fixed date and time
Array
- Empty contents of the array
Boolean
- Negate boolean value
- Substitute with fixed boolean value
ObjectId
- Substitute with new ObjectId
Preview changes
The JSON Preview tab dynamically updates as you apply data masking methods, so you can preview the documents in the target collection or the overwritten source collection.
View exception and history logs
Next to the JSON Preview tab you’ll find an Exception Logs tab, where you’ll find any exceptions thrown during the data masking configuration.
Exceptions can arise, for example, when two types are detected for the same field in the initial scan, if only two characters are detected in a document but you’ve set a rule to show the first three characters, or if you have chosen to be warned in the field masking options dialog for a particular field.
The History tab tracks all changes made to the source collection.
Mask multiple collections at once
Add data masking units
You can add more units by dragging and dropping collections from the Connection Tree to the Overview tab.
Alternatively, you can click on Add unit in the toolbar. A dialog opens and you can choose another source collection from the tree. Click OK.
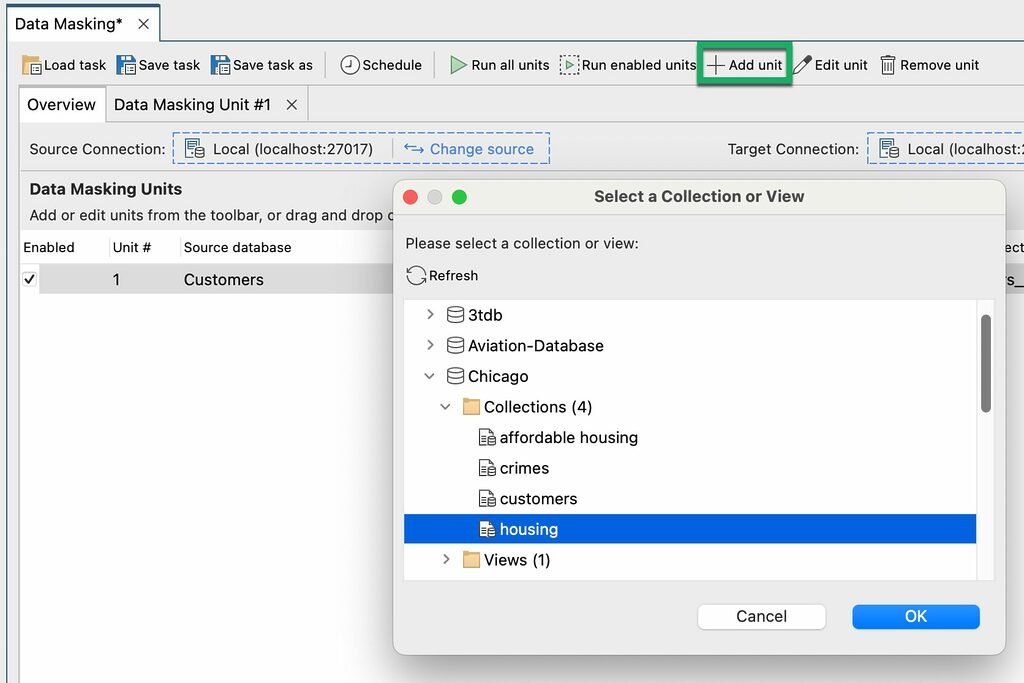
The new data masking unit is displayed in the Overview tab and a separate Data Masking Unit tab opens. Repeat the field-level configuration as needed.
Edit data masking units
From the Overview tab, double-click on the data masking unit.
You can also right-click on the unit and choose Edit selected unit, or select it and click on Edit unit in the toolbar.
Remove data masking units
With a unit tab open, click on Remove unit in the toolbar.
Alternatively from the Overview tab, select the unit to be removed and either click on Remove unit in the toolbar or right-click and choose Remove data masking unit.
Enable/disable data masking units
In the Overview tab, select or clear the checkboxes for the required units. Alternatively, right-click on a unit and choose Enable unit or Disable unit (depending on its state).
Run the data masking job(s)
When you are satisfied the configuration looks good in preview, you can choose to run all units or only the enabled units (in the Overview tab).
Click on either the Run all units or Run enabled units button in the toolbar. You will be prompted if you’d like to continue, then click OK.
You can track the progress of the data masking job in the Operations pane, on the lower-left of the Studio 3T application.
When the data masking job has been run, you will see the masked collection in the target database.
Reset the configuration or detect new fields
Open any data masking unit and on the toolbar under Mapping Tree, click the Reset Configuration button.
This clears the current configuration and restores the default (fields won’t be masked), or rescans the collection to detect any new fields in the documents.
Data Masking scans the last 50 documents of a collection by default. You can adjust the limit as needed.
Other configuration options
Most of the toolbar options are also available by right-clicking on a field.
Edit mask – Edit the mask applied to the selected field.
Remove mask – Removes the mask from the data masking configuration. It does not remove the field.
Add sibling – Manually adds a sibling field to the selected field. This is handy option if you know precisely which fields are new to the collection – instead of doing a collection rescan – or for adding a field back in the configuration.
Add child – Manually adds a child if an array is selected, or the document.
Move up/down (arrows) – Move a selected rule up and down.
Undo and Redo – Undo and redo changes.
Dropdown menu – Handy for showing all, only masked, or only unmasked fields.
Automate & schedule data masking
You can use Data Masking with Tasks and Task Scheduler so that you can save data masking jobs and schedule them to run as needed.
Click on Save task (as) to save the job as a task. Name the task. Then, click OK.
This saves the task and optionally you can open the Task viewer, from which you can choose to schedule, unschedule, edit, clone, delete, add, and execute tasks.
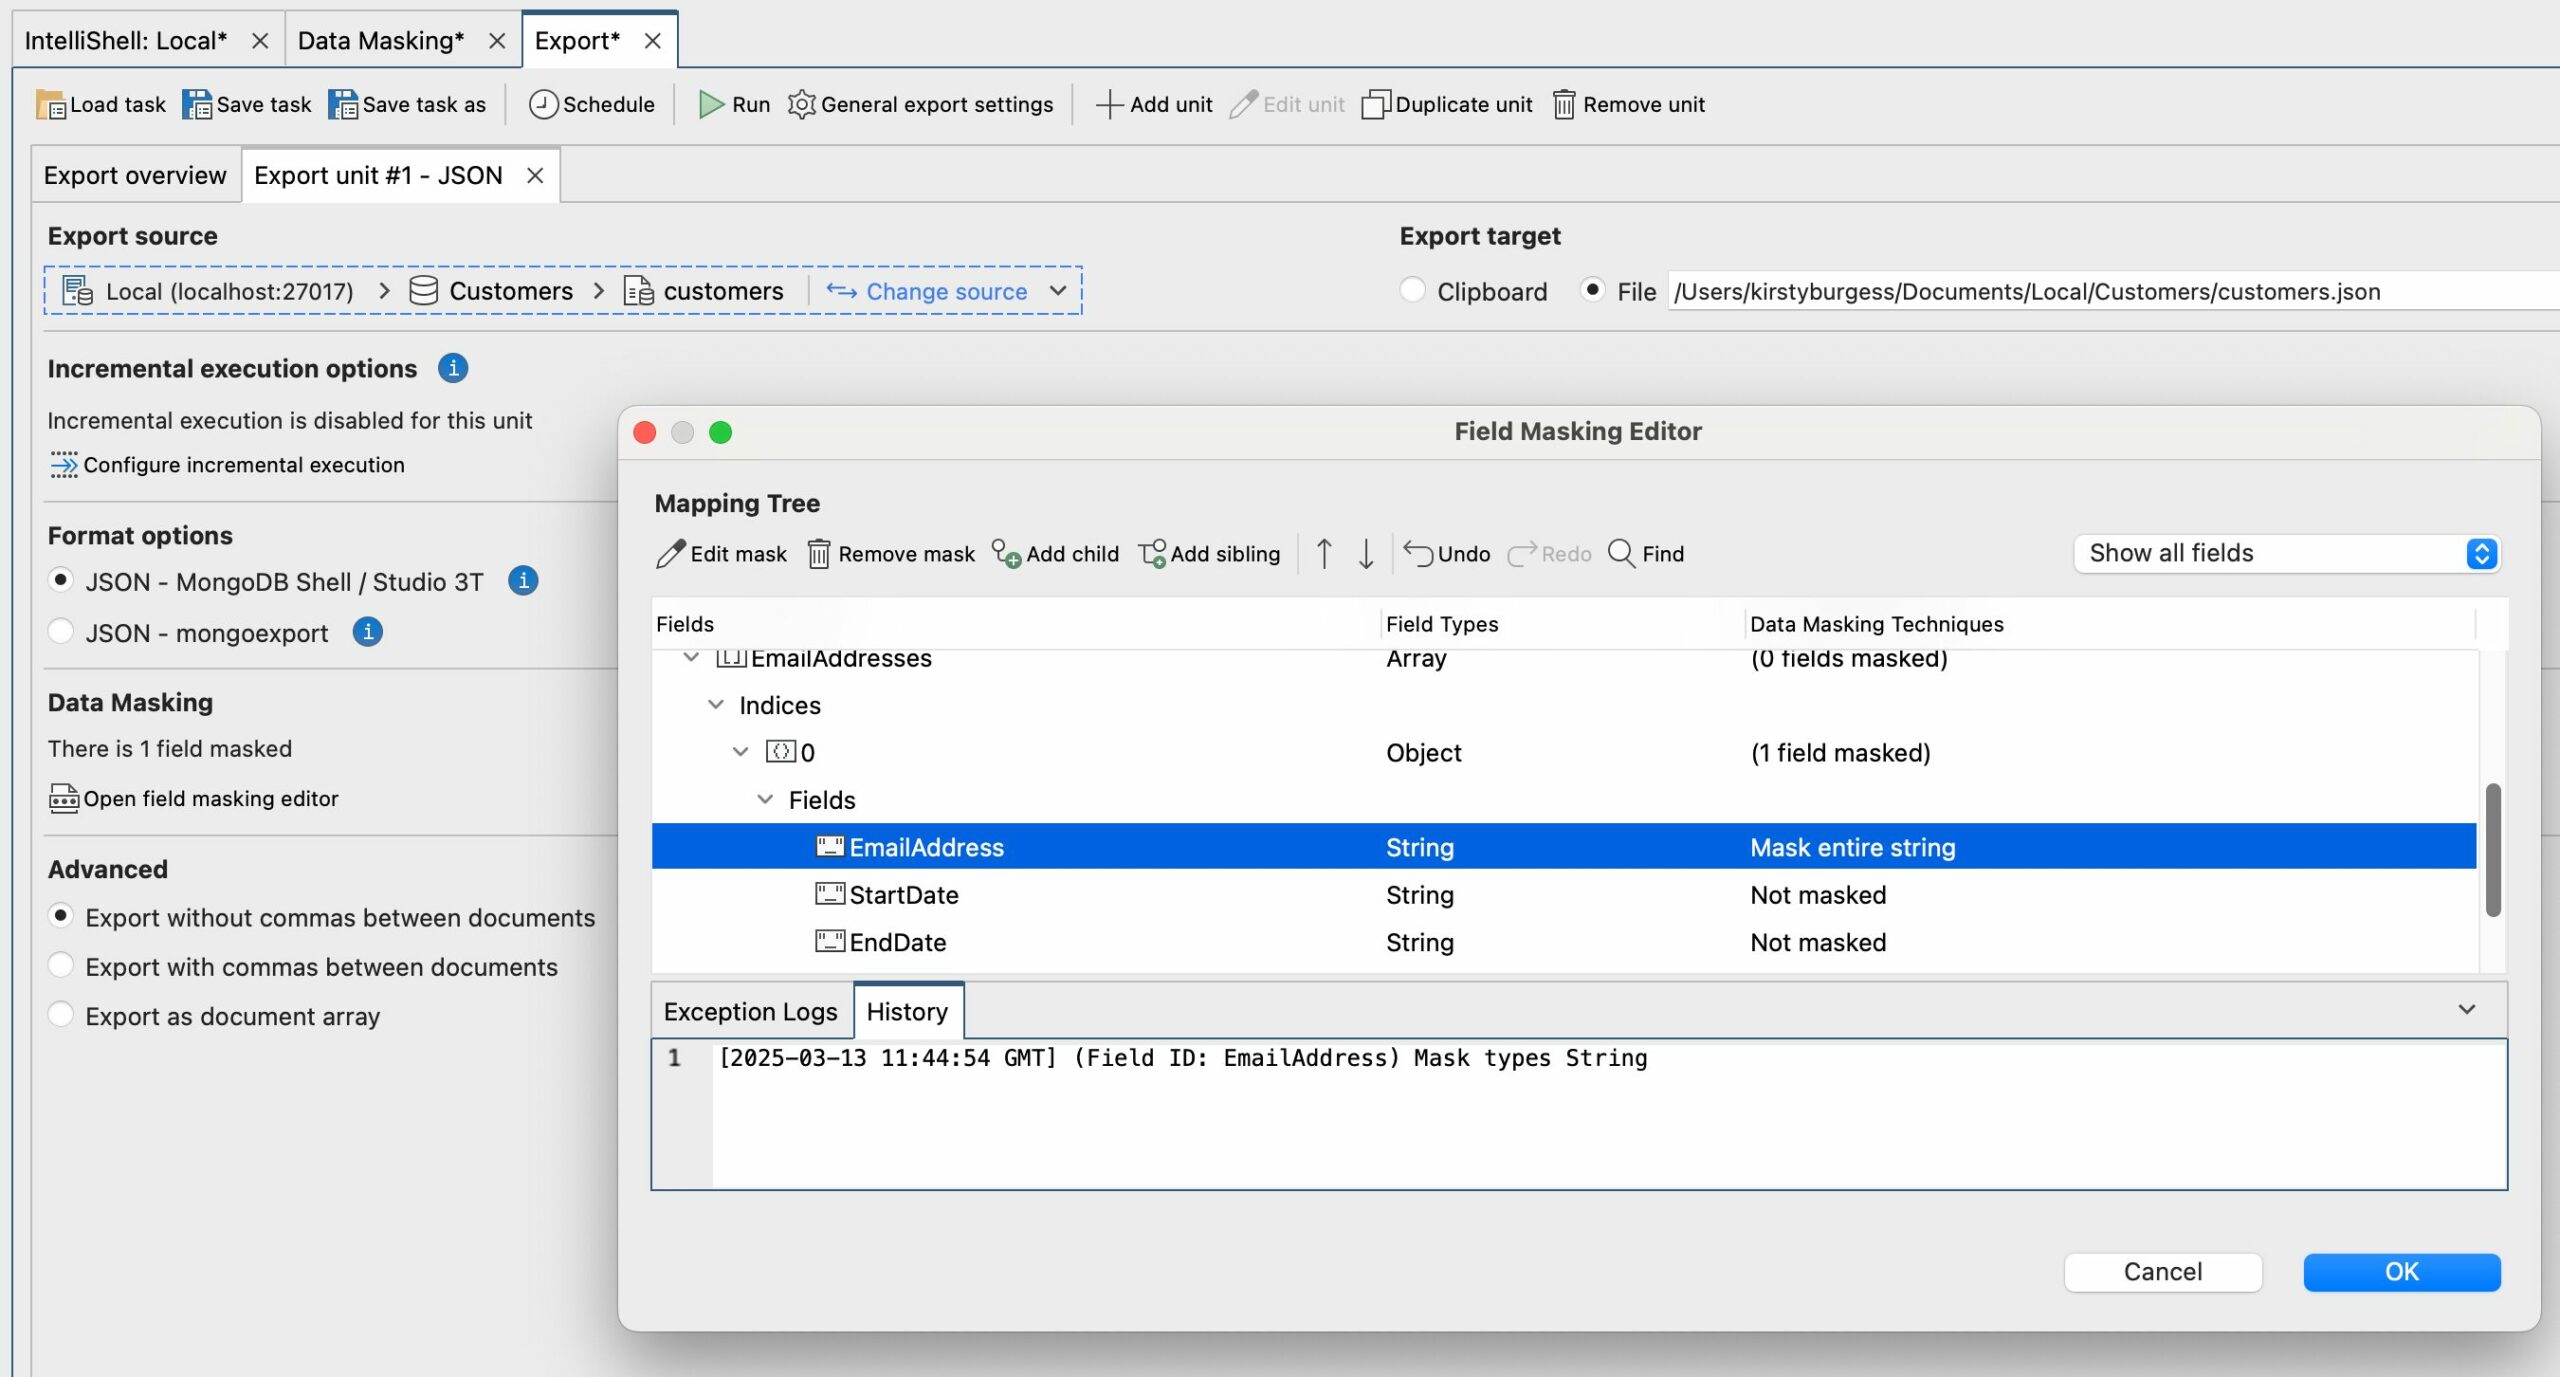
Masking data on export
You can also specify data masking rules when using the Export Wizard. You can export collections, views, queries, query results, or specific documents to CSV, Excel, JSON, BSON/mongodump, SQL, or another collection.
On the Export tab, scroll down to the Data Masking section and click Open field masking editor to begin configuring your data masking rules. The original data source won’t be overwritten.
This article was originally published by Kathryn Vargas and has since been updated.