
Q: Now my boss wants three different spreadsheets generated at the same time? Can I do this without creating a tangle of scheduling?
Welcome to the latest Studio 3T Ask Manatees Anything – #Studio3T_AMA. Want to know how to use Studio 3T to make your MongoDB life better? Just tweet and use #Studio3T_AMA or email [email protected].
A: Yes you can. In the previous Ask Manatees Anything, we showed you how to turn an export into a scheduled Task. What we didn’t mention was that Tasks are actually containers for multiple similar operations.
Diving into a Task
An Export Task can contain as many Exports as you need. That first Export Task we created also created an Export unit within the task. Let’s have a look at that. Bring up the Tasks view by clicking Tasks in the global toolbar.
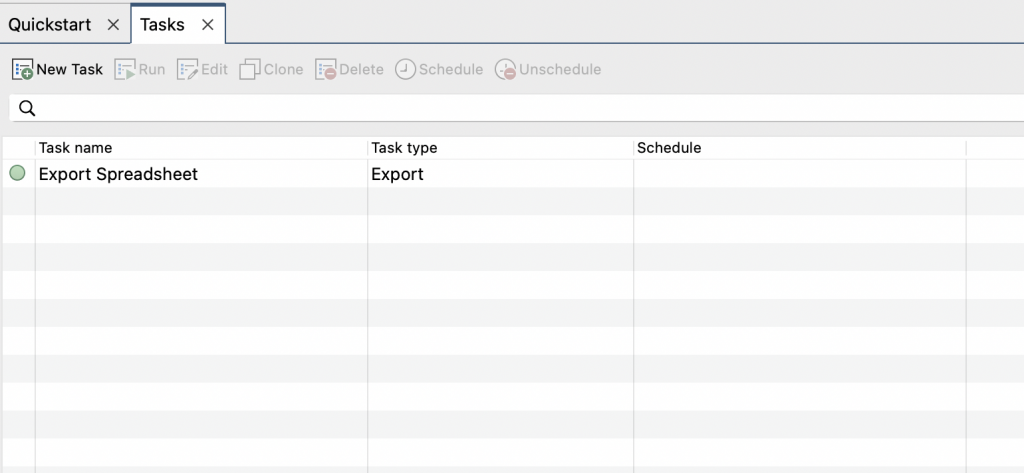
Select your spreadsheet exporting task and click on Edit. Now you can see an overview of the Export:
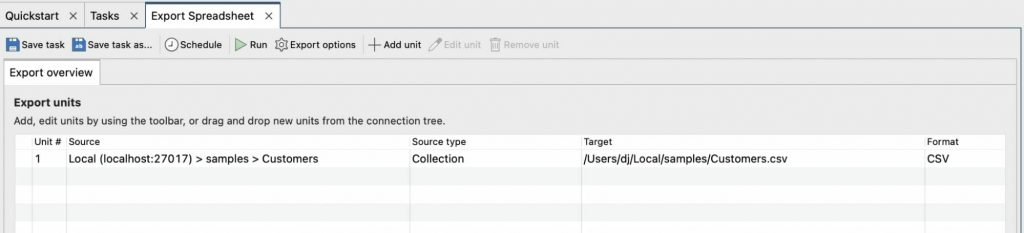
It contains one unit, the export we created previously to export the spreadsheet. In this view, you can see where the data is being sourced – from a local MongoDB instance, in a db called samples and a collection called Customers, what kind of source (the entire collection), where the data will be written (to a local file) and in what format (CSV).
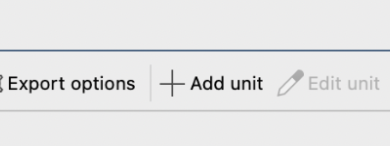
Adding a Unit for Export
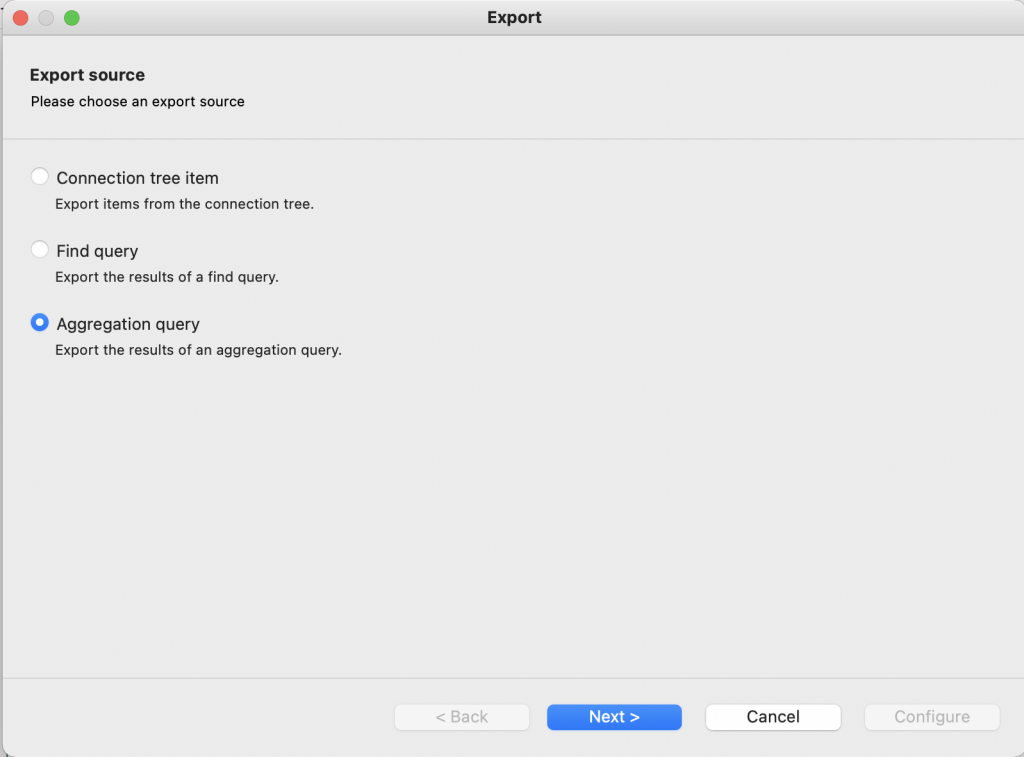
For this example, we’re going to do a quick aggregation query on the data. The boss wants total customers per state as a separate report, the kind of thing aggregation was built to do. Let’s click Next and see:
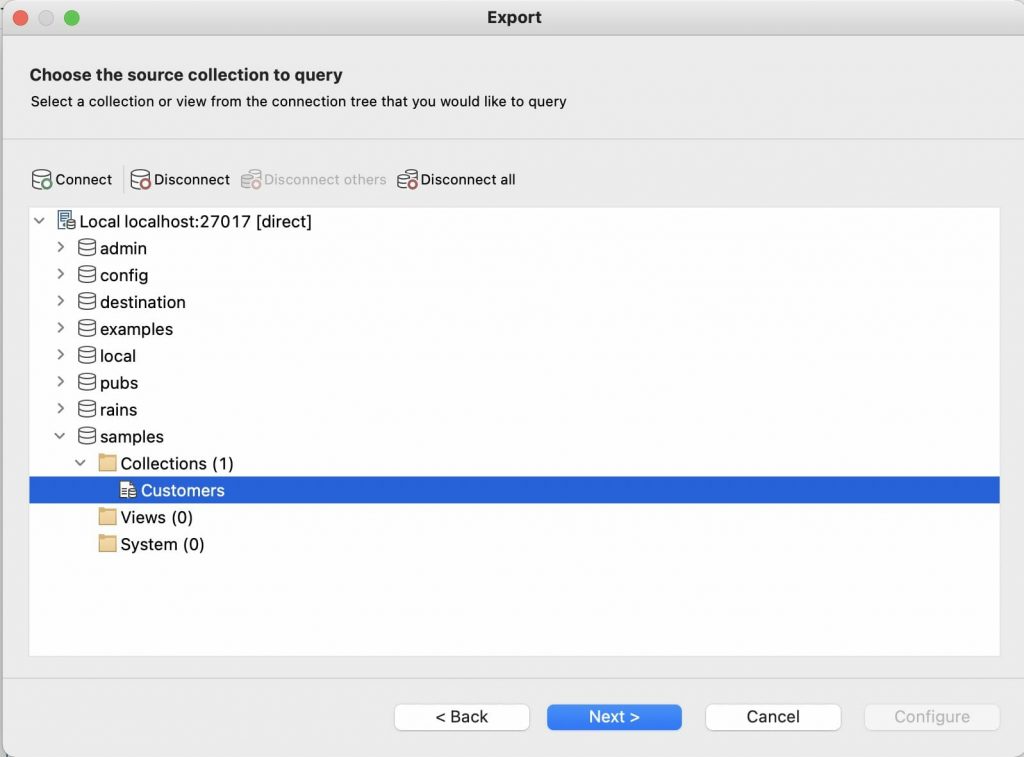
We have to select which collection is going to be the basis for this aggregation; most of the time, Studio 3T can figure it out from where you are in the UI. Once we’ve done that, we get to pick which kind of export to do.
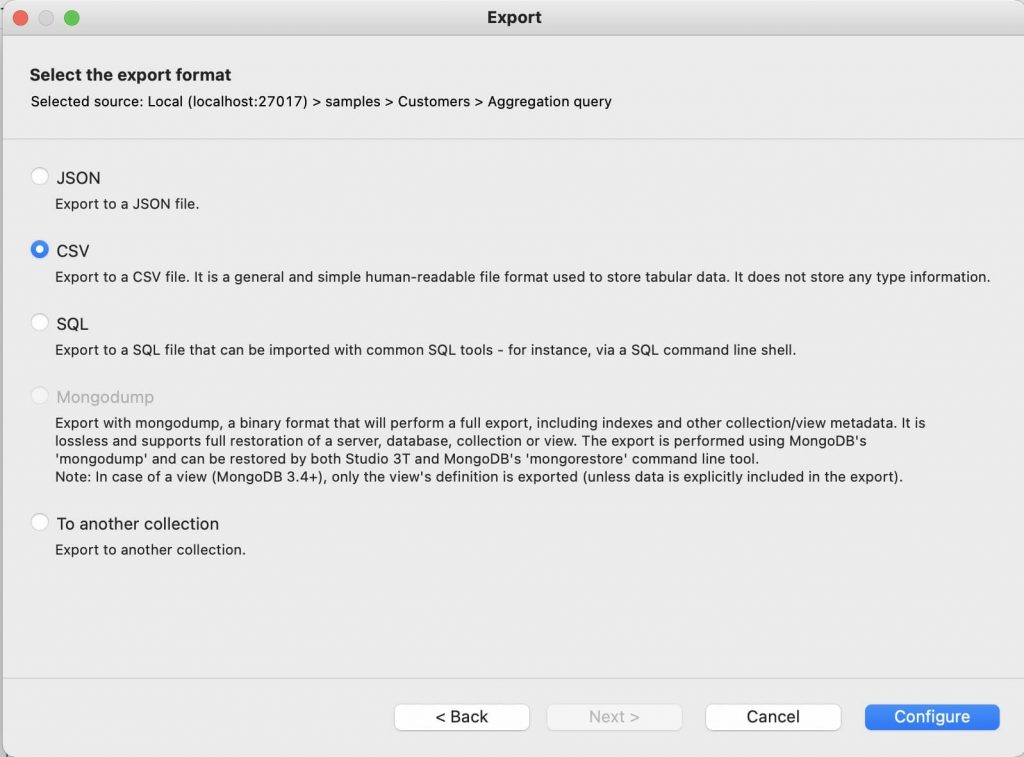
And we select CSV because we want to import this into a spreadsheet. Now we can click Configure.
Making an Aggregation and Configuring an Export
We are now ready to Configure both our aggregation query and export at the same time.
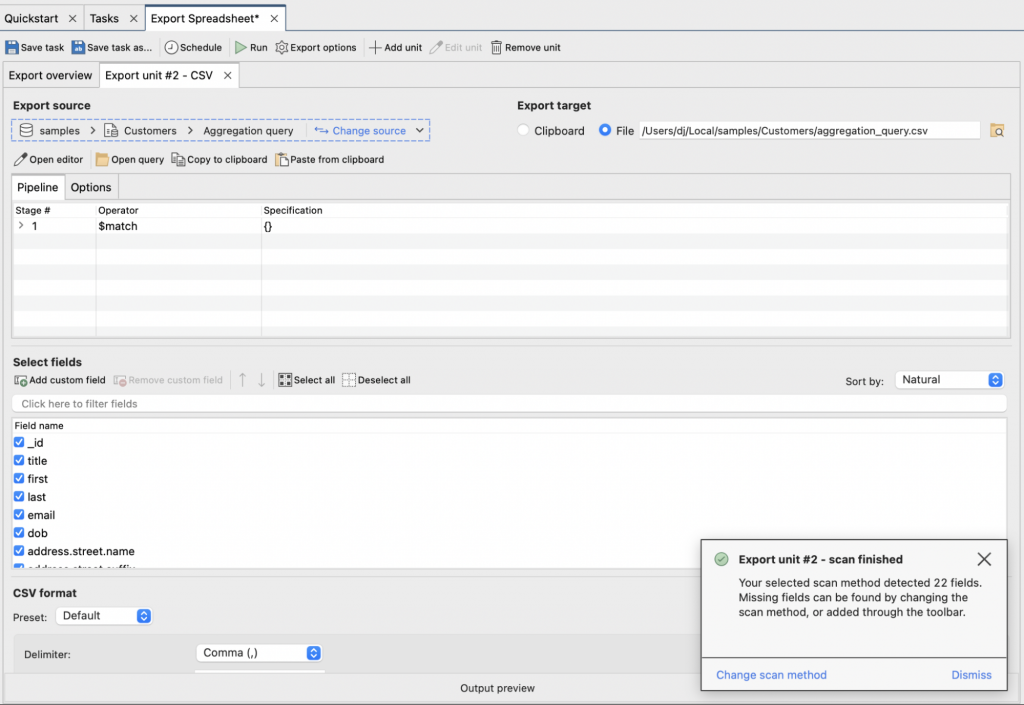
This view of the Export Source pane is scrollable; yes there is more to see. At the top is the definition of the Export source and as we are using an aggregation, underneath that is a view of the aggregation we want to use. Underneath all of that is the export field selector and CSV controls.
Now, if you recall from a previous AMA, Studio 3T scans the source to work out which fields are going to be available. And it notes that in a little “scan finished” panel in the bottom right. That scan has looked at what we currently have coming out of the aggregation.
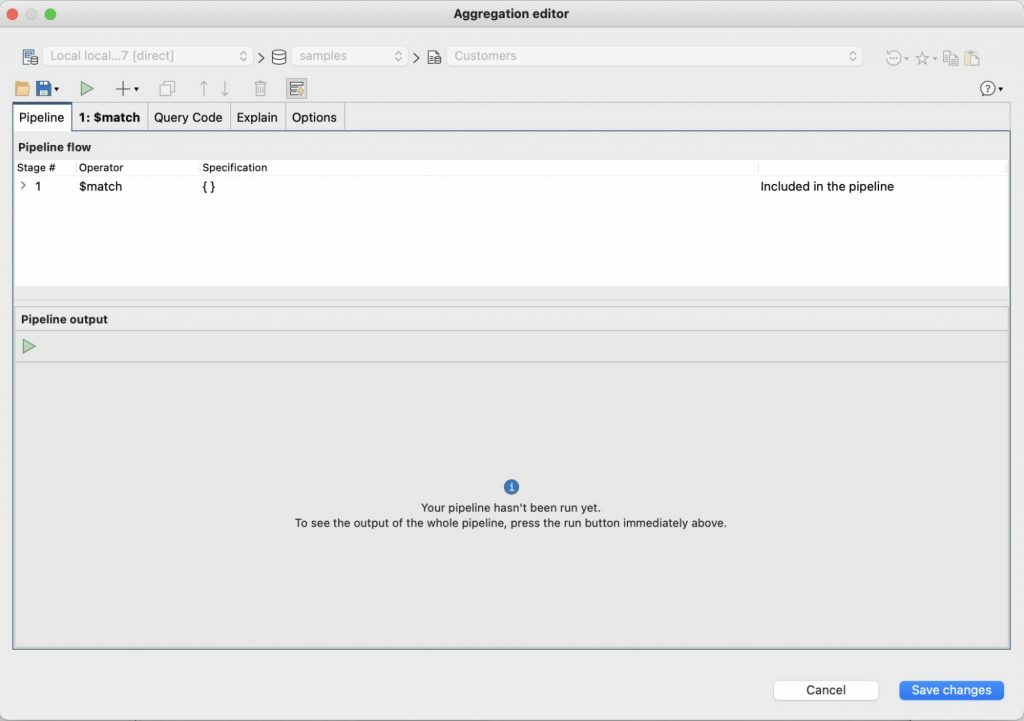
Ok, time to make some data and edit our aggregation. Click on Open Editor and you’ll find yourself in the Aggregation editor, with a $match stage already in place. That’s been put there to let some data flow through up front.
Now we want to count all the customers in each state. The $group stage specialises in grouping things and doing calculations as it does it. So in the editor window, let’s start with:
{
    _id: "$address.state",
This says the output should have a unique _id field derived from the address.state field. That also implies that the output should be grouped by that field.
    customer_count: { $sum: 1 }
}
So as each record comes in and is grouped by state, this field, customer_count, gets 1 added to it. And so we count how many matching documents for that state there are.
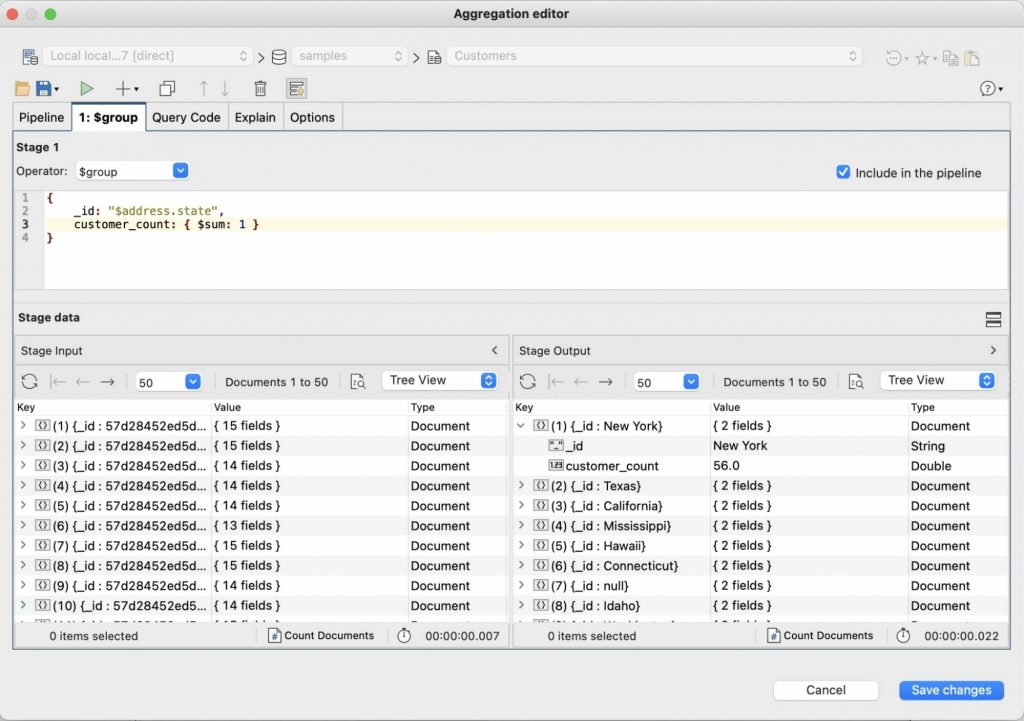
You can test all that out in the aggregation editor’s previews of input and output. When you are happy, click on Save Changes to go back to the Export view.
Dealing with Changeable Sources
It’ll look exactly the same apart from one addition:
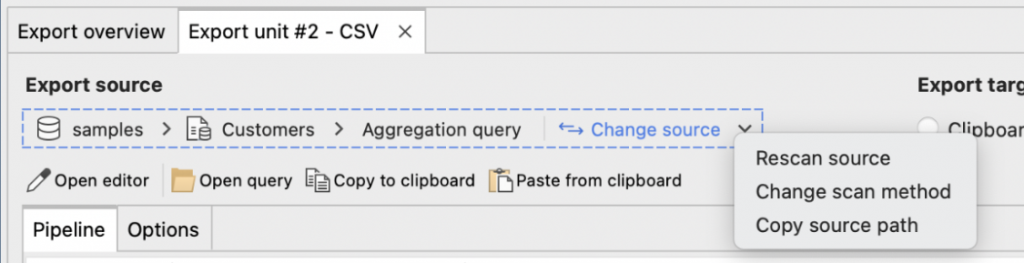
If you didn’t dismiss the Scan dialog earlier, use that to launch a scan. If you did, and who could blame you, head to Change Source in the upper part of the view, click on the down arrow next to it to reveal a menu and a Rescan Source button which will start a fresh scan.
And when that’s done, you’ll see this:
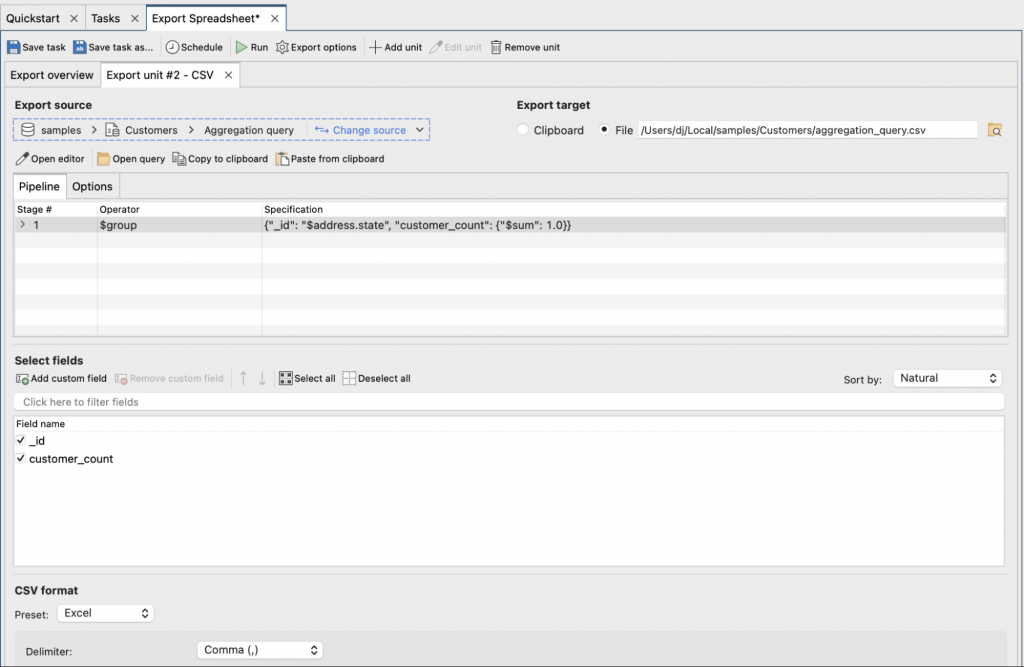
The aggregation is now showing in the fields; _id is standing in for state – you can use $project to turn that into a state field if you want. Don’t forget to set the CSV format to Excel. Check the output in the Output Preview, and then set the Export Target to where you want the resulting file to be output.
Click on Save Task to save the whole Task, including the new unit, and then click on the Export Overview tab to reveal both units.
Ready to Run
Clicking on the Run button will run both units sequentially and you can see their progress in the Operations panel. You can use the Task Scheduler to run this Task by selected day, time or have it an arbitrary calendar.
There’s no limit to the number of units a Task can hold so you can bundle up your export chores into one easy to orchestrate operation. Enjoy your new found exporting powers.