In this exercise, you’ll set up MongoDB Atlas using the free M0 service tier.
The setup process consists of registering with the MongoDB Atlas service and configuring a cluster.
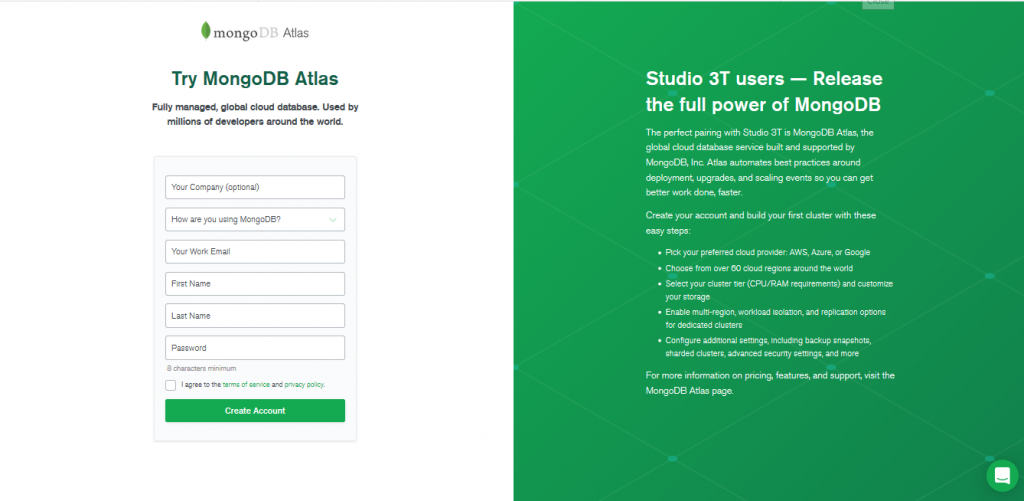
When registering with the service, you must provide an email address, first name, last name, and password. When setting up the cluster, you must select a cloud provider and region.
To set up MongoDB Atlas
1. Go to the MongoDB Atlas landing page.
2. Fill in the required information (email address, first name, last name, and password).
3. Click the terms of service and privacy policy links, which should open on a new tab.
Review the terms, and then return to the Get started free form.
4. If you want to continue with the registration, select the I agree to the terms of service and privacy policy check box.
5. Click the Create account at the bottom of the form.
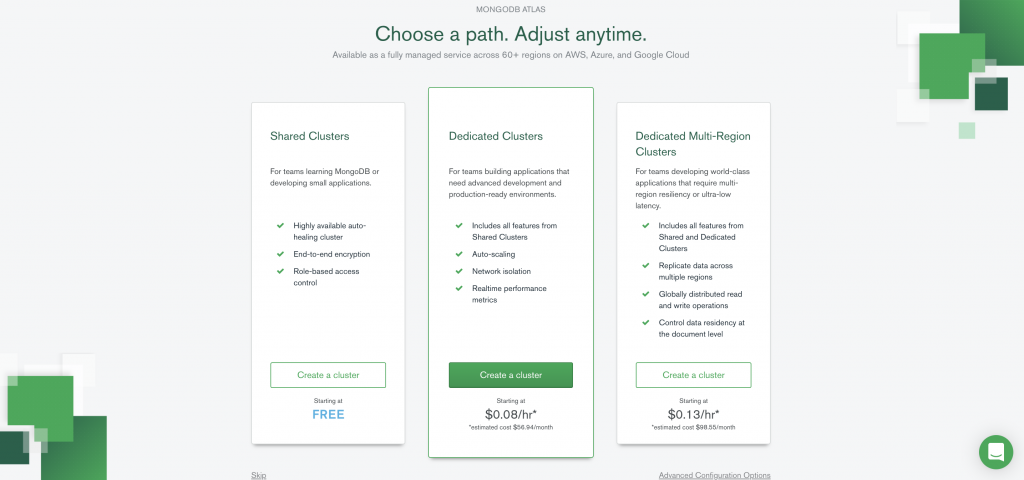
6. The website will ask to choose a cluster. Choose Shared Clusters and click on Create a cluster.

You should also receive a welcome email, which confirms that you’re registered with MongoDB Atlas and includes a link for logging onto the service.
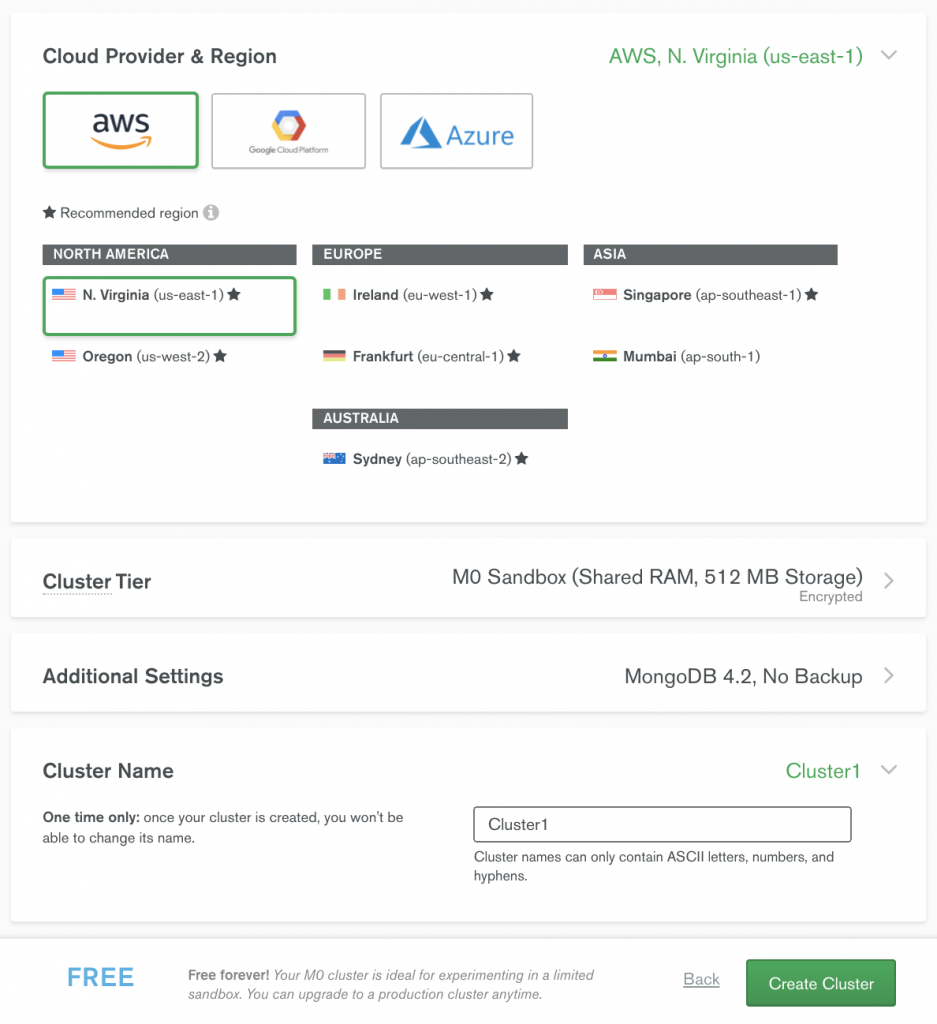
7. In the Cloud Provider & Region section, the aws option should be selected as the default provider, but you can select any provider. All three platforms support the free service tier.
8. Beneath the list of providers, select a region.
9. Expand the Cluster Tier section and ensure that M0 Sandbox is selected. This is the free M0 service level.
10. Expand the Cluster Name section and type Cluster1 in the text box.

11. Click the Create Cluster button at the bottom of the web page.
12. You should then receive a message stating that your cluster is being created.

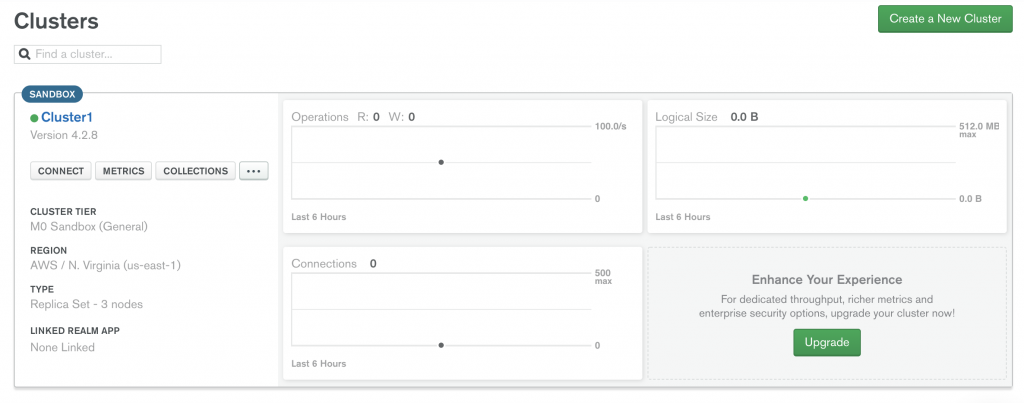
When the process is complete, you’ll be taken to the Clusters page, which includes a listing for your new cluster, as shown in the following figure.
The cluster information includes the service level, cloud provider, and region, along with details about operations, connections and logical size, all of which currently show zero amounts.
Next – Lesson 2, Exercise 2: Configuring MongoDB Atlas

