In this exercise, you will load and run the bios.js file.
The file contains a set of commands that create a database named BioData and add a collection to the database named bios. The collection includes 10 documents that contain biographical information about 10 individuals, one document per individual.
To load and run the script file
1. Launch Studio 3T and connect to MongoDB.
2. In the Connection Tree, right-click the connection (top-level node) and choose Add Database.
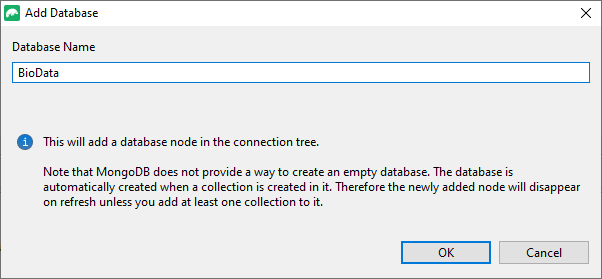
3. In the Add Database dialog box, type BioData in the Database Name text box, and then click OK.
Studio 3T adds the BioData database node to the Connection Tree.
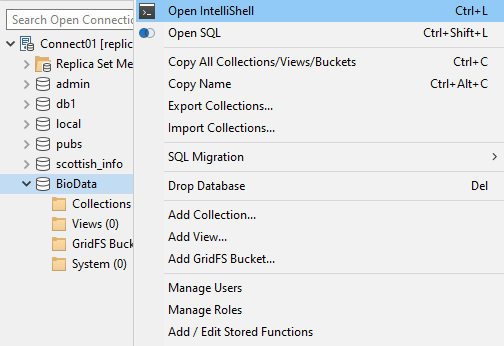
4. In the Connection Tree, right-click on the database (BioData) and click Open IntelliShell.
5. If you haven’t already done so, download the bios.js file and save it to a local folder on your system.
6. On the IntelliShell toolbar, click on the lightning bolt icon ( ) to trigger auto-completion. IntelliShell will then auto-suggest hints as you type.
Enable Query Assist is on by default. Click on the button to disable it. This ensures that, for this exercise, the results are displayed on a single result tab.
The IntelliShell toolbar should look like this:

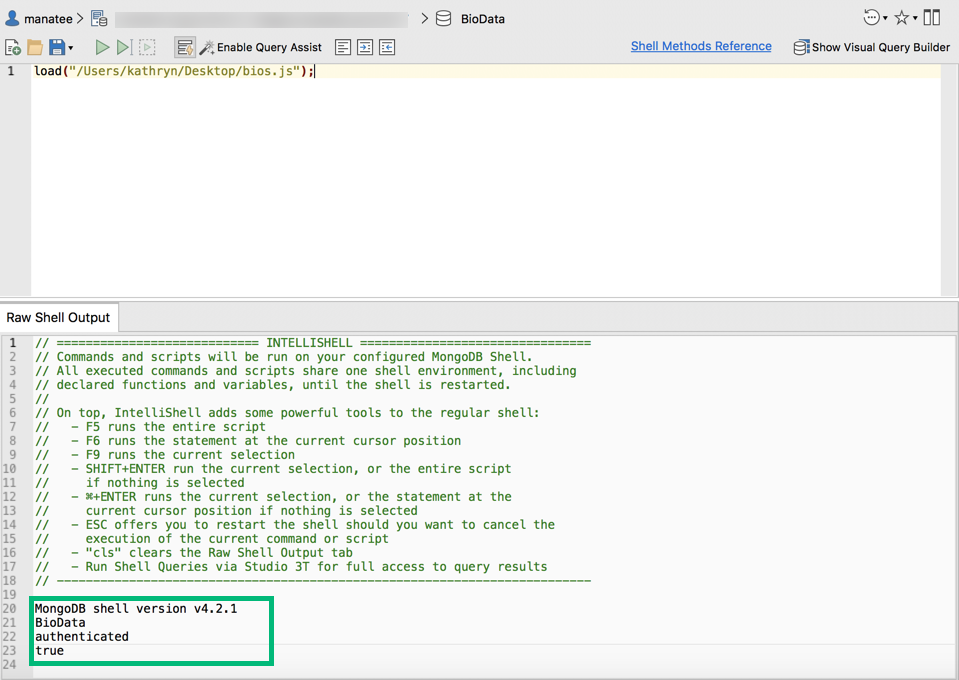
7. In the IntelliShell editor, delete any existing commands and type the following command, replacing the <path> placeholder with the actual folder path:
load("<path>bios.js");
Backslashes can be interpreted in different ways, often indicated by an escape character. When specifying the path, you might need to escape any backslashes by adding an additional backslash to each one.
For example, if you’re working in Windows and save the bios.js file to the folder C:\DataFiles\MongoDB, you would type the following command in the IntelliShell editor:
load("C:\\DataFiles\\MongoDB\\bios.js");
macOS, on the other hand, uses forward slashes. If saving to the same folder, you would type the following command:
load("/DataFiles/MongoDB/bios.js");
The load method loads and runs a script file, which in this case is bios.js.
8. Click the Run entire script button ( ). You should receive a message that says
 true.

9. In the Connection Tree, right-click the connection (top-level node) and click Refresh All.
This creates the bios collection.
10. Expand the BioData database node, and then expand the Collections node if necessary.
Double-click the bios collection node to open the collection in its own tab.
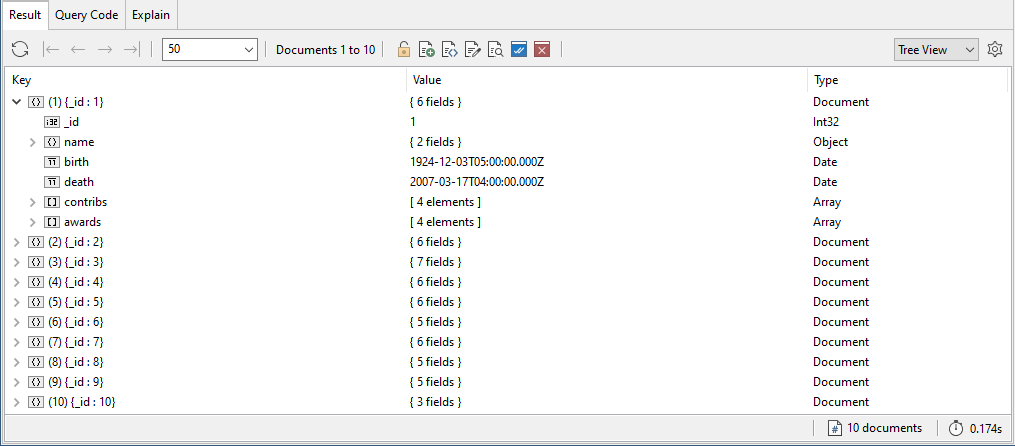
11. Go to the bios collection tab and review the 10 documents, using Tree View, Table View, or JSON View.
The documents include the following fields:
- The
_id fieldis a uniqueInt32value that identifies the document. - The
name fieldis an embedded document that provides the individual’s first and last name, along with other names, if applicable. - The
birth fieldis aDatevalue that indicates when the individual was born. - The
death fieldis aDatevalue that indicates when the individual died. - The
contribs fieldis an array that lists the individual’s contributions to technology. - The
awards fieldis as an array in which each element is an embedded document that includes specific award information. - The
title fieldis aStringvalue that lists the individual’s title. Not all documents contain every field; however, each document includes at least the_id,name, andcontribsfields. Leave the bios collection tab open for now in case you want to reference the documents in later exercises to see how they’re constructed.


