In this exercise, you’ll learn how to connect to your local MongoDB instance or to the MongoDB Atlas cluster you set up in Configuring MongoDB Atlas.
You’ll then test the connection by creating and querying a simple collection.
To connect to MongoDB
1. Launch Studio 3T if it’s not running.
2. On the Studio 3T toolbar, click the Connect button to open the Connection Manager dialog box.

3. On the Connection Manager toolbar, click New Connection.

4. In the New Connection dialog box, type connect1 for the connection name (in the top text box).
5. Take one of the following two steps:
- If you’re connecting to MongoDB Atlas, click the From URI button, type or paste your connection URI, and click OK.
- If you’re connecting to a local instance of MongoDB, the connection to that instance should already be defined. The following figure shows the Server tab with the default settings.
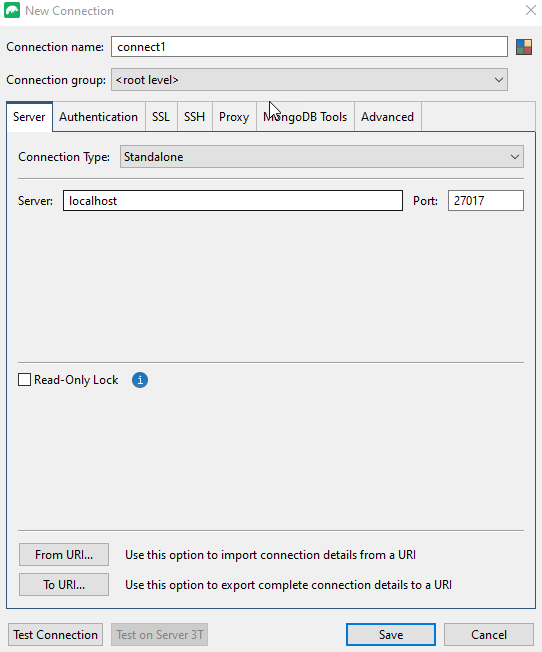
Notice that the Members section has the value localhost:27017. Members points to localhost using port 27017, the default MongoDB listening port. You should not need to change any of the existing settings to connect to a local MongoDB instance.
Let’s continue to connect to our local instance running on localhost.
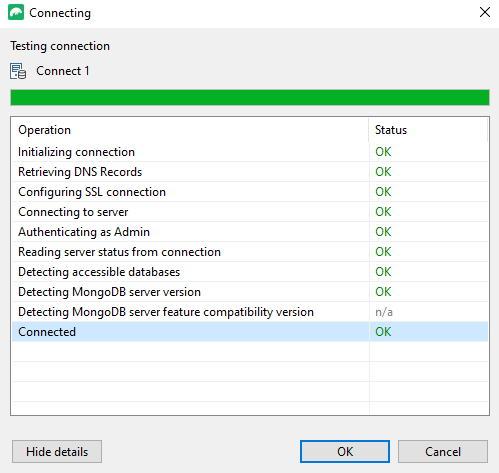
6. To verify the connection, click Test Connection.
The Connecting dialog box appears, displaying a list of connectivity tests. When completed, they should all display a status of OK, as shown below.
7. Click OK to close the Connecting dialog box, and then click Save to save the new connection and close the New Connection dialog box.
The connect1 connection should now be listed in the Connection Manager dialog box.
8. Ensure that the connect1 connection is selected and then click Connect.
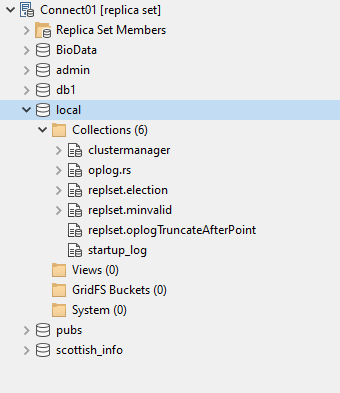
Studio 3T will connect to the local MongoDB instance and display the three default databases in the Connection Tree (left pane).
The following figure shows the Connection Tree with local database expanded. On the Connection Tree, points where pathways intersect are called nodes, so this point is referred to as the local database node.
9. In the Connection Tree, right-click on the connection (top-level node) and click Open IntelliShell.
IntelliShell is a built-in mongo shell with advanced features for writing commands directly against MongoDB.
10. On the IntelliShell tab, in the top text box, type or paste the following MongoDB script:
use db1;
 db.collect1.insertMany([
   { fld1: "string1", fld2: 10, fld3: "stringA" },
   { fld1: "string2", fld2: 20, fld3: "stringB" },
   { fld1: "string3", fld2: 30, fld3: "stringC" }
 ]);

The script creates the db1 database, adds the collect1 collection to the database, and populates the collection with three simple documents.
11. On the IntelliShell toolbar, click the Execute entire script button (![]() ).
).
12. In the Connection Tree, right-click the top-level connection and then click Refresh All.
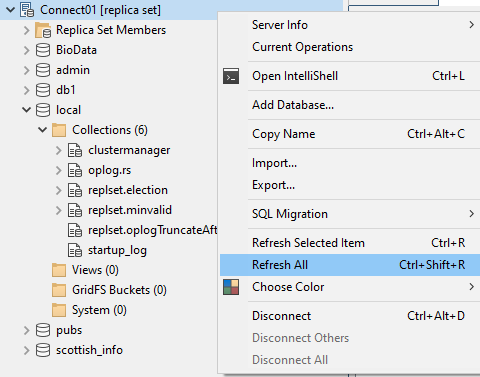
Studio 3T adds the db1 database node to the list of databases.
13. Expand the db1 database node, expand the Collections node, and double-click the collect1 collection node.
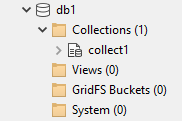
collect1 opens in its own collection tab, which is one of the most important components of the Studio 3T interface. You can open multiple collection tabs at the same time and move easily between them.
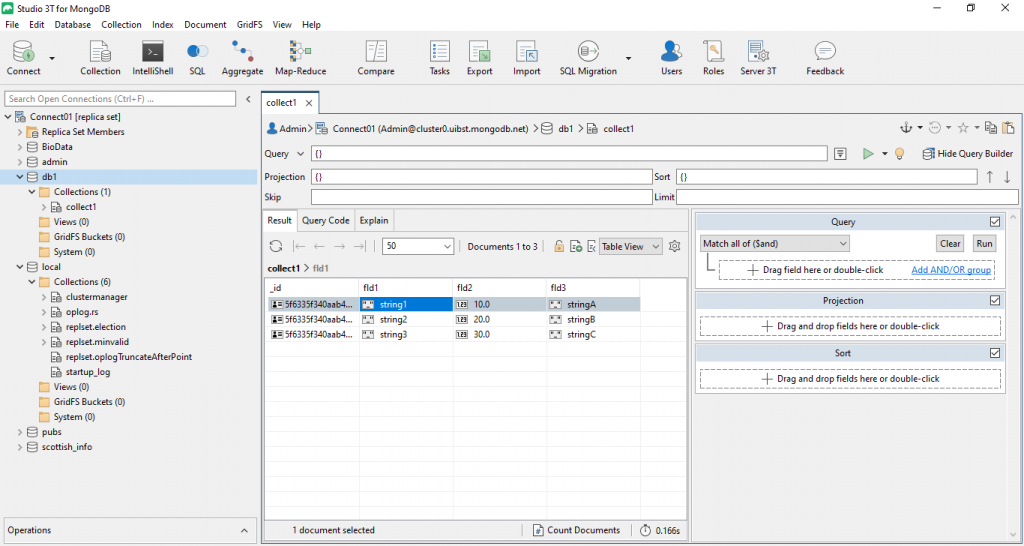
The collect1 tab lists the three documents in the collection, as they appear in Table View. MongoDB automatically adds an _id value to each document, unless you specify your own value.
14. On the collect1 tab, click the Visual Query Builder button in the upper right corner.
This launches the Visual Query Builder, which opens in a separate pane to the right.

The Visual Query Builder is a graphical interface for building queries to retrieve data from the collection. It offers drag-and-drop features and pre-populated drop-down lists for easy query construction without having to know the MongoDB query language.
15. In the Query section of the Visual Query Builder form, click the plus button to expand the form.

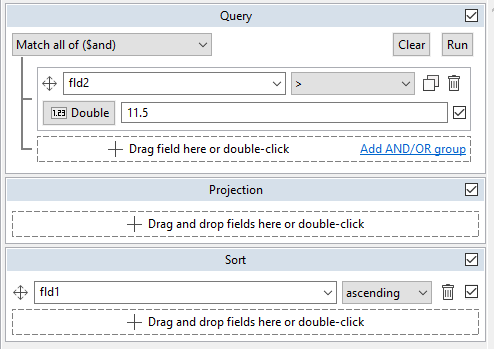
16. Configure the options in the expanded Query section as follows:
- Select the fld2 field from the first drop-down list in the expanded section.
- Select the greater than (>) operator from the second drop-down list to the right.
- Select the Double option from the data type list.
- Type 11.5 in the value field.
17. In the Sort section, click the plus button and select the fld1 field from the first drop-down list.
The Visual Query Builder form should now look similar to the one in the following figure.
18. Click the Run button at the top of the Visual Query Builder form.
Studio 3T updates the contents of the Result tab to include only the two documents with a fld2 value greater than 11.5.

19. Close the collect1 collection tab and the IntelliShell tab.
If prompted to save changes, click No.
20. In the Connection Tree, right-click the db1 database node and click Drop Database.
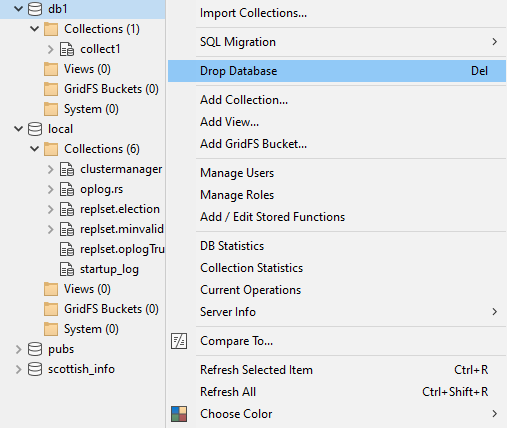
21. In the Drop Database dialog box, click Drop Database.
22. Close Studio 3T.
Terms you might not know:
instance: while a database is a collection of files that reside on the server, an instance is the allocated memory and collection of processes running on the server (in this case, on your local machine) (source)

