In this exercise, you’ll use the View Editor in Studio 3T to create a MongoDB view that retrieves data from the customers collection.
The view will aggregate data based on the package and prio_support fields, providing the total number of transactions for each group.
To create the view
1. Launch Studio 3T and connect to MongoDB Atlas.
2. In the Connection Tree, expand the sales database node and, if necessary, expand the Collections node for that database.
3. Right-click the customers collection node and click Add View Here.
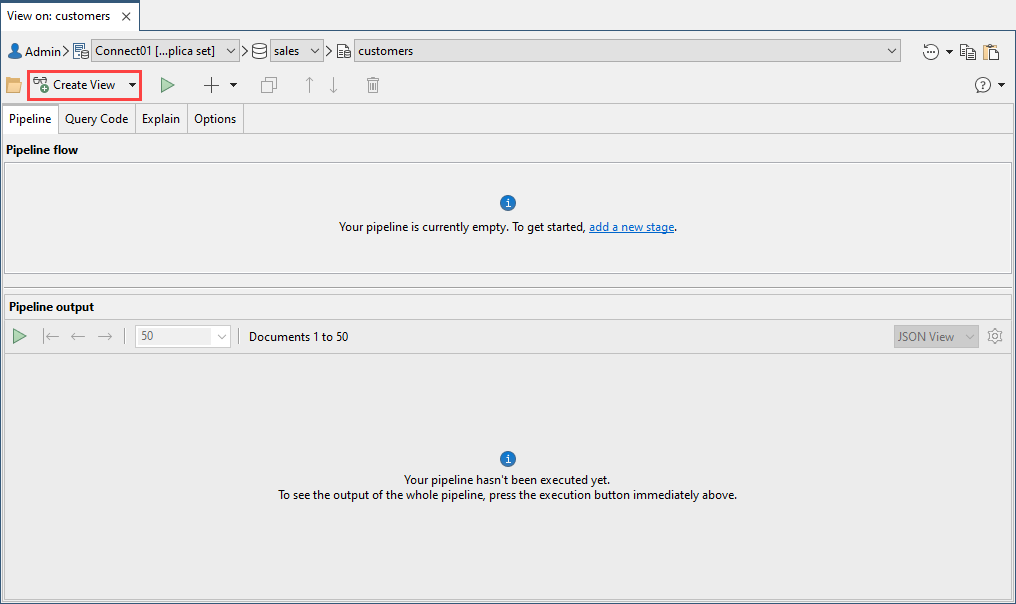
Studio 3T launches the View Editor in its own tab. The View Editor is nearly identical to the Aggregation Editor, except that it provides an option for creating a view, as shown in the following figure. The option is near the top left corner, outlined by the red rectangle in the figure.

At this point, you can build your own aggregation pipeline from scratch, defining each stage as needed, just as you would in the Aggregation Editor.
However, because aggregations were covered earlier in this course, you’ll take an easier approach this time around and create your view based on a pre-defined aggregate statement.
4. Copy the following aggregate statement to your clipboard:
db.getCollection("customers").aggregate(
  [
    {
      "$match" : {
        "transactions" : {
          "$gt" : NumberLong(0) } }
    },
    {
      "$group" : {
        "_id" : {
          "package" : "$package",
          "prio_support" : "$prio_support" },
        "SUM(transactions)" : {
          "$sum" : "$transactions" } }
    },
    {
      "$project" : {
        "package" : "$_id.package",
        "prio_support" : "$_id.prio_support",
        "transactions" : "$SUM(transactions)",
        "_id" : NumberInt(0) }
    },
    {
      "$sort" : {
        "package" : NumberInt(1),
        "prio_support" : NumberInt(1) }
    }
  ]
);
The statement’s aggregation pipeline defines the following four stages:
- The first stage is based on the
$matchoperator. It limits the documents to those with atransactionsvalue greater than0. This helps eliminate any anomalies in the data, such as outliers that don’t include thetransactionsfield. - The second stage is based on the
$groupoperator. It groups the documents first by thepackagefield and then by theprio_supportfield. It then calculates the total number of transactions for each group. - The third stage is based on the
$projectoperator. It defines three fields to be included in the results, while excluding the_idfield. - The fourth stage is based on the
$sortoperator. It sorts the documents first by thepackagefield and then by theprio_supportfield, both in ascending order.
5. In the View Editor, click the paste button in the upper right corner (![]() ). It’s the button with the tooltip that reads Pastes an aggregate query from the clipboard.
). It’s the button with the tooltip that reads Pastes an aggregate query from the clipboard.
Clicking the button automatically populates the Pipeline tab with the four aggregation stages from your aggregate statement, as shown in the following figure.

6. Press F5 to run the pipeline stages. It’s always a good idea to run the query at this point to ensure it will return the expected results once you save the aggregation as a view.
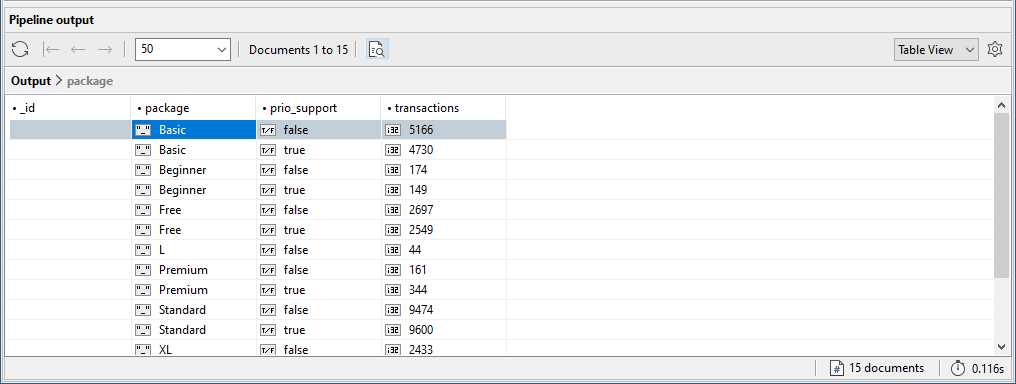
Studio 3T should return 15 rows, as shown in the following figure.

7. Click the Create View button on the View Editor toolbar.
8. In the Create View dialog box, type package_totals in the Enter view name text box, and then click OK.
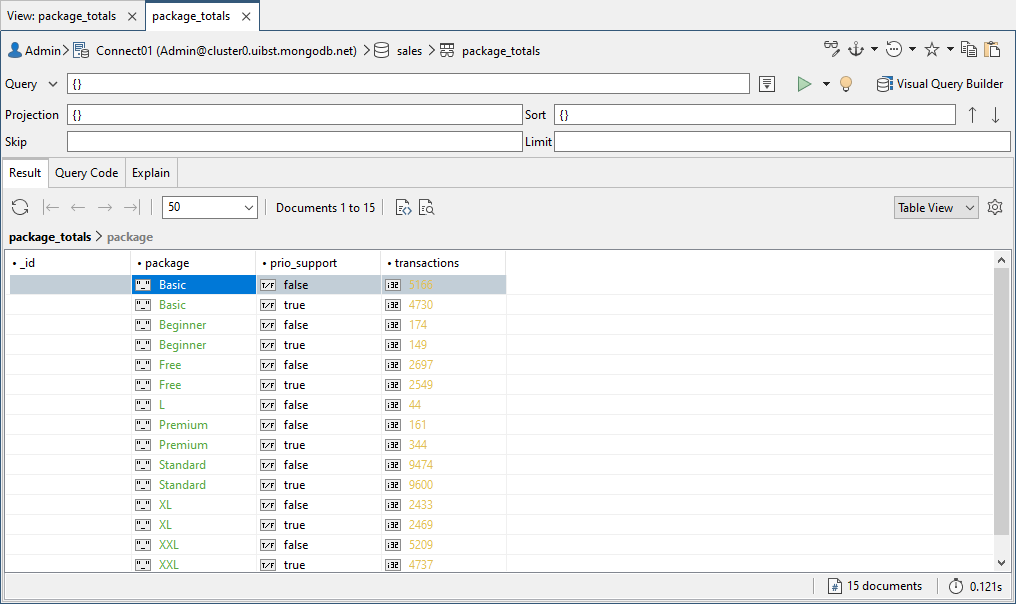
Studio 3T adds the view beneath the Views node in the Connection Tree and opens the view results in its own tab, which is similar to a collection tab. The following figure shows the package_totals view tab that launches after creating the view.

A view tab works much like a collection tab. You can query and sort documents, launch Visual Query Builder, select different views, and carry out a number of other tasks. However, you can only read the data. You cannot update it like you can on a collection tab.
9. Close the View Editor, but leave the package_totals view tab open for the next exercise.

