In this exercise, you will launch the Aggregation Editor and add the first stage to the pipeline.
The stage is based on the $match aggregate operator, which lets you filter the documents in the pipeline so you’re working with only a subset of documents.
Each exercise in this section walks you through the steps necessary to add a stage to the aggregate pipeline.
By the end of the exercises, you will have created an aggregate statement that returns the number of transactions in each city in California, as they’re recorded in the customers collection.
To filter the documents in the aggregation pipeline
1. Launch Studio 3T and connect to MongoDB Atlas.
2. In the Connection Tree, expand the sales database node and, if necessary, expand the Collections node.
3. Right-click the customers collection node, and then click Open Aggregation Editor. Studio 3T opens the Aggregation Editor in its own tab in the main window.
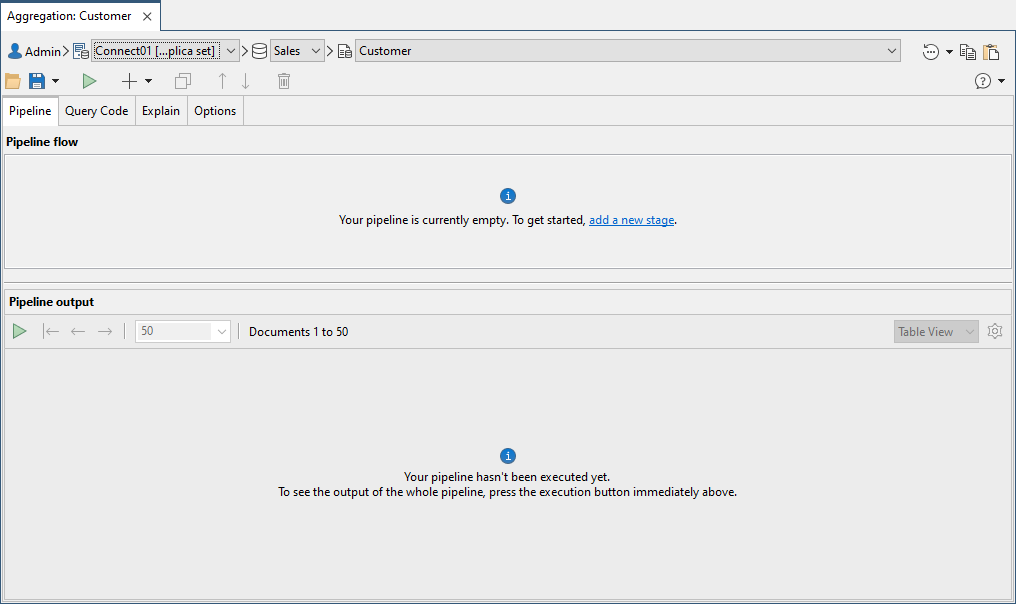
The following figure shows the Aggregation tab when you first launch the Aggregation Editor for the customers collection.
The Aggregation tab is divided into two sections.
The top section provides a workspace for building your aggregation, setting statement options, and viewing the final query code.
The bottom section displays the query results when you run your aggregation.
4. On the Pipeline tab in the upper section, click the Add button (![]() ) to add a new stage to the pipeline.
) to add a new stage to the pipeline.
The Aggregation Editor adds the Stage 1: match tab to the right of the Pipeline tab and makes the new tab active.
By default, the $match operator is selected in the Filter drop-down list, as shown in the following figure.
The $match operator filters the documents so that only those that match the specified condition will be included in the pipeline.
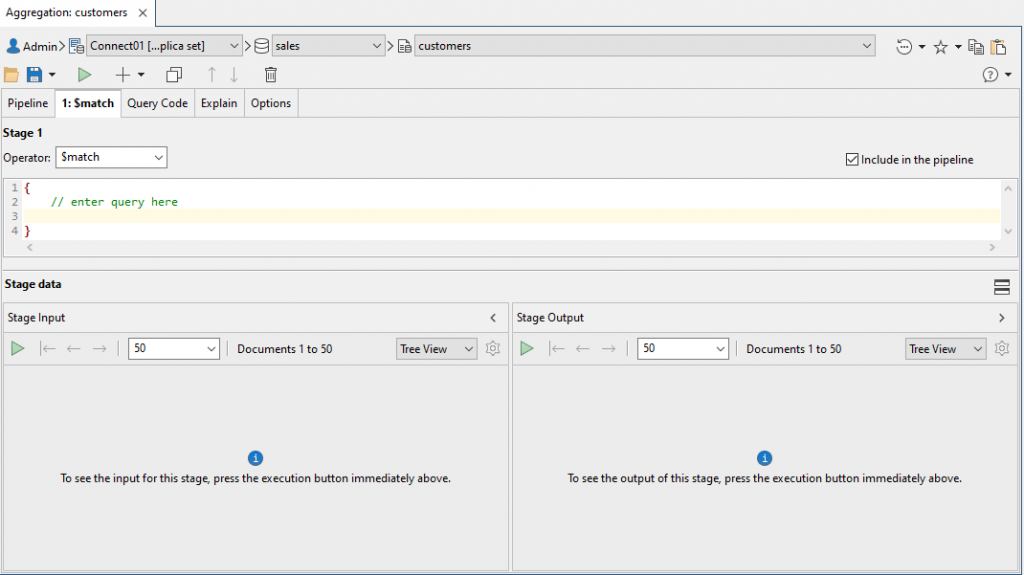
The top section of the Stage 1 tab provides an editor for adding the expression that’s passed to the $match operator.
The editor is pre-populated with a set of curly braces that will enclose the expression, along with a comment (// enter query here) that serves as a placeholder for the expression.
The bottom section of the Stage 1 tab is where the query results for that stage are displayed. This section is divided into the Stage Input pane and the Stage Output pane.
- The Stage Input pane displays the results up to but not including the current stage
- The Stage Output pane displays the results up to and including the current stage
5. Delete the placeholder in the editor window and type the following expression:
"address.state": "California"
The expression specifies that the address.state field value must equal California in order for a document to be returned. You do not include the $match operator itself, only its expression. The Aggregation Editor puts all the pieces together for you.
When adding the expression, be sure to insert a tab or a couple spaces before the expression so it’s indented. This makes it much easier to read your code as it becomes more complex. You final expression should look like the follow code:
{
  "address.state": "California"
}
6. In the Stage Input pane in the bottom section, click the Execute button (![]() ). This will execute the pipeline up to but not including the first stage.
). This will execute the pipeline up to but not including the first stage.
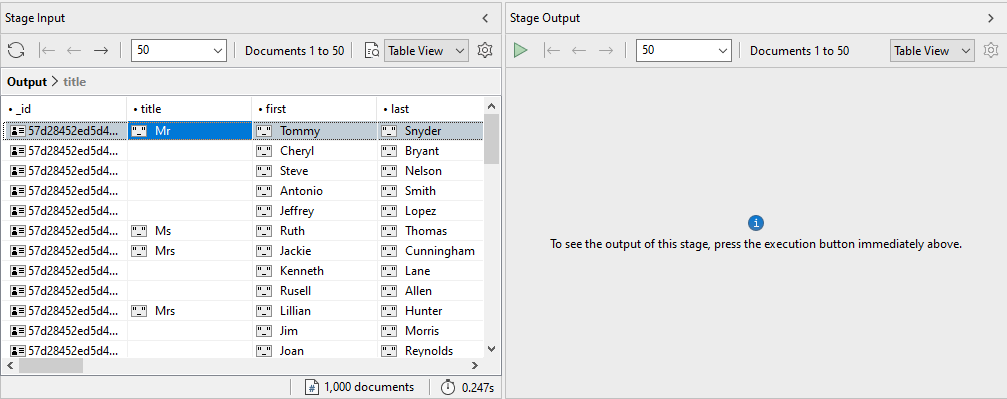
The following figure shows part of the results, as they appear in Table View.
7. In the Stage Output pane in the bottom section, click the Execute button. This will execute the pipeline up to and including the first stage.
The following figure shows part of the results for both panes, as they appear in Table View.
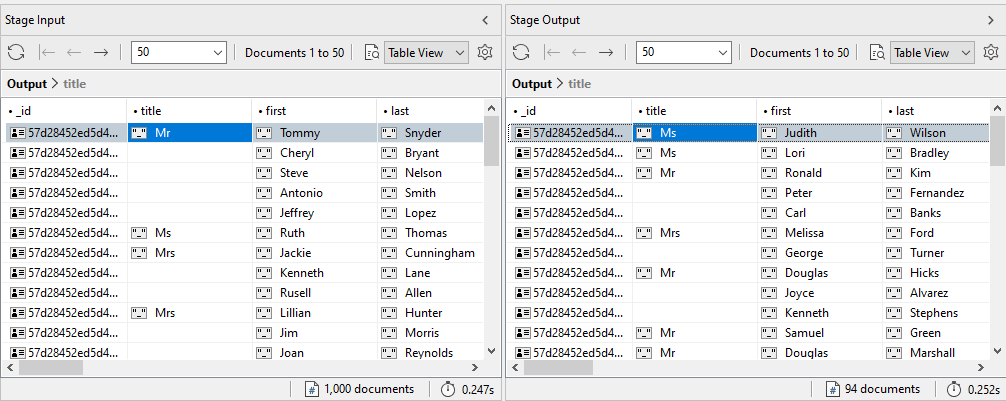
The results in Stage Input pane include all 1,000 documents in the customers collection.
The results in the Stage Output pane include only documents whose address.state value is California, which totals 94 documents. These are the documents that are passed on down the pipeline to the next stage.
8. Go to the Query Code tab in the upper section. The tab displays the aggregate statement as it has been defined up to this point. It now includes the $match operator and its expression, as shown in the following figure.
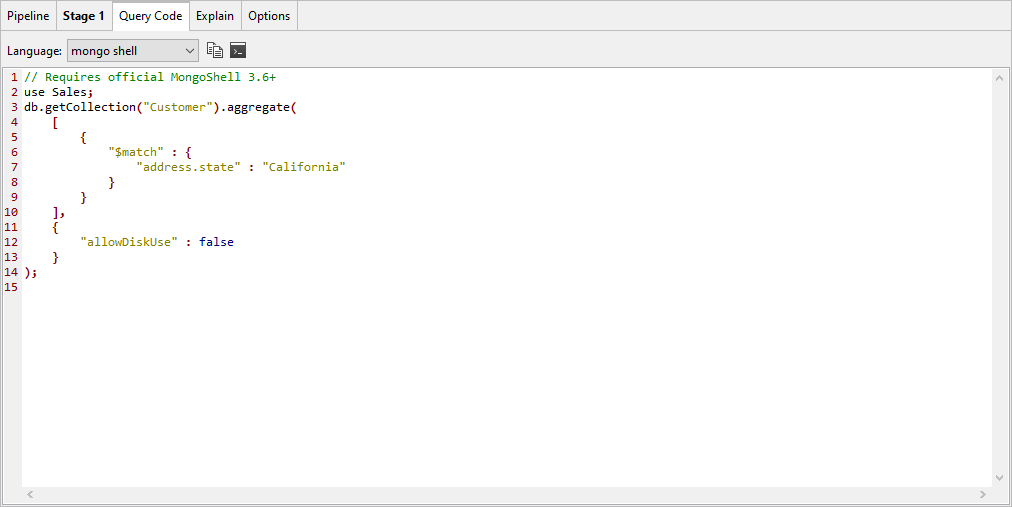
Notice that the aggregate statement also includes the allowDiskUse option, set to false.
If the option were set to true, aggregation operations could write to the _tmp subdirectory in the dbPath directory.
The Aggregation Editor includes this option in the aggregate statement by default. You can set this and other options on the Options tab.
9. Go to the Pipeline tab. Each time you insert a stage, it is added to the pipeline and reflected on this tab.
The Stage 1 row should show the $match operator and its expression (in the Specification column), as shown in the following figure.

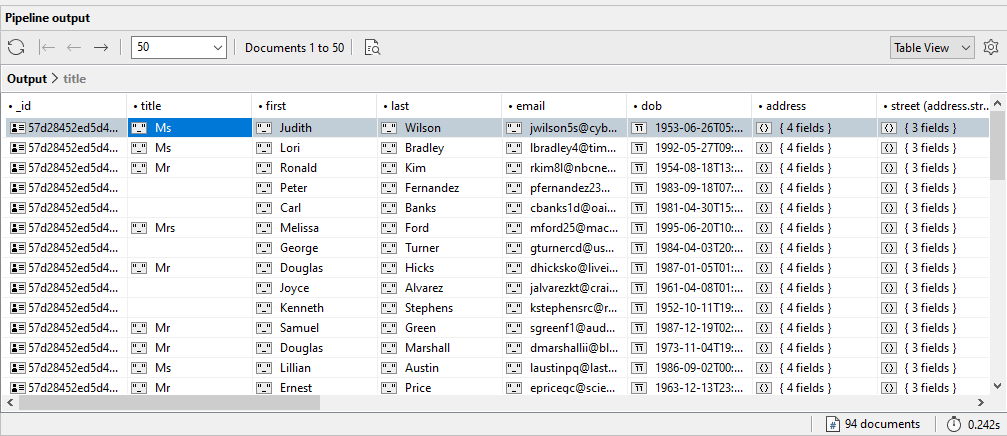
10. On the toolbar of the Aggregation tab, click the Execute button. The Aggregation Editor runs the query in its current state and displays the results in the Pipeline output pane, as shown in the following figure.
11. Leave the Aggregation tab and aggregate statement in place for the next exercise.

