In this exercise, you’ll use Visual Query Builder to build and run the final find statement that you created in the first exercise.
By building the same statement, you’ll get a better sense of the step-by-step approach that you can use in Visual Query Builder to create queries, while seeing how the tool can help simplify the query-building process.
To build and run the find statements
1. In the Connection Tree, expand the sales database node and then expand the Collections node.
2. Double-click the customers collection node to open the collection in a collection tab.
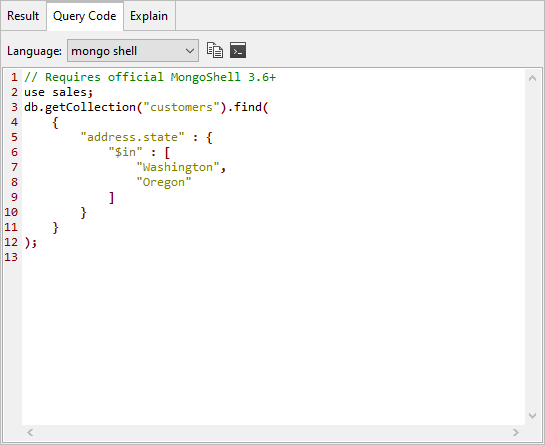
3. On the customers collection tab, go to the Query Code tab. The tab displays the mongo shell code used to retrieve the customers collection, as shown in the following figure.
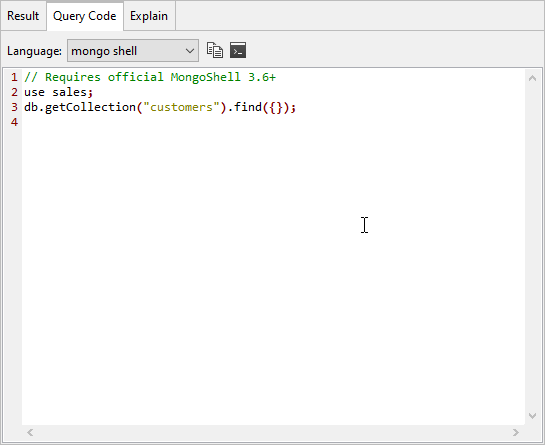
Notice that the code includes a comment about the required version of mongo shell, along with a use statement that sets the context to the sales database. Next comes the find statement, which uses the getCollection method to specify the collection.
You can use the code on the Query Code tab in IntelliShell or with other tools or applications to retrieve a collection’s data.
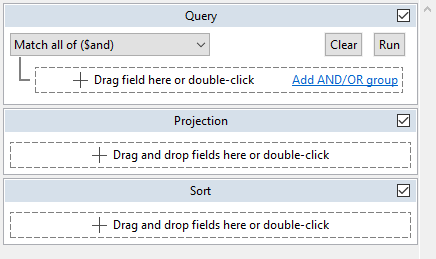
4. Click the Visual Query Builder link near the top right corner of the customers collection tab. Studio 3T opens a form for building queries, as shown in the following figure.
5. In the Query section of the query form, click the Add button (![]() ). The form will expand to include options for defining a search condition.
). The form will expand to include options for defining a search condition.
6. The first drop-down list in the expanded section includes the collection’s fields. From the list, select the address.state option.
7. The second drop-list list contains a list of operators for defining the search condition. From the list, select the in option.
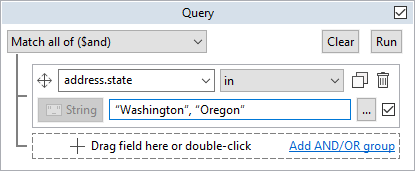
8. In the text box beneath the two drop-down lists, type "Washington", "Oregon" (including the quotation marks and comma), as shown in the following figure.
As you build your query in Visual Query Builder, Studio 3T also updates the query form at the top of the customers collection tab. In this case, the form’s Query text box now includes the search condition you just defined, as shown in the following figure.

9. In the Query section of Visual Query Builder, click the Run button at the top right corner.
Studio 3T runs the query and updates the Query Code tab to reflect the changes you made in Visual Query Builder, as shown in the following figure.
10. Go to the Result tab and click the Count Documents link at the bottom of the tab. The query should have returned 29 documents.
11. In the Query section of Visual Query Builder, click the Add button in the open text box (the one that reads Drag field here or double-click). The form will expand to include the options necessary to define a second search condition.
12. From the first drop-down list, select the device field option.
13. From the second drop-down list, select the contains operator option.
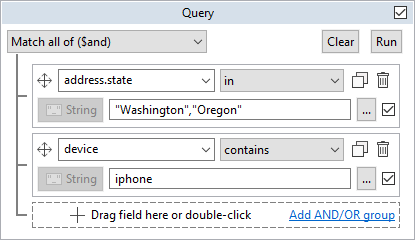
14. In the text box beneath the two drop-down lists, type iphone, as shown in the following figure.
15. Click the Run button at the top right corner of the Query section. Studio 3T runs the query and returns the documents that match both search conditions. Studio 3T also updates the code on the Query Code tab.
16. On the Result tab, change the display to Tree View and expand the first document if not already expanded.
17. Select the following three fields: first, last, and user_name.
18. Drag the selected fields to the text box in the Projection section. Studio 3T adds the fields as separate listings in that section, with the include option selected for each field. This ensures that only these three fields (along with the _id field) will be included in the query results.
19. On the Result tab, de-select the three fields and then drag the last field to the text box in the Sort section. Studio 3T adds a listing for that field in the Sort section, along with a second text box.
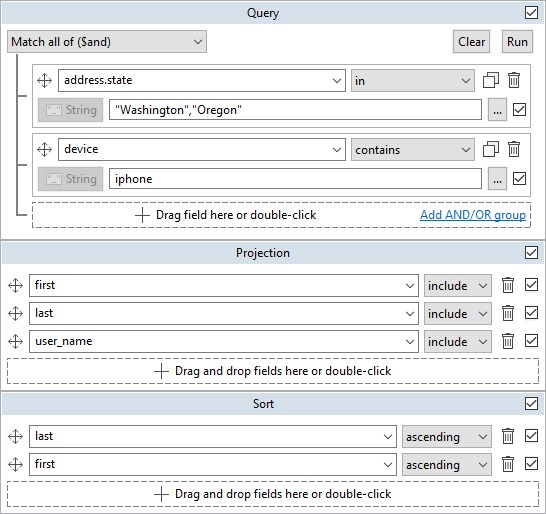
20. On the Result tab, drag the first field to the new text box in the Sort section. The Visual Query Builder form should now look like the following figure.
21. Click the Run button at the top right corner of the Query section.
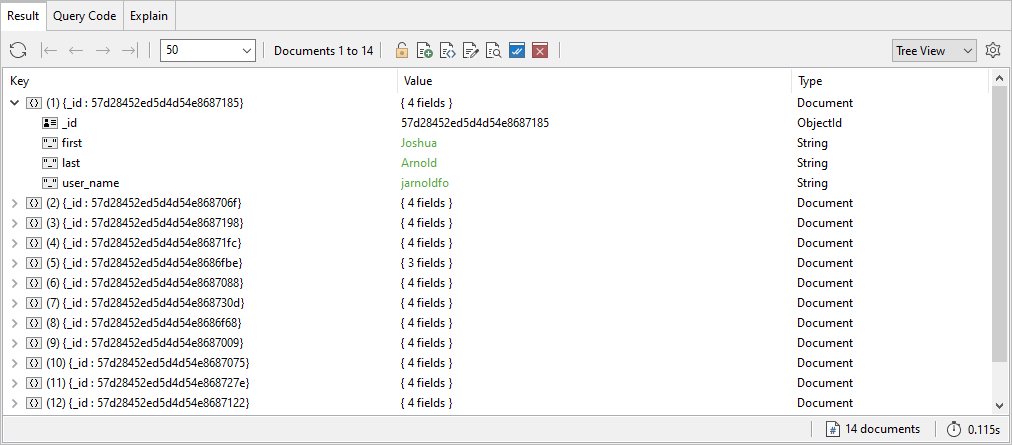
22. Go to the Result tab and view the returned documents. The results should now include only 14 documents, and those documents should include only the _id, first, last, and user_name fields, as shown in the following figure.
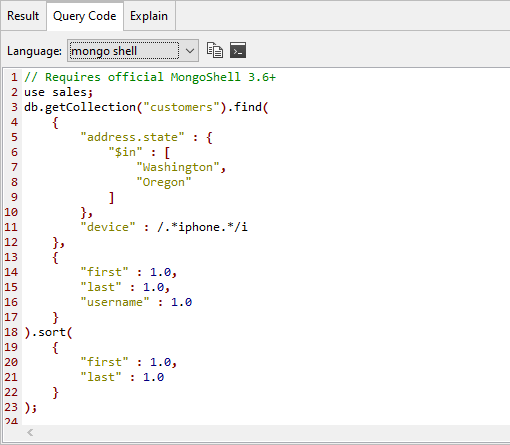
23. Go to the Query Code tab and view the find statement that Studio 3T generated when you ran the query, as shown in the following figure.
24. Leave the query results in place for the next exercise.
