The MongoDB find method provides the foundation for performing basic queries against a MongoDB database.
The following syntax shows the elements you must include when calling the find method, along with several optional elements, which are enclosed in brackets:
db.collection.find([{query}] [,{projection}])[.method];
To invoke the find method, you start by specifying the db object, which points to the currently active database.
You then provide the target collection, replacing the collection placeholder with the collection’s name.
In most cases, you can specify the name without using any special constructs, although there are some exceptions to this, which will be discussed shortly.
After you specify the collection, you then call the find method.
MongoDB find method arguments
The method takes two arguments: the query and the projection, both of which are optional.
If you don’t specify either argument, the method returns all documents in the current collection and includes all their fields.
For example, the following MongoDB find statement returns all documents in the customers collection in their entirety:
db.customers.find();
A find statement must always run within the context of the database where the collection is stored.
If you open IntelliShell from a database node on the Connection Tree, the find statement automatically runs within the context of that database.
For example, if you launch IntelliShell from the sales database node, any find statements you run will do so within the context of the sales database.
If you want to run a find statement against a database other than the currently active one, you must first set the context to the new database by running a use statement.
For example, the following use statement sets the context to the sales database:
use sales;
After you run this statement, all find statements will execute within the context of the sales database until you change the context to a different database.
In some cases, you might also need to use the getCollection method to specify the collection name if the name could cause confusion with the MongoDB engine.
For example, if the database name begins with a special character such as an underscore or is the same as a mongo shell keyword, you’ll need to use the getCollection method.
You can use the getCollection method for specifying any collection. For example, the following find statement returns the same results as the first example, but uses the getCollection method to specify the collection:
db.getCollection("customers").find({});
Notice that the find method in this example includes curly braces within the method’s parentheses. The braces represent a query argument that includes no search conditions, in which case, all documents are returned.
Whether you include or exclude the braces, the results are the same. However, if you want to limit your results to specific documents, you must include one or more search conditions in your query argument.
Each search condition focuses on a specific document element within the collection, serving as a filter that determines which documents to include in the results.
Adding search conditions to the query argument
For example, the query argument in the following find statement contains two search conditions, one specific to the package field and the other specific to the registered_on field:
db.customers.find(
  {
    "package":"Free",
    "registered_on":{$gt:new Date("1989-12-31")}
  }
);
Notice that the two search conditions are enclosed in curly braces and separated by a comma.
The first search condition specifies that a document’s package field value must equal Free. The second search condition specifies that a document’s registered_on data value must come after 1989-12-31.
The second search condition uses the $gt (greater than) operator to provide the comparison logic necessary to determine whether to include a document in the results. The value used for comparison is a string that must be converted to a Date object before it can be compared to the registered_on values.
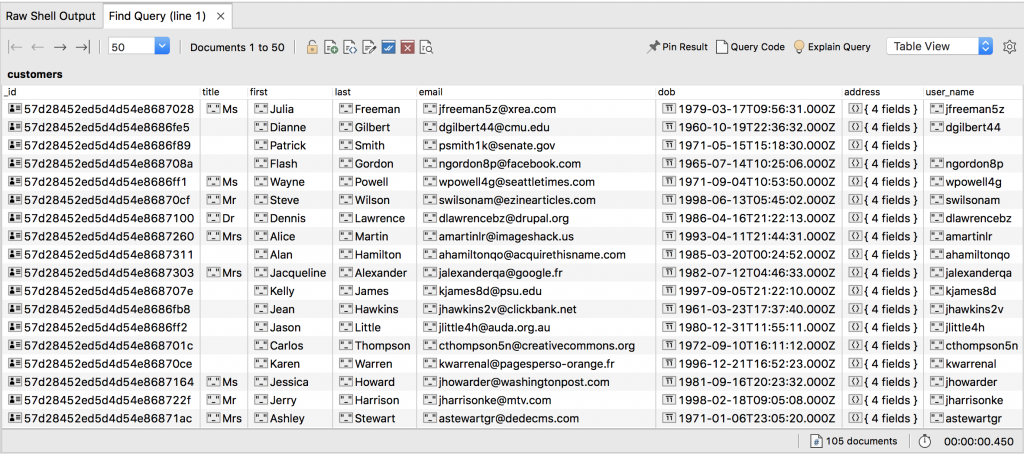
Both search conditions must evaluate to true for a document to be returned. The following figure shows part of the results returned by the find statement after running it in IntelliShell.

Adding the projection argument
If you want to limit the results to certain fields, you can add a projection argument that specifies the field names.
The projection argument is added after the query argument, with the two separated by a comma.
Like the query argument, the projection argument is also enclosed in curly braces. For example, the following find statement includes a projection argument specifying that results should include the first, last, and email fields:
db.customers.find(
  {
    "package":"Free",
    "registered_on":{$gt:new Date("1989-12-31")}
  },
  { first: 1, last: 1, email: 1}
);
When you specify the field names, you must separate them with a comma and provide a value of either 1 or 0. A value of 1 indicates that the field should be included, and a value of 0 indicates that it should not.
You cannot mix and match fields in the projection argument. They must all be included fields (1) or all excluded fields (0). The only exception to this is the _id field, which can be excluded even if all other fields are included.
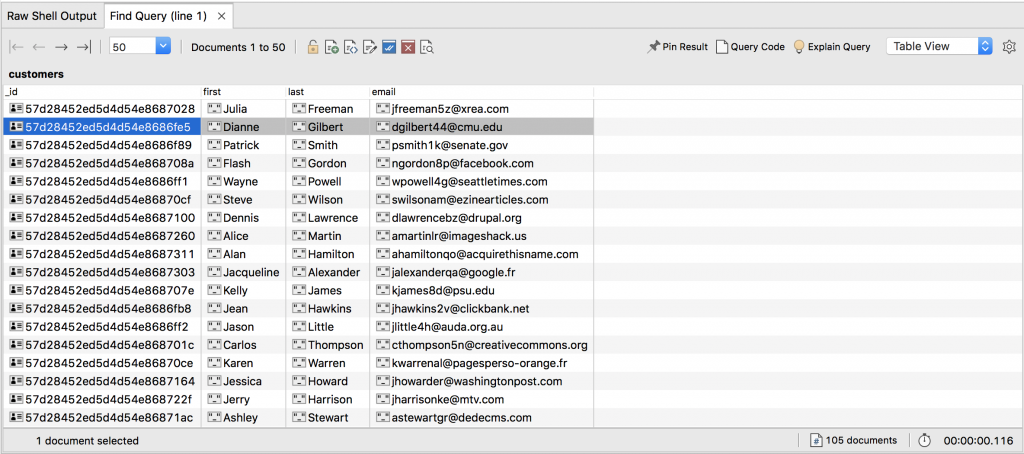
The reason for this is that the _id field is included with your query results by default. For example, the find statement above returns the document fields shown in the following figure.

The results include the _id field, even though it’s not specified in the projection. However, you can exclude the field by adding it to the projection and setting its value to 0.
The MongoDB find method can also be used with other methods to help refine your searches even further, such as being able to sort them or limit the number of returned documents.
For example, the following find statement users the sort method to order the results by the last field.
db.customers.find(
  {
    "package":"Free",
    "registered_on":{$gt:new Date("1989-12-31")}
  },
  { first: 1, last: 1, email: 1}
).sort({last:1});
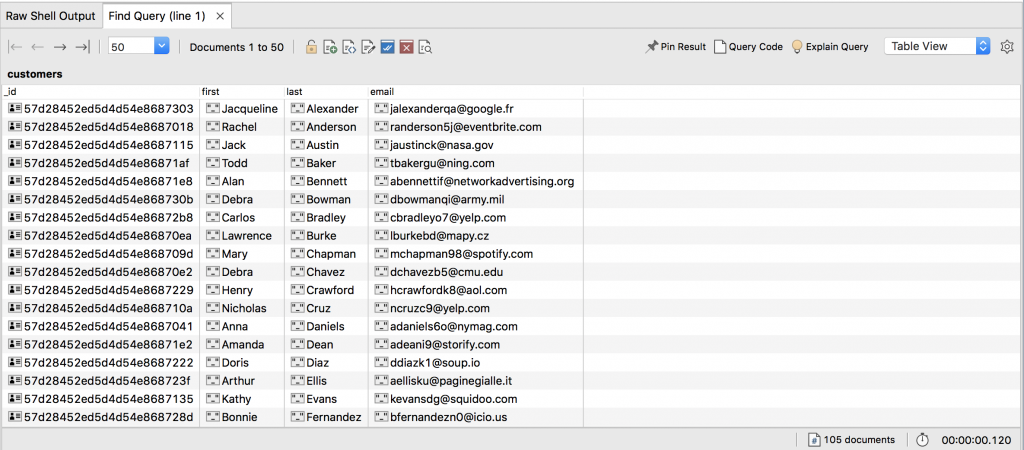
When specifying the sort fields, you can also specify the sort order, using 1 for ascending (the default) and -1 for descending. The find statement in this example returns the results shown in the following figure.

As noted above, Studio 3T provides several tools for querying data. Two of these tools are IntelliShell and Visual Query Builder, which can be particularly useful for understanding how the MongoDB find method works.
In the exercises to follow, you’ll use both tools to create and run several find statements in order to better understand the basics of querying MongoDB data.

