Now that SQL Server can understand and shred JSON data, SQL Server and MongoDB can easily cohabit and pass data between them.
Although you can get a good ODBC connection to MongoDB, the REST interface is easier to manage and prevents development work having to be close-coupled (where the two databases are so closely linked that changes and releases have to be done in sync).
MongoDB has uses even where relational systems are required to manage the transactional side. It is particularly useful for offloading the less structured data that requires less analysis and aggregation, and for assimilating data quickly.
We are going to set up a simple REST service and query it from SQL Server. For the sake of the demonstration, we will query our sample database of Marine Mammals that I introduced in my article, MongoDB, A Database with Porpoise. It is a taxonomy of marine mammals, part of the WORMS (World Register of Marine Species) database.
We want to do the following in a SQL Server stored procedure:
- Provide a simple string to search for, such as ‘manatee’ or ‘walrus’
- Get a list of all the species, and alternatively, give part of the scientific (latin) name
- End up with a tabular result in SQL Server
I’m not pretending that this information is always useful, but it is easy to substitute your real information.
Setting things up
First you’ll need to set up the database from the article, MongoDB, A Database with Porpoise. I’ll assume that even the mention of Node.js grips you with slight feelings of dread, so I’ll keep things simple.
Using chocolatey to download Node.js
If you haven’t got Node.js, install it. I’ll be using Windows for the REST interface because this is usually where SQL Server lurks, so I suggest that you use Chocolatey to do this. If you do as much as you can of your Windows installation work in Chocolatey, it is easy to keep everything updated.
If you haven’t got Chocolatey, you will need to install this into PowerShell first.
(See here for an alternative installation and also some basic checks.)
Using NMP to create and install packages
The first step for any Node project is to create a directory for your project. I’ve chosen C:\Projects\Restful\MarineMammals
You use NMP to set things up. Firstly, it’s best to create a package.json file that will be used by NPM to list the packages your project depends on, and makes your build easier to reproduce and share.
This is done easily at the command prompt.
First, navigate the command shell to the project directory.
…and so on, filling in all the parameters.
Now we need to install our packages.
The –save parameter saves the dependency information to the project file you’ve just created.
Using npm-mongodb
We are now ready to save our node application.
I’ve used npm-mongodb rather than mongoose as it is a bit simpler and for this application we don’t need mongoose’s special features.
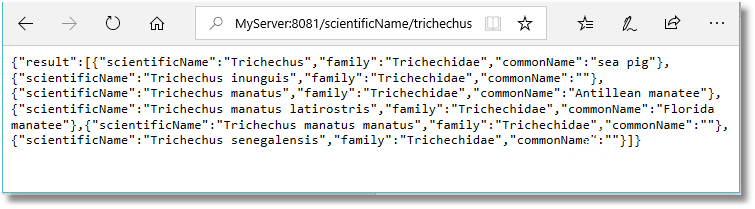
We will have just two functions: The first gets the common names and scientific names that match your string to the common name(e.g. ‘whale’, and the other that does the same thing for the scientific name (e.g. ‘inia’).
In the latter case, you would get this returned:
We will keep the actual connection details in a separate file so that we can keep any credentials out of the source code.
The credentials are in this format. On config.js:
Running the REST service
Now we have everything we need for the service.
If we want to run this on a Windows server, then we need to create a firewall rule to allow this service to work.
You can do this manually, but here is a PowerShell script that does it.
We now check that it is working.
You can test it from a browser:
…or by using curl from the command line:
Now we can go to SQL Server. You’ll need SQL Server 2016 upwards for its JSON handling. We will need to use the ‘Ole Automation Procedures’ which are switched off by default to make it more difficult for a SQL Injection attacker to dispatch the payload. You need to switch it on:
Then you will need a procedure to execute REST services on SQL Server:
Now you have this, you are ready to go.
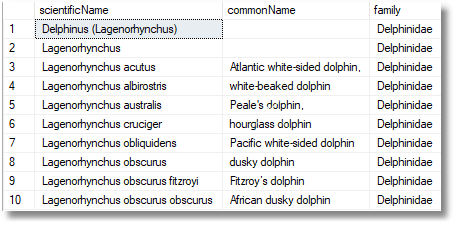
Set ‘ourServer’ to the server you have set up the service and execute this:
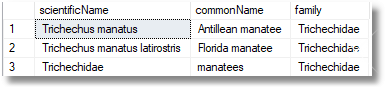
Or this:
Conclusions
You can do mighty things with Node.js and MongoDB, and a simple REST interface can be extended to give a wide range of features for controlling a database (see loopback, for example).
The MEAN stack is becoming quite mature. However, this article just illustrates how to get started, showing how you can use it to provide a simple service for SQL Server or anything that can make http requests.
It can easily be extended to POST, PUT, and DELETE. I’ve already shown in Setting up a simple Rest interface with SQL Server how one can go the other way round and access a REST interface provided by SQL Server.
There are a lot of possibilities from databases such as SQL Server and MongoDB communicating via REST. The pain is all in getting things up and running, but the task of extending a working system is much easier.