Studio 3T uses a web-based License Manager to manage licenses. There are Professional and Ultimate editions that enable different sets of Studio 3T features.
- How do I activate my license?
- How do I reassign a seat to another user?
- I’ve received an email inviting me to use Studio 3T. What should I do next?
- How do I configure the License Manager to use a proxy server?
- How to manage multiple Studio 3T seats and users
- Frequently asked questions about Studio 3T Licensing
About licenses, seats, and editions
A Studio 3T license contains one or more seats. Each seat within a license can be a different edition: Professional or Ultimate.
Seats can be assigned to a user. A user is an account that a person uses to log in to Studio 3T. Users are also assigned roles: User, Admin, or Owner. The role defines the level of access in the License Manager. For more information see About roles.
Seats can also remain unassigned until needed.
How do I activate my license?
When you purchase a Studio 3T license, you’ll receive an email with a link inviting you to activate your seat.
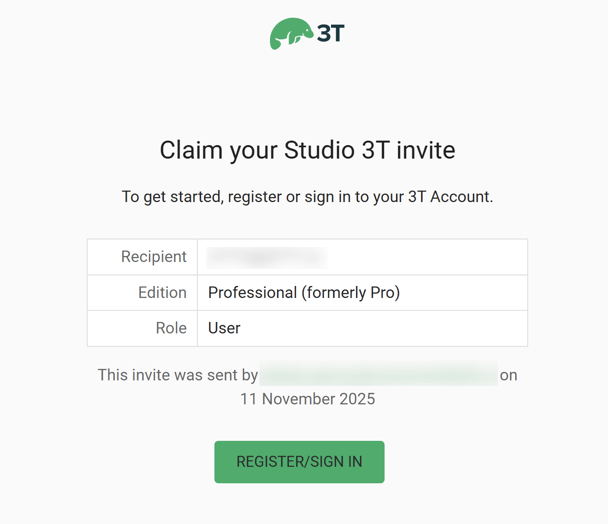
Click on the link in the first step of the email to start the process. Your browser opens in a new window with a Studio 3T page inviting you to claim your invite. During this process you’ll be assigned the only available seat. Click on Claim License.
You’ll be taken to the registration/sign in page. Complete the details (or log in if you already have a Studio 3T account).
In the Studio 3T application, follow the instructions in the activation wizard to get started using Studio 3T.
How do I reassign a seat to another user?
If you purchased a Studio 3T license and you want to assign it to another user, click on the link in the first step of the mail we sent you and follow the instructions in How do I activate my license?.
You’ll see it says “1 Seat Used”. Because you entered your email during the purchase process, we assumed that you are the end user. To change the user, click on Manage Users.

You’ll see your own details in that row. Click Edit.
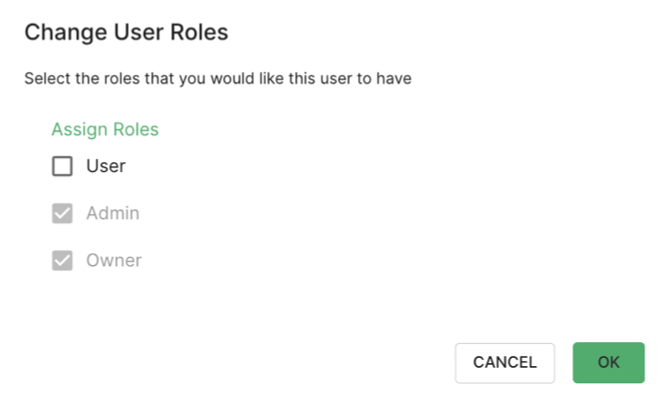
In the next screen, you can update your role. Click the cog icon under Roles.

Amend your role from “Admin, Owner, User” to “Admin, Owner”. This frees up the seat that you bought for the intended user, so that you can allocate it to them.
Clear the User checkbox, click OK, then Save Changes.
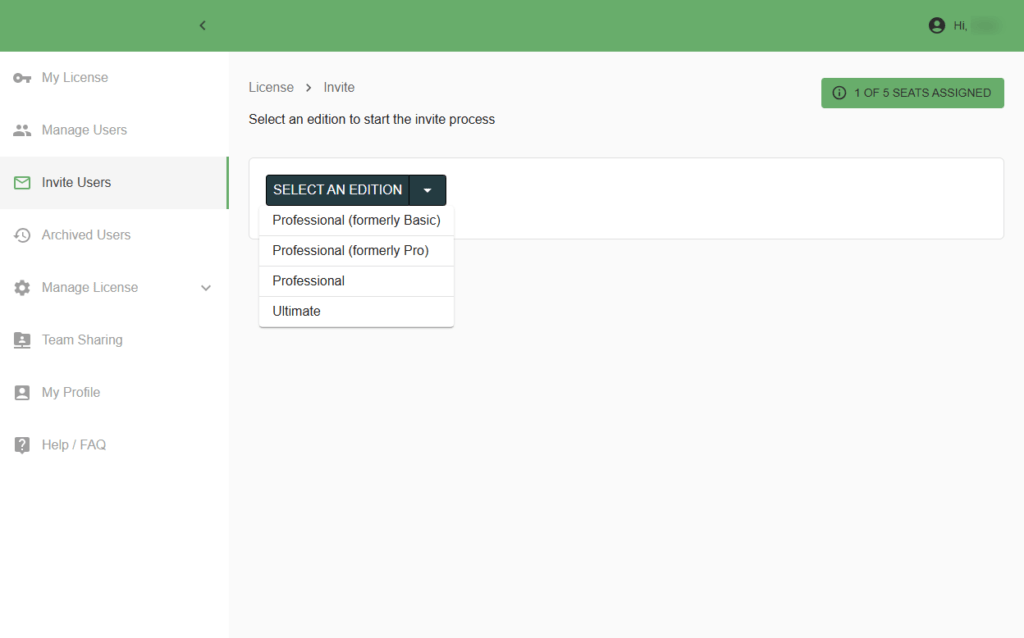
Now go to the menu on the left, Invite Users. Select the edition you want to assign from the dropdown list.
Enter the end user’s email address and click Send Invitation. They’ll be sent an email with instructions on how to accept their invitation.
I’ve received an email inviting me to use Studio 3T. What should I do next?
Click on the link in the first step of the email to start the activation process. Then follow the instructions in How do I activate my license?.
How do I configure the License Manager to use a proxy server?
When Studio 3T starts up, or when you are changing its license settings, it needs to make contact with a service on the internet. If you are getting an error message when logging into the License Manager, it could be that your environment allows communication only through a proxy server, as is typical in corporate environments.
To configure the License Manager to use a proxy server:
1. In the Studio 3T application, go to Preferences.
2. On the Advanced settings > Network page, under Proxy for Studio 3T tools, select System proxy config.

3. You should only fill out the username and password fields if your proxy server uses basic authentication. Otherwise, leave these fields blank.
4. Verify the setup by clicking on Test connectivity.
5. Click OK.
You’ll also need to contact your IT Department to whitelist the following URLs:
- license-portal-eb.studio3t.com
- license.studio3t.com
- auth.studio3t.com
- signin.studio3t.com/login
- https://s3t-auth.studio3t.com/
- https://cognito-idp.us-east-1.amazonaws.com/
If you’re still unable to connect, please fill out our Technical support form and send us screenshots of your proxy setup, the Network page, and any error messages.
How to manage multiple Studio 3T seats and users
If you have more than one user of Studio 3T, you’ll want to manage usage of Studio 3T so that it is in line with the number and types of seats that you have purchased. Studio 3T’s License Manager gives you one central location for all your licensing needs.
If you are going to be a Studio 3T user yourself, you should click the link in the email you received when you purchased Studio 3T to start the activation process. This will not only get you signed up with the License Manager but also allocate you a seat as a user and grant you the roles of User, Admin, and Owner. You are now ready to manage all your seats and users.
You can access the License Manager at any time from this page: https://license.studio3t.com/
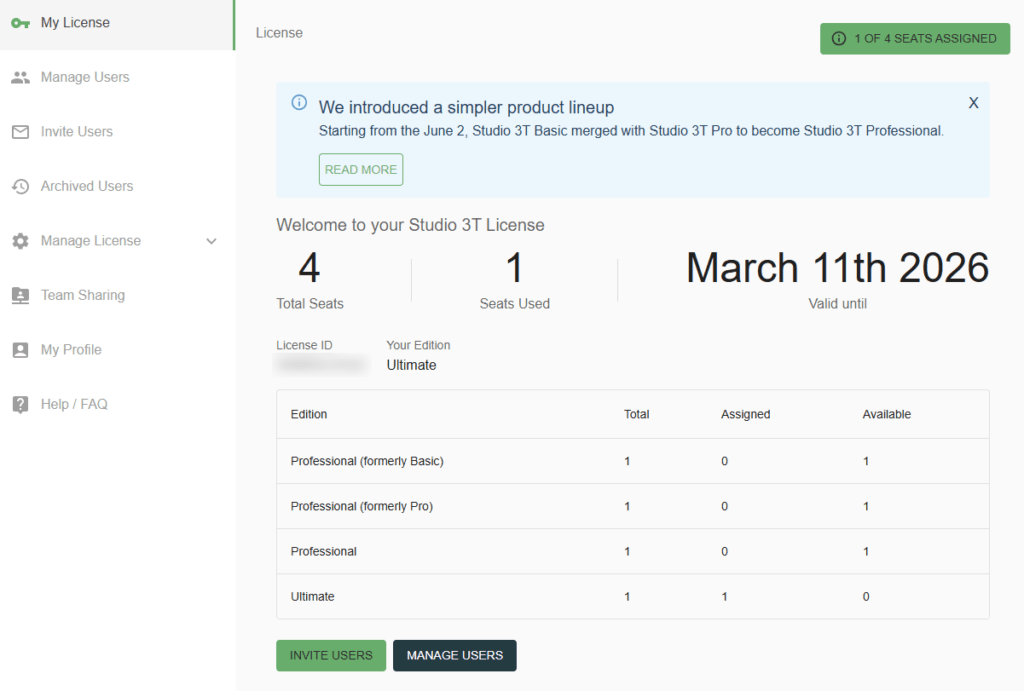
On the My License page, you can see how many seats you have, how many are used and how long they are valid until. Below that is a breakdown of your license editions, showing how many seats are claimed or are available to be assigned.
Inviting users
Click Invite Users on the left side bar and then select the edition of the seat.

Note that if an edition is displayed in gray, it is unavailable to you.

You can now enter email addresses for users, or upload the users from a CSV file.
Optionally, you can add users to a group. A group is a collection of user accounts. Groups help you identify which team or department a user belongs in, which is useful for large organizations.
Next, click on Send Invitations.
Each user will receive an email invitation to take up a Studio 3T seat. The users can then follow the activation process by clicking the link in the email.
Managing users
Selecting Manage Users in the left side bar displays an overview of user details. Here you can see the user’s email address, what edition they have a seat for, the group (team or department) they belong in, what roles they have in the License Manager, whether they have claimed their seat and, finally, full name and team. The name and team are taken from each user’s profile, so encourage your Studio 3T users to fill in the My Profile section.

The Edit button on each row allows you to change the Edition and Roles for each user.
About roles
Roles control what a user can do in the License Manager.
User: Can be assigned a seat by an Admin and update their profile.
Admin: Can manage and invite users to claim a seat. They can also promote users to Admin (or demote them). There can be as many Admins as necessary. Each Admin must also be a User. Can also purchase more seats.
Owner: Can also be a User and an Admin. This is the default set of roles for a new user with a new license. There can only be one Owner. The Owner is the only person who can give up their User role, freeing up a seat when there’s an administrator that doesn’t need to use Studio 3T. Can also purchase more seats.
Buying and upgrading seats
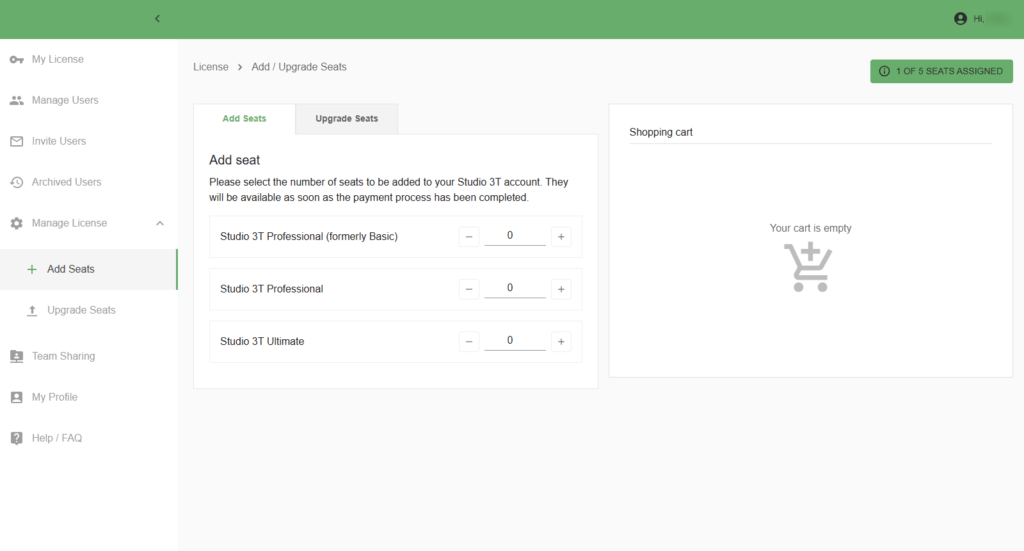
Selecting Add / Upgrade Seats lets an Admin or Owner purchase more seats or upgrade existing seats for their Studio 3T license.
The initial tab view, Add Seats, allows an Admin to add new, unassigned seats for specific editions. You can assign them to users later. The other tab view, Upgrade Seats, allows you to upgrade seats that are already assigned to users.
After selecting the relevant editions and upgrades, an estimated cost is shown. Click on Checkout to complete the purchase.
If you run into any issues, please don’t hesitate to contact sales support.
Frequently asked questions about Studio 3T licensing
What does my Studio 3T license enable?
A seat for Studio 3T’s Professional or Ultimate edition enables you to run Studio 3T on up to two machines (or virtual machines).
What does your free trial enable?
Your 14-day trial enables you to use all features of Studio 3T without restrictions, except for a 1000 document limit on SQL Migration, Reschema, and Data Masking. The free trial begins when you install and start up Studio 3T.
If you require a new trial, please contact [email protected].
What does it mean when I’ve signed in on my Studio 3T license?
When you are signed in on a particular machine, it means that your Studio 3T seat is activated on that machine (or VM). As Studio 3T allows you to have two activated machines per seat, that means you can still sign in on another machine with the same user credentials and use the same seat there.
On each machine you sign into, the license to use it persists for a month. If you sign out of a signed in machine, the license continues to persist for another month.
If you need to free up that machine license before the month is over, please contact [email protected]
If you have reached your limit of two machines signed in, you cannot sign into further machines. If you need to free up the license, please contact [email protected].
How can I transfer or move my Studio 3T license to a new computer or laptop?
You don’t need to manually transfer your license. Simply download Studio 3T or get the installer from your IT department and install it on your new computer.
Then log in with your email and password. The new instance is automatically associated with your existing seat on your license.
Depending on your company’s IT guidelines, you may also be required to connect through a proxy server.
What features are in each edition?
See the full feature comparison on the Studio 3T website.
What is a Studio 3T volume license?
A volume license is designed to reduce the administrative overhead for your organization. With a volume license, a single expiration date supports a specific number of users. Your organization can start with as many seats as you need and, during the license year, you can purchase more seats (which will be prorated to the price of the seats to the same expiration date). Those seats will be added to the same license as additional seats.
What is a Studio 3T site license?
A site license is designed to remove delivery times and the overheads which come from the procurement process. With a site license, a single expiration date (one year on) is good for all user activations during this period. There is no need to place orders for more seats. All users get access to the Ultimate version of Studio 3T including priority support. When the expiration date approaches, the number of Studio 3T users will be assessed. The renewal pricing will then be based on that actual assessed usage.
How do I renew a license?
All licenses run for a period of time. The expiration date for any license is shown in the License Manager. Continuing to use the application beyond the expiry date requires a license renewal.
Renewing a license
Only the owner or the administrators of a yearly (1/2/3 year) license can renew the license. Renewal is done using the License Manager. Go to the license.studio3t.com web site and log in with the credentials you used when you activated the license.
Renewal reminders
Owners, Admins and Purchasers of a yearly (1/2/3 year) license will receive emails at 30 days before expiration of a license. Follow up reminders may be delivered in the days immediately before expiration.
Users of such a license will be notified, 30 days before expiration and only in the application, that the license is expiring. They should contact the Owner/Admin of the license to begin the renewal process.
What does the error message “token expired” mean?
When you see this error message, it means that Studio 3T has not been able to reach the License Manager for over 72 hours.
This does not mean your license has expired and usually happens when you are not connected to the internet or there is an issue with your proxy configuration. Please contact your IT Department for further assistance. If the issue remains unresolved, please contact [email protected].
