In SQL relational databases, a view lets you pre-specify a query so that you can quickly see its results.
Think of it as a virtual shortcut – an additional layer that doesn’t take up disk space because it doesn’t store the data – to view specific information through a predetermined query.
In MongoDB, you create a view by applying a specified aggregation pipeline to a collection through the db.createView() method.
Studio 3T’s View Editor makes it easy to create views with its visual pipeline builder so that software engineers can specify the view definition faster and without errors.
Watch the video below to learn how to create a view in Studio 3T:
Create a MongoDB view
1. In the Connection Tree, right-click on the collection to which you want to add a view and click Add View Here.
2. This will open the View Editor where you can build your query with the desired operators and add the stages to your aggregation pipeline accordingly.
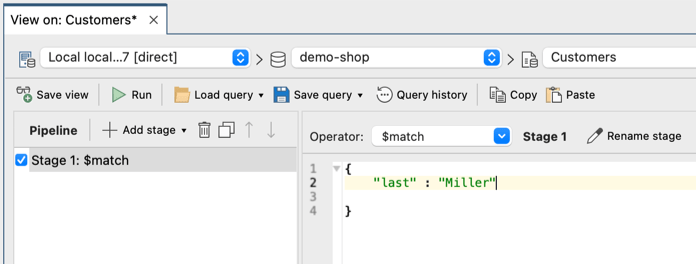
The $match stage is automatically added, ready for you to start specifying the code in the editor.
3. Click on Add stage to add additional stages.
4. Choose the desired operator from the Operator dropdown. Repeat steps 3 and 4 as needed, specifying the code in the editor for each stage.
5. Click Save view to create your view.
Create a MongoDB view from a SQL Query
If you’re using the SQL language to query MongoDB through SQL Query, you can still create the familiar SQL view in two ways, depending on whether you have a simple or complex SQL query.
Simple SQL queries
You can get the MongoDB Shell translation of simple SQL queries through Query Code, which you can then segment and add as a $match stage and other relevant stages while in View Editor.
In the example in the image below, we wrote a SQL query to select only customers with the last name Miller and show only the specific fields _id, first, last, and address.state.
To get the translation of the SQL query to a MongoDB query, click Run statement to run the SQL query, and then click the Query Code tab.
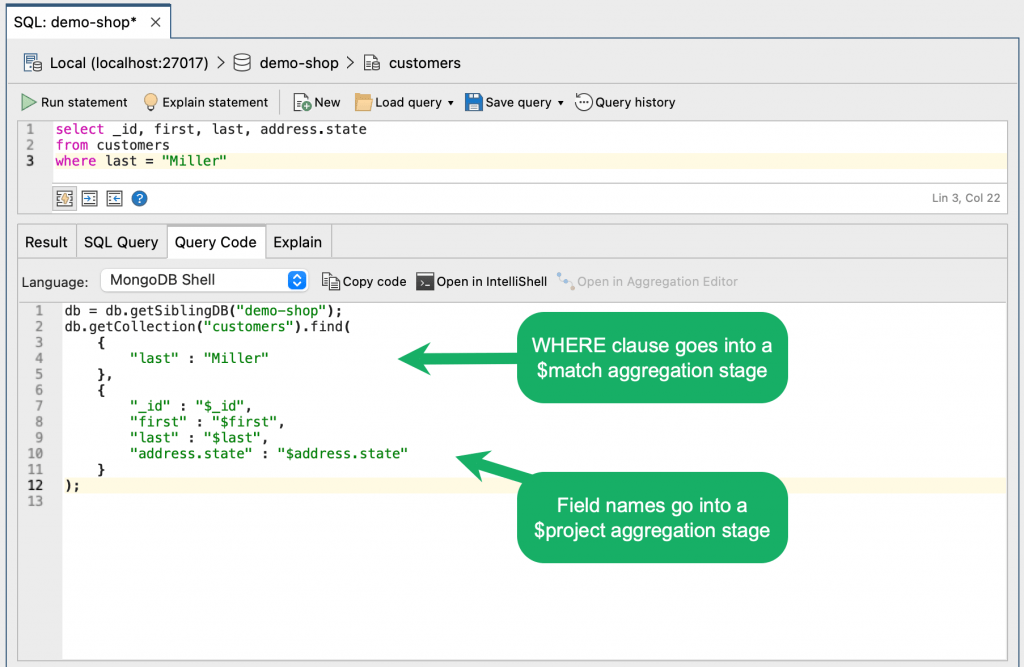
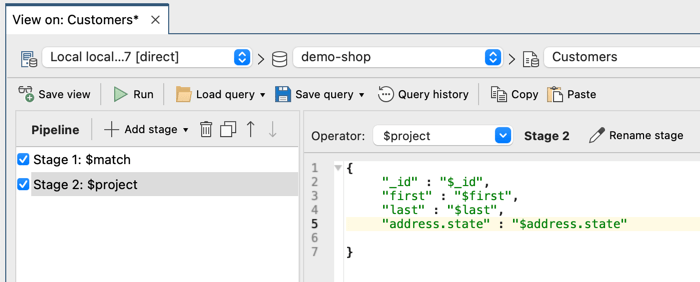
You can then divide your MongoDB query into the appropriate stages (in this case, $match and $project), and add them as stages in View Editor:
(Not-so) simple SQL queries
For more complex SQL queries which include GROUP BY, ORDER BY, and other aggregate functions like COUNT, MIN, MAX, SUM and AVG, Query Code automatically generates a MongoDB aggregation query translation, which you can directly copy and paste in View Editor.
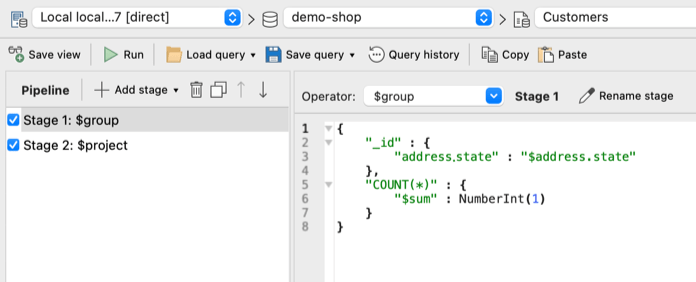
In the example below, we’ve written a SQL query which uses the COUNT and GROUP BY function:
SELECT address.state, COUNT(*)
FROM customers
GROUP BY address.state
When you run the SQL query, Query Code detects that a SQL aggregation function has been used, so it automatically generates the equivalent MongoDB aggregation query:

From here, simply copy the MongoDB aggregation query by clicking on the Copy code button.
Right-click on the collection to which you want to add your view and click Add View Here.
In the View Editor, paste your MongoDB aggregation query by clicking on the Paste button.
Your pasted aggregation query is automatically split into stages, so all you need to do is click on Save view to create your view.
Create a MongoDB view from Aggregation Editor
You can create a view directly from an aggregation query built through the Aggregation Editor.
Build an aggregation query, right-click anywhere in the Pipeline section and Stage editor and choose Save > Create view from this aggregate query.
In the Create View dialog, name the view and click OK.
Your view is shown in the Connection Tree, under the database where your collection is located, within a separate folder called Views.
This article was originally published by Kathryn Vargas and has since been updated.