MongoDB aggregations can provide you with an effective method for reshaping and summarizing data, but in some cases, the collection on which you base your aggregations might not be in an ideal format. For example, you might be planning to create multiple aggregations based on the same collection. Each aggregation will require the same lookup data and the same fields to be modified in the same way. Rather than repeating identical stages in each aggregation, you can instead create a collection that incorporates these changes in advance, resulting in simpler and better performing aggregations.
Aggregations are not the only reason to reshape a collection. You might want to clean up an SQL import, optimize query performance, merge or split up collections, or reshape data for other purposes. Regardless of the reason, the Reschema tool in Studio 3T makes modifying schema easier than ever. You can migrate data to a new collection and in the process reshape the underlying schema. For example, you can add and delete fields, rename and reorder fields, or embed and flatten fields. You can also merge data from multiple collections or create multiple collections from a single collection.
In this section, you’ll learn how to use Reschema to define a target collection based on data from two source collections. As part of this process, you’ll reshape the schema for the target collection by adding, deleting, and modifying fields. You’ll then use the Tasks feature in Studio 3T to create and populate the target collection. Finally, you’ll run an aggregate statement against the target collection to demonstrate how the Reschema tool helps to simplify the aggregation.
By the end of this section, you will learn how to
- Set up a reschema unit that includes lookup data
- Define a target collection in the reschema unit
- Add and schedule a task to create the target collection
- Run an
aggregatestatement against the target collection
What you will need
- Access to a MongoDB Atlas cluster
- Ability to download .json files from the internet
Introducing Reschema for MongoDB
As with other Studio 3T tools, Reschema is integrated into the interface and opens in its own tab in the main window. On this tab, you’ll find all the features you need to identify a source collection, pull in lookup data from another collection, and reshape the schema for a target collection. Most Reschema operations are either point-and-click or drag-and-drop procedures, greatly simplifying the process of migrating and refining data. Once you’ve mastered the tool’s fundamental components, you can easily define collections to meet your exact requirements.
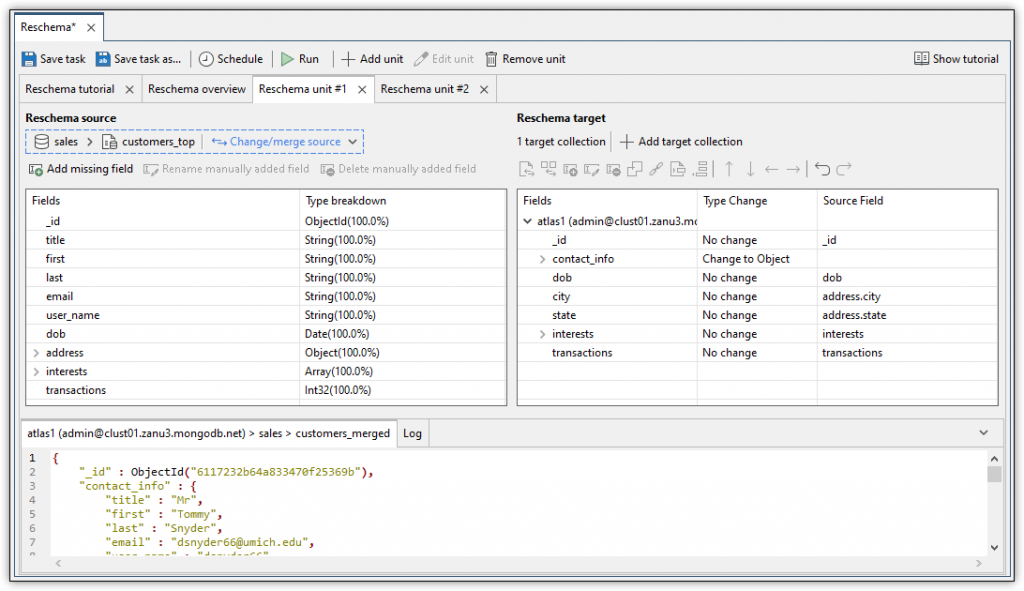
The Reschema window is divided into multiple tabs, as shown in the following figure. In this case, the Reschema unit #1 tab is active. A reschema unit is a dedicated workspace that’s tied to a specific source collection. Here you can view the source’s schema, add elements from another collection to that schema, and define one or more target collections, modifying their schema as you go along.

You can also add multiple reschema units to a Reschema project, providing you with even greater flexibility. Each reschema unit is displayed in its own tab and numbered sequentially. Notice that the figure includes a second reschema unit tab, labeled Reschema unit #2.
Each reschema unit tab contains three panels:
- The top left panel displays the schema of the source collection, as well as any lookup data you might have added.
- The top right panel displays the schema for the target collections you are building. You can define one or more target collections. (The figure shows only one target collection.)
- The bottom panel displays sample documents from the active target collection. In this way, you can immediately see how your schema changes impact the data.
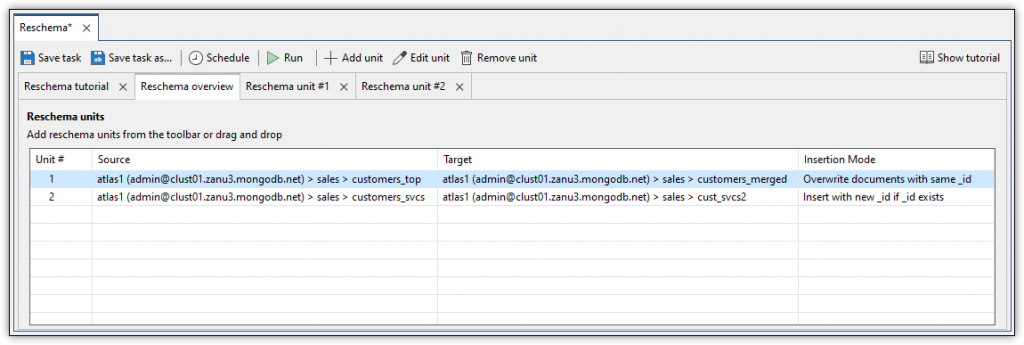
Another tab in the Reschema window is the Reschema overview tab, which lists the currently defined reschema units. For each reschema unit, the tab displays the source collection, target collection, and insertion mode, as shown in the following figure. If more than one target collection has been defined for a reschema unit, its listing shows only the total number of target configurations.

The insertion mode determines how Studio 3T should behave when creating and populating the target collection. By default, the Insert with new _id if _id exists option is selected. The option determines how Studio 3T will add a document to the target collection if the _id value already exists. If the value does exist, Studio 3T adds the document as a new one and assigns a unique _id value to that document. However, you can select a different insertion mode by double-clicking the Insertion Mode cell for the specific reschema unit and then selecting one of the other options. For example, you can choose to overwrite the existing document rather than adding a new one.
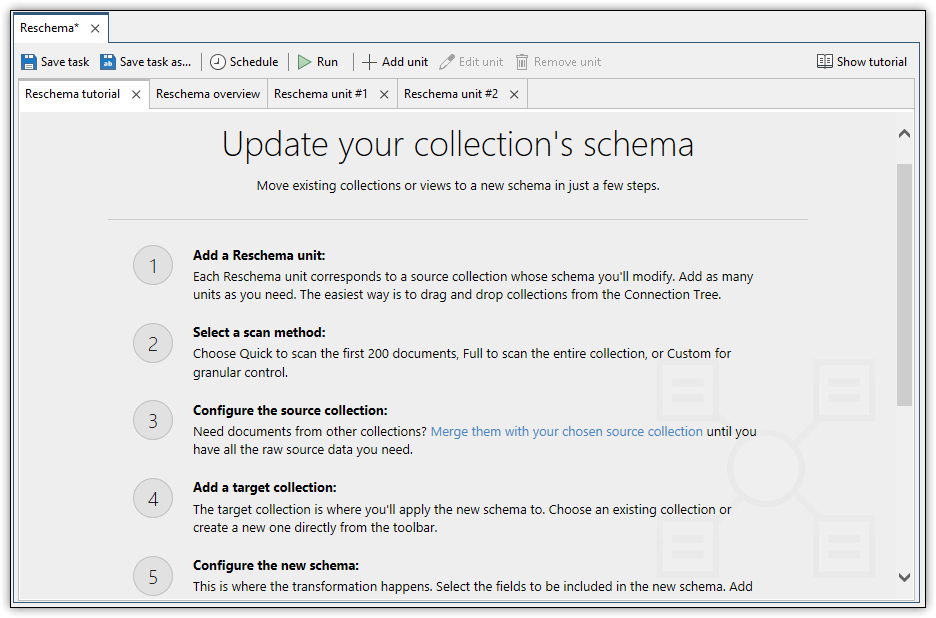
The Reschema window also includes the Reschema tutorial tab, which provides a quick overview of the steps you should follow when creating a target collection. The following figure shows the first five steps in the tutorial. The tab can be handy if you need a reminder of how to proceed when building your target collection. After you become familiar with the tool, you probably won’t need the tutorial, in which case you can prevent it from being displayed.

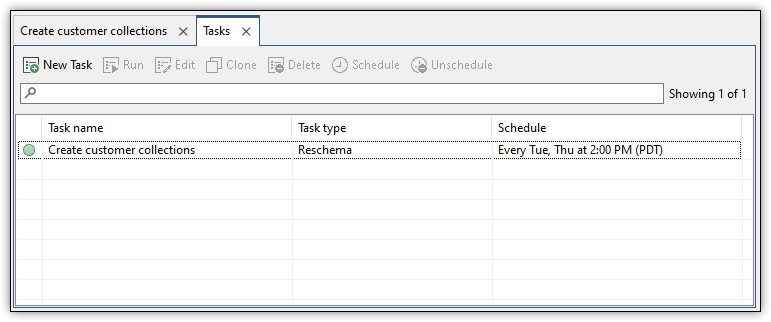
The Reschema tool is also supported by the Tasks feature in Studio 3T. When you save a Reschema project, it is automatically saved as a task, which you can then schedule to run at specified times. For example, the following figure shows a task named Create customer collections, with the task type set to Reschema. The task is currently scheduled to run every Tuesday and Thursday at 2:00 PM. However, you can easily change the schedule by selecting the task, clicking the Schedule option on the Tasks toolbar, and applying the new settings.

Reschema and Tasks are both powerful Studio 3T tools that can help you streamline your operations and enable you to work with MongoDB data more effectively. Once you’ve created a collection that meets your requirements, you can aggregate the data in multiple ways without needing to repeat the same steps in every aggregation.

