What is MongoDB Atlas?
MongoDB Atlas is MongoDB’s fully-managed global cloud database-as-a-service that comes with a free tier. The service is built to handle enterprise workloads, with support for global clusters.
You can store your data with Amazon Web Services (AWS), Google Cloud Platform, or Microsoft Azure. However, you don’t need to set up an account with any of these platforms. MongoDB Atlas takes care of all this behind the scenes.
MongoDB Atlas also automatically handles backend administrative processes such as provisioning resources, setting up clusters, or scaling services. Most of the tasks you perform are simple point-and-click operations that you carry out through the service’s centralized web interface.
What’s the difference between MongoDB and MongoDB Atlas?
MongoDB is a document database – which is a type of NoSQL database – that was built as a flexible way to store, index, and query JSON documents. For many organizations, the operating load of maintaining and managing many servers, especially when globally distributed, was high. MongoDB was designed to solve the issue through highly available and scalable distributed hardware.
MongoDB Atlas is MongoDB’s cloud database as a service that offers all the capabilities of the on-premise MongoDB product, from small servers to global distributed clusters, entirely managed by MongoDB themselves. That includes cluster provision, backups, alerting, and service integrations with third parties.
From the point of view of a user and their tools, MongoDB Atlas works in the same way as MongoDB the database does, save for some variations in user management to make it work across multiple database clusters. The advantages of scale provided by the cloud-based offering have allowed MongoDB to add new related services such as full-text search based on Lucene (Atlas Search) and cross-storage querying (Atlas Data Lake).
How does MongoDB Atlas pricing work?
MongoDB Atlas pricing will depend on:
- your cluster size
- your cluster region
- the cloud provider you choose (AWS, Azure, or Google Cloud Platform), and
- any additional services you register for
For example, an AWS based cluster, with M50 class servers, 32GB of RAM and 160GB of storage would work out at $2 per hour. Different hardware configurations and different cloud providers can see that price range as low as $1.13 or up to $3.80. There will also be costs for data transfers (which vary between cloud providers), certain types of backups and other optional costs.
These optional costs include Atlas Search and Atlas Data Lake usage, multi-cloud configurations, global cluster configuration, multiple electable, read-only and workload-isolated analytics nodes.
What’s included in a free MongoDB Atlas cluster?
The free cluster includes:
- 512 MB of storage
- Shared RAM
- Highly available replica sets, end-to-end encryption, automated patches, REST API
- Max connections: 100
- Network performance: Low
- Max databases: 100
- Max collections: 500
What tools are available for MongoDB Atlas?
As with any widely adopted technology platform, MongoDB Atlas is an ecosystem in itself with plenty of 3rd party tools bringing additional functionality, querying speed, and flexibility to the platform. Migrations to and from relational systems, data modeling, monitoring and more can all be easily accomplished using these third-party tools for MongoDB Atlas.
One of these tools is Studio 3T, the professional GUI and IDE for MongoDB, with many features that are not available in Atlas’ built-in GUI. Studio 3T users especially value the ability to connect to an unlimited number of MongoDB and MongoDB Atlas instances at once, the comprehensive import/export options and querying features, the ability to instantly generate code, and more.
The next section shows you how to set up a free tier cluster in Atlas , and after that, we’ll illustrate how you can connect to multiple MongoDB Atlas clusters and query your databases using Studio 3T.
How to set up a free MongoDB Atlas cluster
1. Go to the MongoDB Atlas landing page.
2. Fill in the required information and click the Get started free at the bottom of the form.
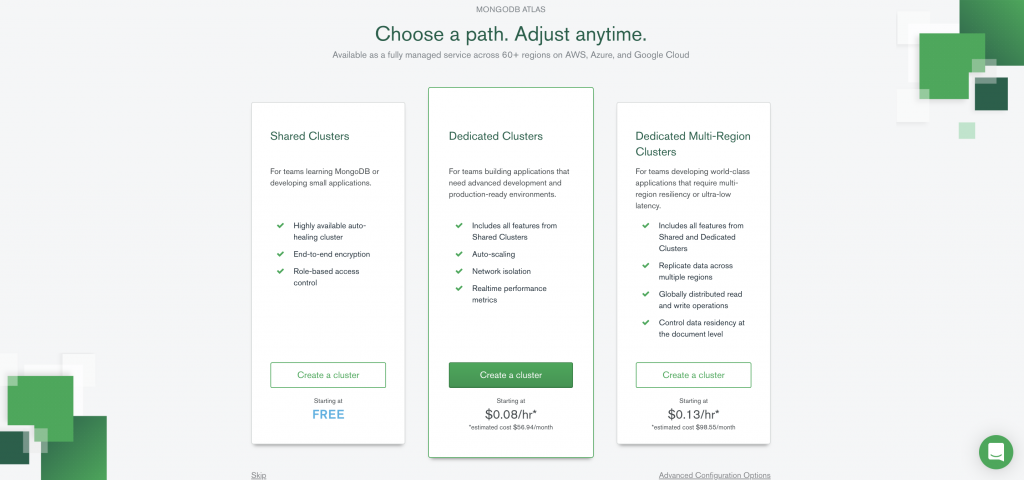
3.Now choose Starter Clusters and click on Create a cluster.
You should also receive a welcome email, which confirms that you’re registered with MongoDB Atlas and includes a link for logging onto the service.
4. In the Cloud Provider & Region section, the AWS option should be selected as the default provider, but you can select any provider. All three platforms support the free tier.
5. Beneath the list of providers, select a region.
6. Expand the Cluster Tier section and ensure that M0 Sandbox is selected. This is the free M0 service level and name your Cluster.
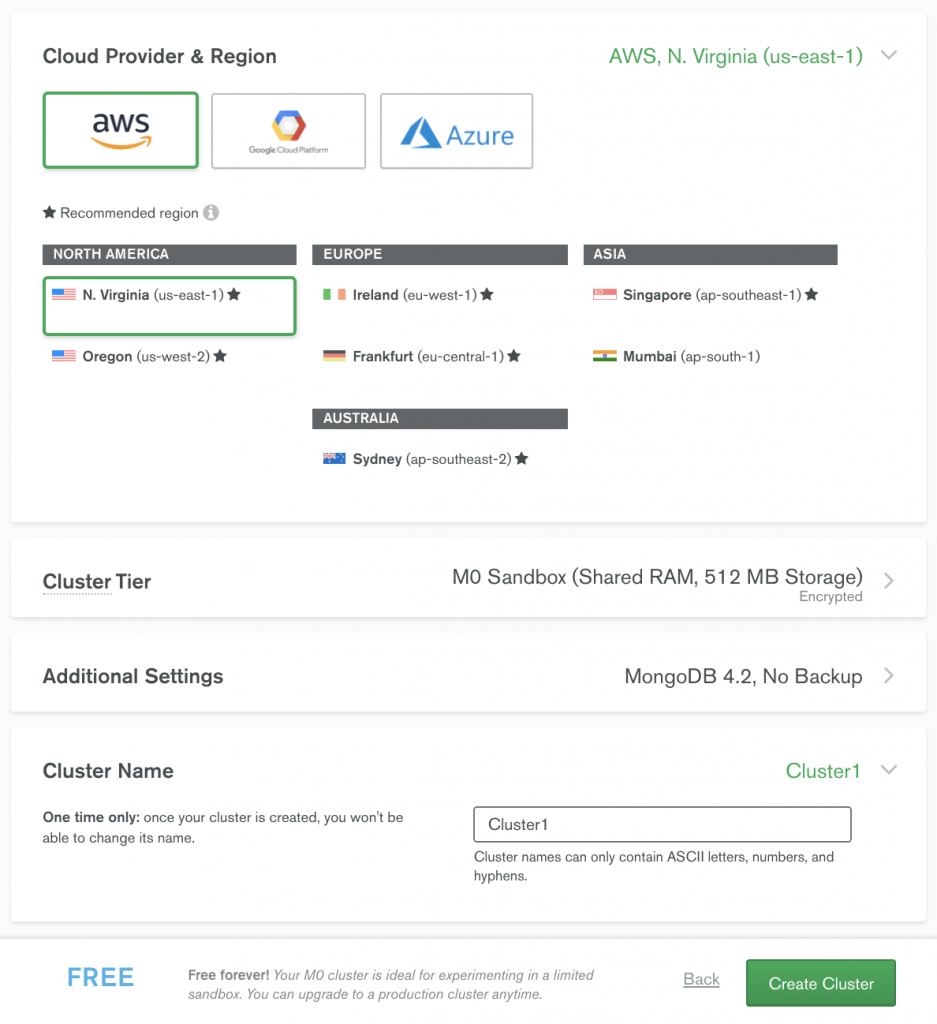
11. When you click the Create Cluster button, you should then receive a message stating that your cluster is being created.
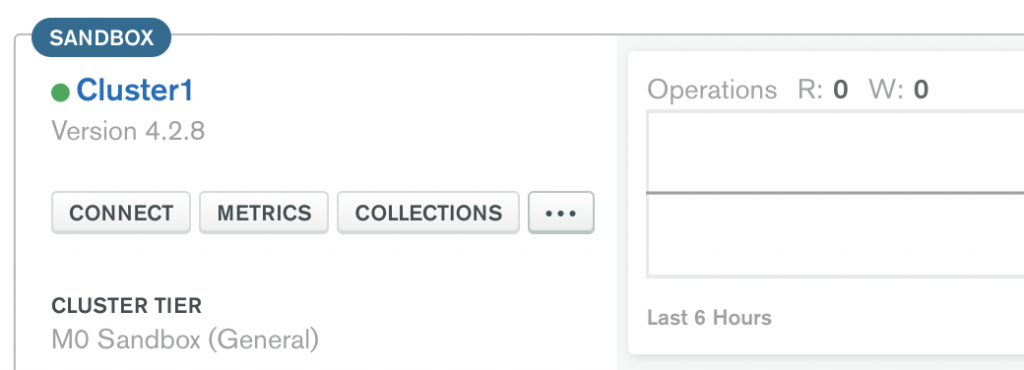
When the process is complete, you’ll be taken to the Clusters page, which includes a listing for your new cluster, as shown in the following figure.
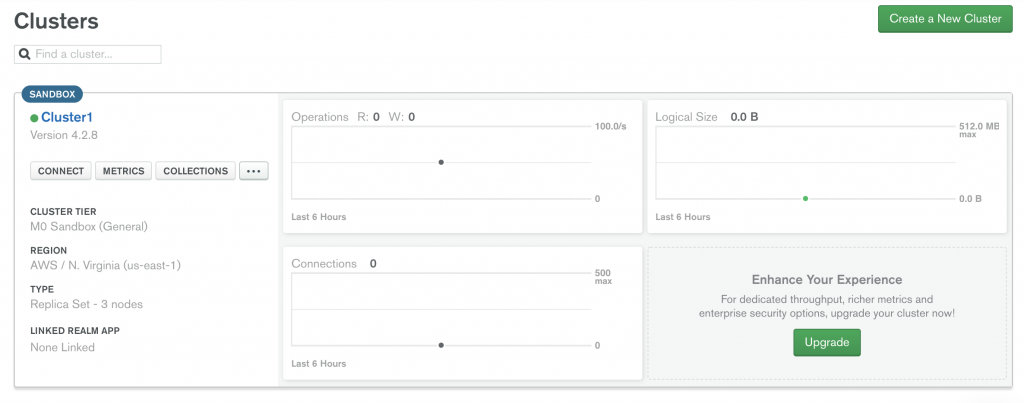
The cluster information includes the service level, cloud provider, and region, along with details about operations, connections and logical size, all of which currently show zero amounts.
Configure IP address and connection string
Next, you’ll configure MongoDB Atlas to connect to the cluster you created.
For this, you will need the IP address of the device that will connect to the service.
If you plan to connect to MongoDB Atlas on the same device where you’re setting up the service, MongoDB Atlas can find the local IP address automatically.
As part of this exercise, you’ll also set up an administrator account for accessing the cluster.
You’ll then generate a connection string or Uniform Resource Identifier (URI) based on this account. You’ll be able to use the connection string in Studio 3T, which we’ll use to access MongoDB Atlas.
1. In the Cluster1 section of the Clusters page, click the CONNECT button in the left pane.
The Connect to Cluster1 dialog box appears, showing the two steps you must take to configure your connection.
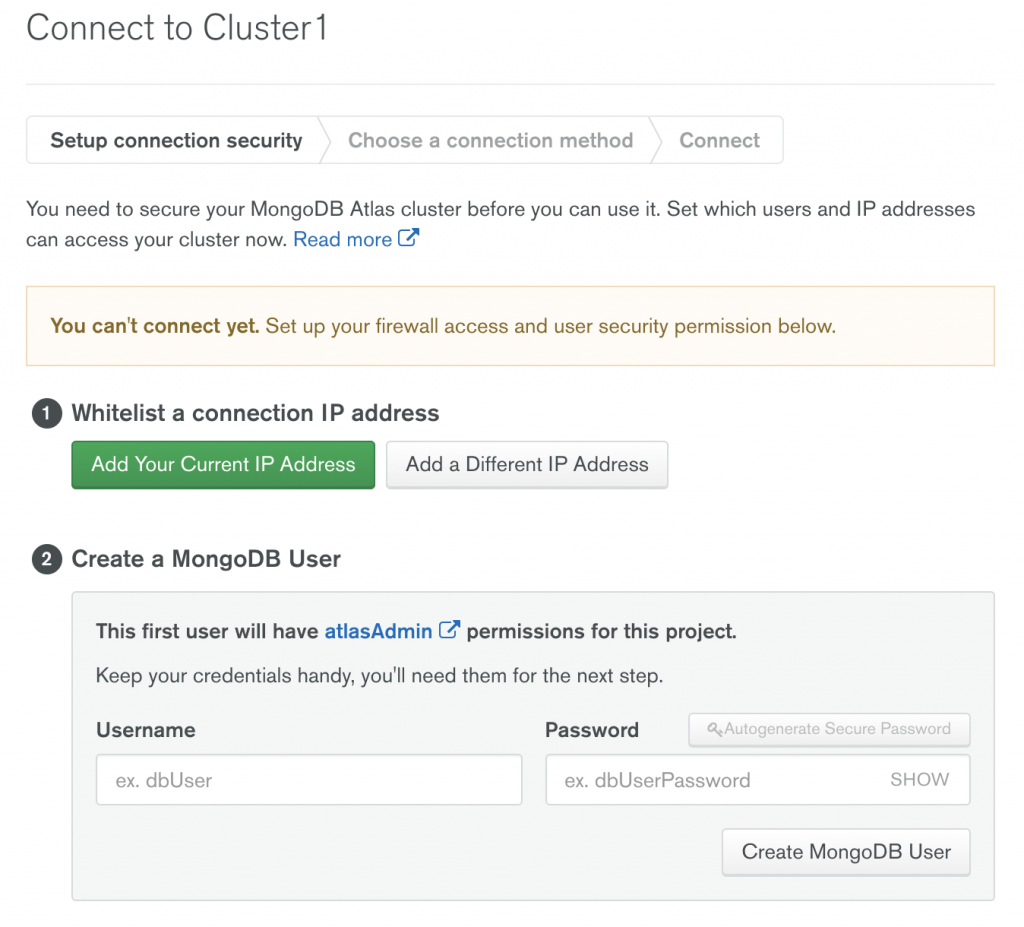
2. For security reasons, MongoDB Atlas blocks all outside connections by default. In order to connect, you must first whitelist your IP address. In the Step 1 section, do one of the following:

- If you plan to connect from the computer you’re currently using, click Add Your Current IP Address and then click Add IP Address.
- If you plan to connect from a different computer, click Add a Different IP Address, type the IP address, and then click Add IP Address. You can edit the IP address, add IP addresses, or delete them at any time in case you change devices.
3. In the Step 2 section, type admin in the Username text box (or whatever name you want to use), and then type a password in the Password text box.
To make it easier to connect to MongoDB Atlas from Studio 3T, your password should include only alphanumeric characters, that is, letters and numbers only with no special characters.
If you use special characters, you will need to encode them when creating a connection string for accessing the MongoDB service.
4. Click the Create MongoDB User button.
How to connect to MongoDB Atlas using Studio 3T
Open Studio 3T and click on Connect in the top-left corner of the toolbar. This will open the Connection Manager.
Click on New Connection in the top-left corner, which will open a new connection window.

Name your connection and click on the From URI button.
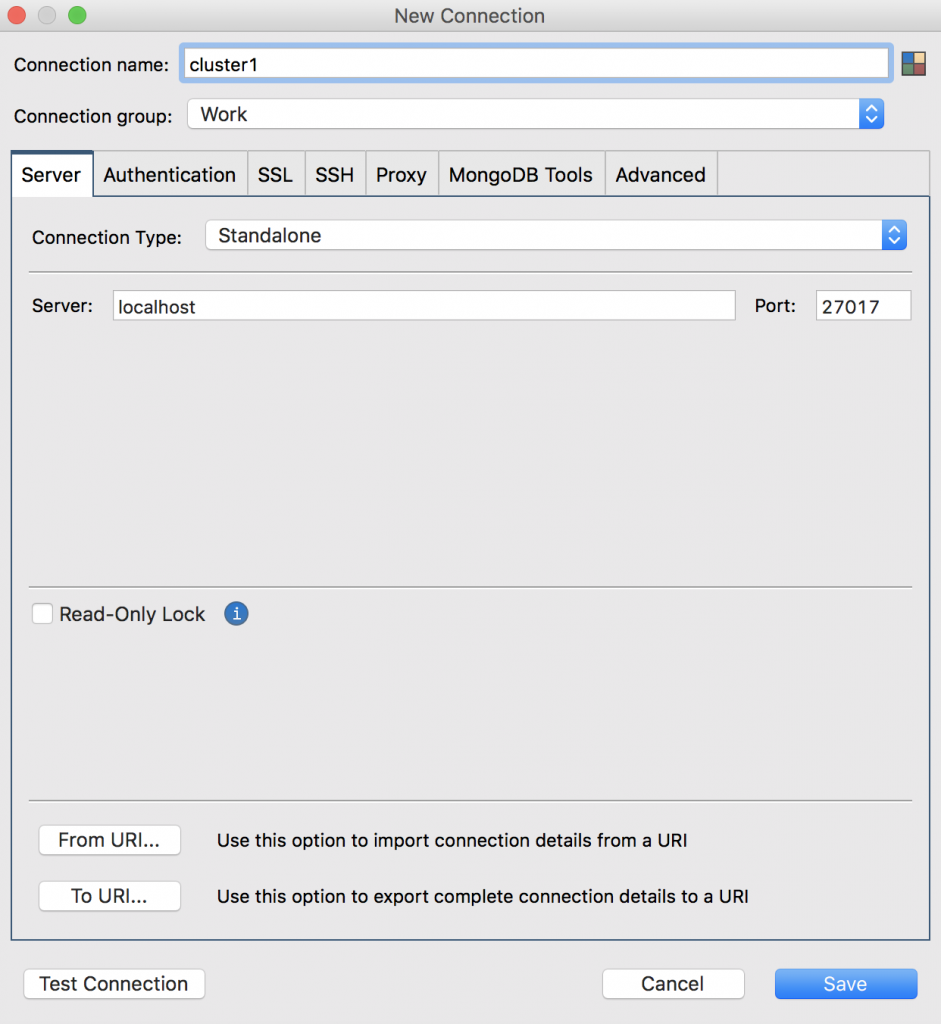
Paste the connection string you copied from MongoDB Atlas.
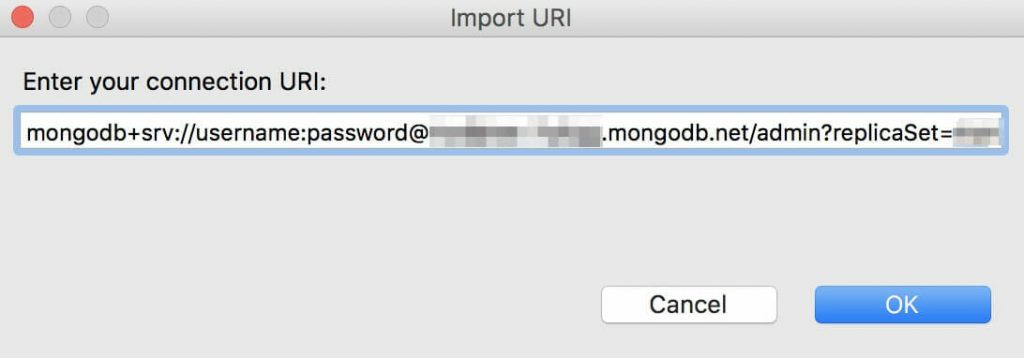
Replace the placeholder “<password>” with your actual password and “<dbname>” with the name of the database that connections will use by default. Make sure to replace the brackets too, and click OK.
Studio 3T will automatically extract the information and pre-populate the fields in the Server, Authentication, SSL, SSH Tunnel, and Advanced tabs. It will also save the connection for later use.
Click through the Server, Authentication, SSL, and SSH Tunnel tabs and verify that the information is correct.
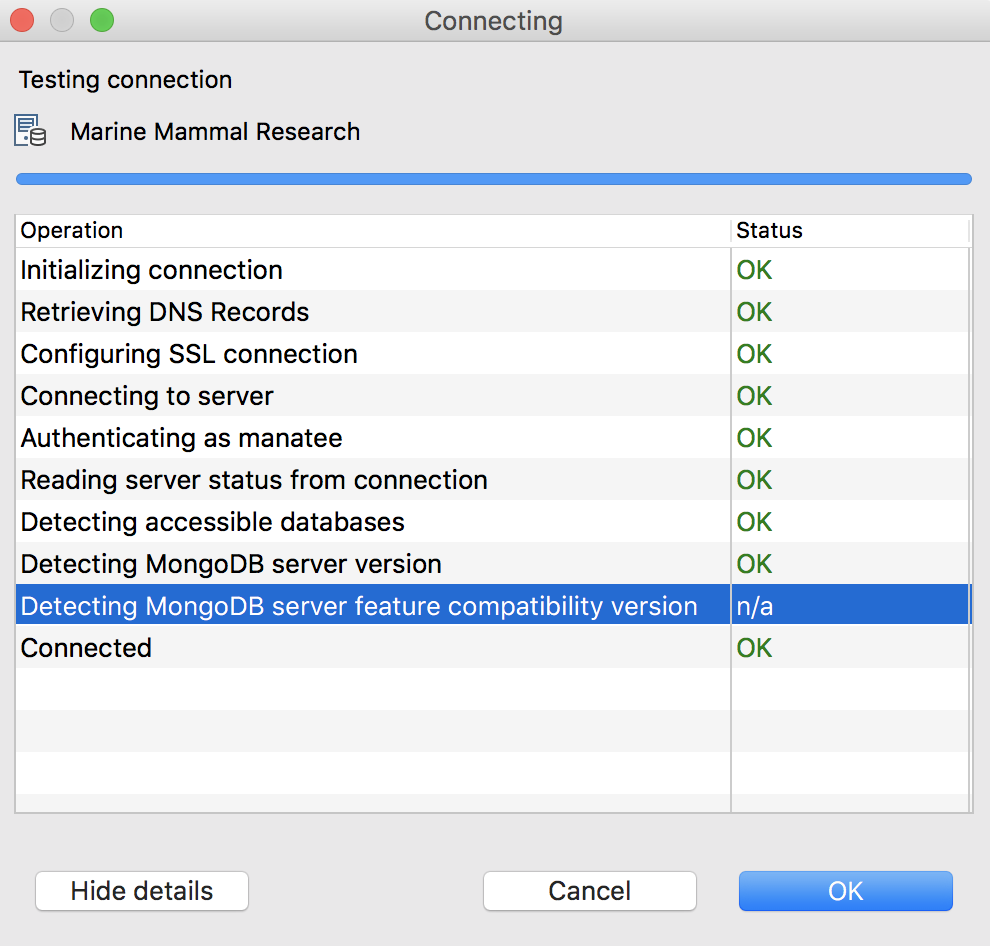
Click on Test Connection. A successful test will look like this:
Click Save. Then click Connect.
Repeat as needed for other MongoDB instances and MongoDB Atlas clusters.
Import data in JSON, CSV, BSON/mongodump or SQL
If you have an empty cluster, you can easily import JSON, CSV, BSON/mongodump or SQL to MongoDB with Studio 3T’s Import Wizard:
How to query MongoDB Atlas data
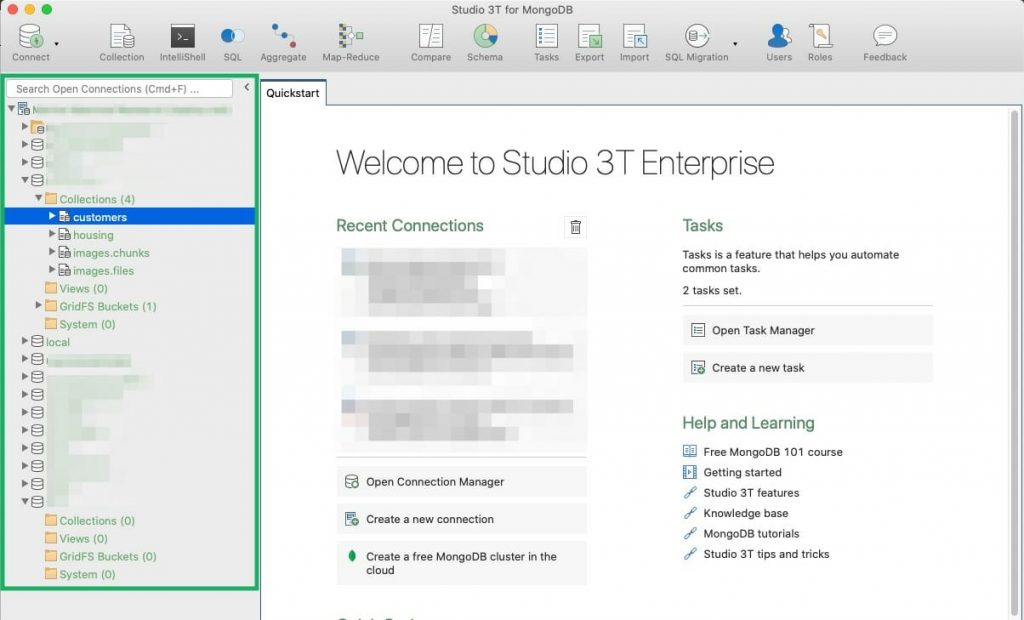
Click on a collection in the Connection Tree to open a Collection Tab, which is the starting point of all data exploration in Studio 3T.
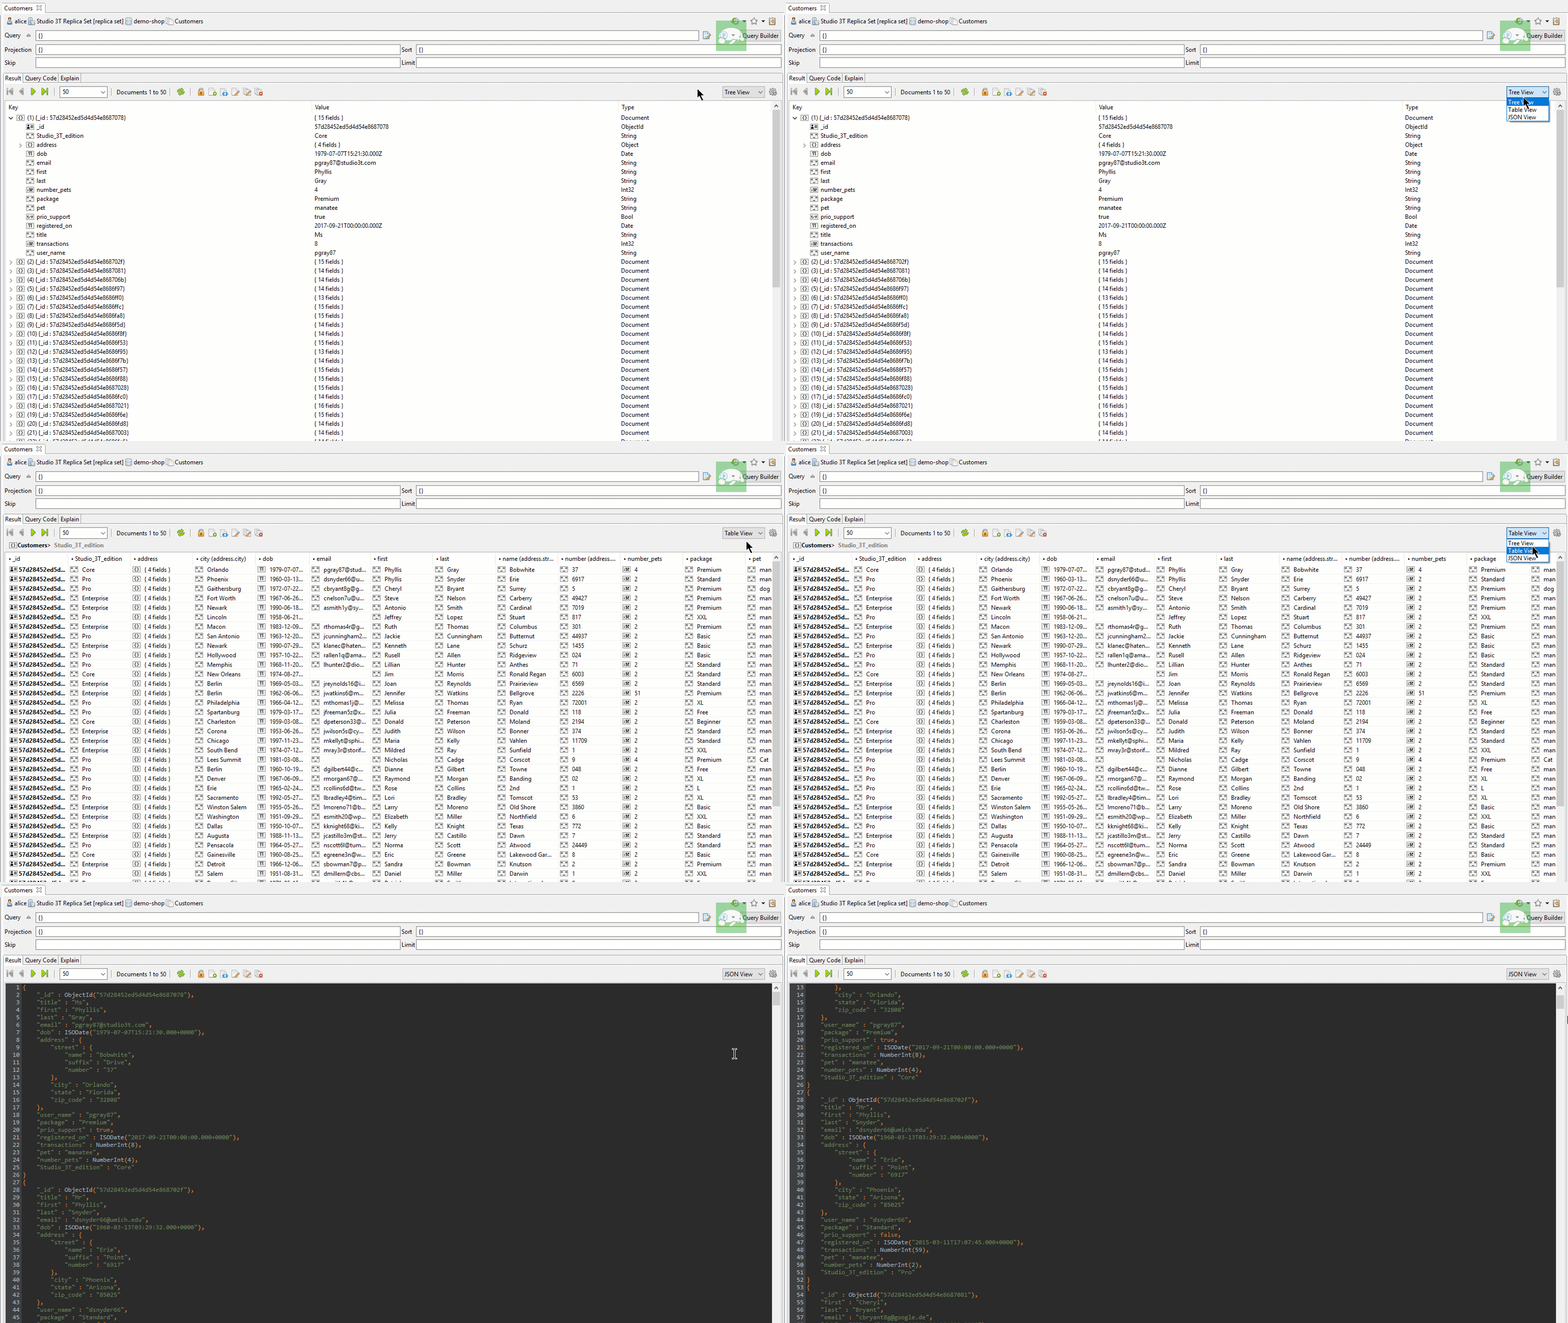
Here you can view the contents of your MongoDB Atlas collection in either Table View, Tree View, or JSON View:
Or access the Visual Query Builder, a drag-and-drop MongoDB query builder ideal for both newcomers and pros:
Once you’ve built your query, click on Query Code tab to see how it translates to Java, Node.js, PHP, C#, Python, Ruby, and the mongo shell language:
And that’s just one way of querying data in Studio 3T. There’s also IntelliShell, the built-in mongo shell with robust auto-completion; Aggregation Editor, the stage-by-stage aggregation query builder; and SQL Query, which lets you write SQL to query your MongoDB database.
Bonus: How to turn aggregations into MongoDB Charts
MongoDB Charts is a great data visualization tool that is available free with your MongoDB Atlas cluster. It lets you create visual representations of your data, from bar and column charts to heatmaps and word clouds. Within Atlas, MongoDB offers the first 512MB of monthly data transfer for free, which is equivalent to 500,000 typical chart renders. Using the point-and-click data management simplicity of Studio 3T in conjunction with Charts provides a simple and easy solution for fast and effective data reporting for MongoDB.
It can be accomplished in five simple steps:
Step 1 – Import a CSV file of some Demo-Data into Studio 3T
Step 2 – Use the Aggregation Editor to get the results we’re after
Step 2A: Write a SQL query to get the same results
Step 3 – Save the Aggregation that we’ve built as a View
Step 4 – Connect our MongoDB Atlas cluster to that View as our data source
Step 5 – Pull the Aggregation results into MongoDB Charts to render them visually
